Category: Uncategorized

  • A Guide to Product Catalog Management Software

    A Guide to Product Catalog Management Software

    Think of product catalog management software as the central command center for all your product information. It acts like an orchestra conductor, making sure every detail—from descriptions and prices to images and SKUs—plays in perfect harmony across all your sales channels. Whether it's your own website, a marketplace like Amazon, or a social media shop, this system keeps everything in sync.

    Unpacking Product Catalog Management Software

    Laptop displaying product catalog software on a tidy wooden desk with office supplies.

    At its heart, this kind of software is built to be the single source of truth for creating, storing, enriching, and distributing product data. It’s the antidote to the chaos of managing countless spreadsheets, scattered image folders, and inconsistent product descriptions that often plague growing e-commerce businesses.

    Instead of the mind-numbing task of updating product details one by one on each platform, you make changes once in the central system, and it automatically pushes those updates everywhere. This is a game-changer for maintaining accuracy and consistency.

    Imagine launching a new product line. Without a unified system, your marketing team might accidentally use old images while the e-commerce team lists the wrong price on your Shopify store. These kinds of mistakes don't just confuse customers; they can directly hit your sales and erode brand trust.

    The Problem It Solves

    The biggest challenge this software tackles is data fragmentation. As businesses expand their product lines and sell across more channels, information gets trapped in different places—or "siloed." This inevitably leads to inefficiencies, frustration, and costly mistakes.

    A dedicated platform fixes this by giving you the tools to:

    • Standardize data from various sources, like supplier feeds and internal ERP systems.
    • Enrich product listings with compelling descriptions, detailed specifications, and high-quality media.
    • Automate distribution to multiple channels, ensuring every customer touchpoint has the correct, up-to-date information.

    The growing need for such organized systems is clear from the market trends. The global Product Catalogue Management Software market was valued at around $3.2 billion in 2023 and is projected to hit $7.5 billion by 2032, growing at an impressive 10.2% annually. This isn't just a niche tool anymore; it's becoming a business necessity.

    A robust product catalog is no longer just a list of items for sale; it's the foundation of the entire customer experience. Getting it right means faster time-to-market, fewer product returns, and a more professional brand image.

    Core Functions and Key Benefits at a Glance

    Before we get into the nitty-gritty features, let’s quickly break down what these systems do and why it matters. This table gives a high-level look at the core functions and the direct business value they provide.

    Core Function Primary Business Benefit
    Centralized Data Repository Establishes a single source of truth, eliminating inconsistencies and errors.
    Data Enrichment & Validation Improves product data quality, leading to better customer experiences and fewer returns.
    Multi-Channel Syndication Automates the distribution of product info to all sales channels, saving time and effort.
    Digital Asset Management (DAM) Organizes and links images, videos, and documents to products for easy access.
    Workflow & Collaboration Tools Streamlines the process of creating and approving product content across teams.

    In short, this software brings order to the potential chaos of managing product information.

    Ultimately, the goal is to make sure accurate and compelling information reaches your customers, which is a fundamental requirement for modern commerce. At its core, this software is designed to be a central hub, which is why discussions around how product catalog software that integrates data is so essential for a connected business are more relevant than ever.

    2. A Look Under the Hood: Core Features and Architecture

    Tablet displaying a 'Core Features' diagram with technology and industrial icons on a wooden desk.

    To really get why product catalog management software is such a big deal, we need to pop the hood and see what makes it run. Don't think of it as just another spreadsheet or database. It’s more like the central nervous system for your entire e-commerce operation, connecting raw data to every channel and turning it into a compelling customer experience.

    These systems are built to solve the most tedious, error-prone problems that bog down marketing and e-commerce teams every single day. They take the soul-crushing, manual work out of the equation and replace it with smart, automated processes. This frees up your people to think about strategy and growth instead of just plugging holes in data.

    The Engine Room: Must-Have Features

    At the heart of any solid catalog management platform, you'll find a set of tools designed for one thing: handling product information at scale, and with precision. These aren't just bells and whistles; they're the foundational features that save you from headaches and costly errors.

    Let's break down the essentials.

    • Robust Data Import and Export: This is your data's gateway in and out of the system. A great platform makes it simple to pull in data from anywhere—supplier spreadsheets, your ERP, manufacturer files—and then push it out in the exact format needed for channels like Amazon, Shopify, or Google Shopping. No more manual reformatting.

    • Bulk Editing Capabilities: Imagine you need to update the price on 500 different products for a flash sale. Doing that one by one is a recipe for disaster (and a very long night). Bulk editing tools are a lifesaver, letting you apply changes to thousands of SKUs at once using simple rules and filters. What used to take days now takes minutes.

    • Integrated Digital Asset Management (DAM): A DAM is basically a super-organized library for all your product media. It’s where you store photos, videos, 360-degree views, and spec sheets, all linked directly to the right product. When you update an image in the DAM, it updates everywhere that product is shown. No more broken image links or outdated visuals haunting your product pages.

    • Workflow Automation and Collaboration: This feature brings some much-needed order to the chaos of content creation. You can build simple, automated workflows. For example, a new product description from a copywriter can automatically route to a manager for review, then to the legal team for a final check-off, all before it ever sees the light of day. It ensures consistency and accountability.

    Picking Your Foundation: The Architectural Models

    Just as important as the features is the architecture the software is built on. How it's hosted and structured has a huge impact on cost, scalability, and how much technical heavy lifting your team has to do. There are really three main ways these systems are set up.

    Choosing the right architecture is like deciding between building a custom home, renting a fully furnished apartment, or using a flexible, modular building system. Each has its pros and cons depending on your budget, technical know-how, and where you see your business going.

    1. On-Premise
    This is the old-school approach: you buy the software license outright and install it on your own servers. The big plus is you have total control over your data and security. The downside? It requires a hefty upfront investment and a dedicated IT team to handle all the maintenance, updates, and security patches.

    2. Cloud-Based (SaaS)
    Software-as-a-Service is, by far, the most popular model today. You pay a monthly or annual subscription, and the provider handles everything—the hosting, the updates, the security. It’s a much lower upfront cost, scales easily as you grow, and lets you focus on using the tool, not managing it.

    3. Headless (API-First)
    In a headless setup, the back-end "body" (where you manage all the data) is completely separate from the front-end "head" (what the customer sees). This API-first approach gives you ultimate flexibility. Your developers can pull product data and push it to literally any touchpoint—a website, a mobile app, an in-store kiosk, or even a smart mirror. It’s the go-to choice for complex, omnichannel businesses that need a truly custom experience.

    Every one of these features and architectural models plays a critical part in building a product information ecosystem that can actually keep up with the speed of modern commerce.

    How to Choose the Right Software for Your Business

    Picking the right product catalog management software is a whole lot more than just a line item in your budget. It's a strategic move that will directly affect your team's efficiency and how fast you can grow. The right platform isn't just a digital filing cabinet for your products; it's the engine that powers your entire commerce operation, from your website to marketplaces and beyond.

    The real challenge is looking past the shiny feature lists. A slick user interface is great, but it’s worthless if the system crashes during Black Friday or can’t talk to the other tools you depend on every single day. You're not just buying software—you're looking for a partner that can solve your specific operational headaches and pave the way for future growth.

    Define Your Core Requirements

    Before you even think about watching a demo, you need to look inward. The first, most important step is to map out exactly what problems you need to solve and what your absolute non-negotiables are. This internal audit is the foundation of your entire evaluation process.

    A good way to kick this off is by getting your team together and asking some tough questions:

    • Scalability Needs: If our product catalog doubles in size next year, will this software keep up? Can it handle the massive surge in traffic and data updates during peak season without grinding to a halt?
    • Integration Capabilities: How well does this play with others? We need it to connect flawlessly with our ERP for inventory counts, our Shopify store for sales data, and our CRM to understand our customers.
    • Ease of Use: Is this actually intuitive for the people who aren't developers? A tool can be incredibly powerful, but if your marketing and merchandising teams find it too complicated for their daily tasks, it's a failure.

    Answering these questions upfront gives you a clear scorecard to measure every potential solution against.

    The Critical Role of Image Automation

    In today's e-commerce world, let's be honest: your product images are the product to your customers. They are your single most powerful sales tool. But managing them at scale can quickly turn into a soul-crushing operational nightmare. That’s why robust image automation isn't a "nice-to-have" anymore—it's an absolute must.

    When you're evaluating a product catalog management software, dig into its image-handling features. Get specific with vendors and ask them about their capabilities for:

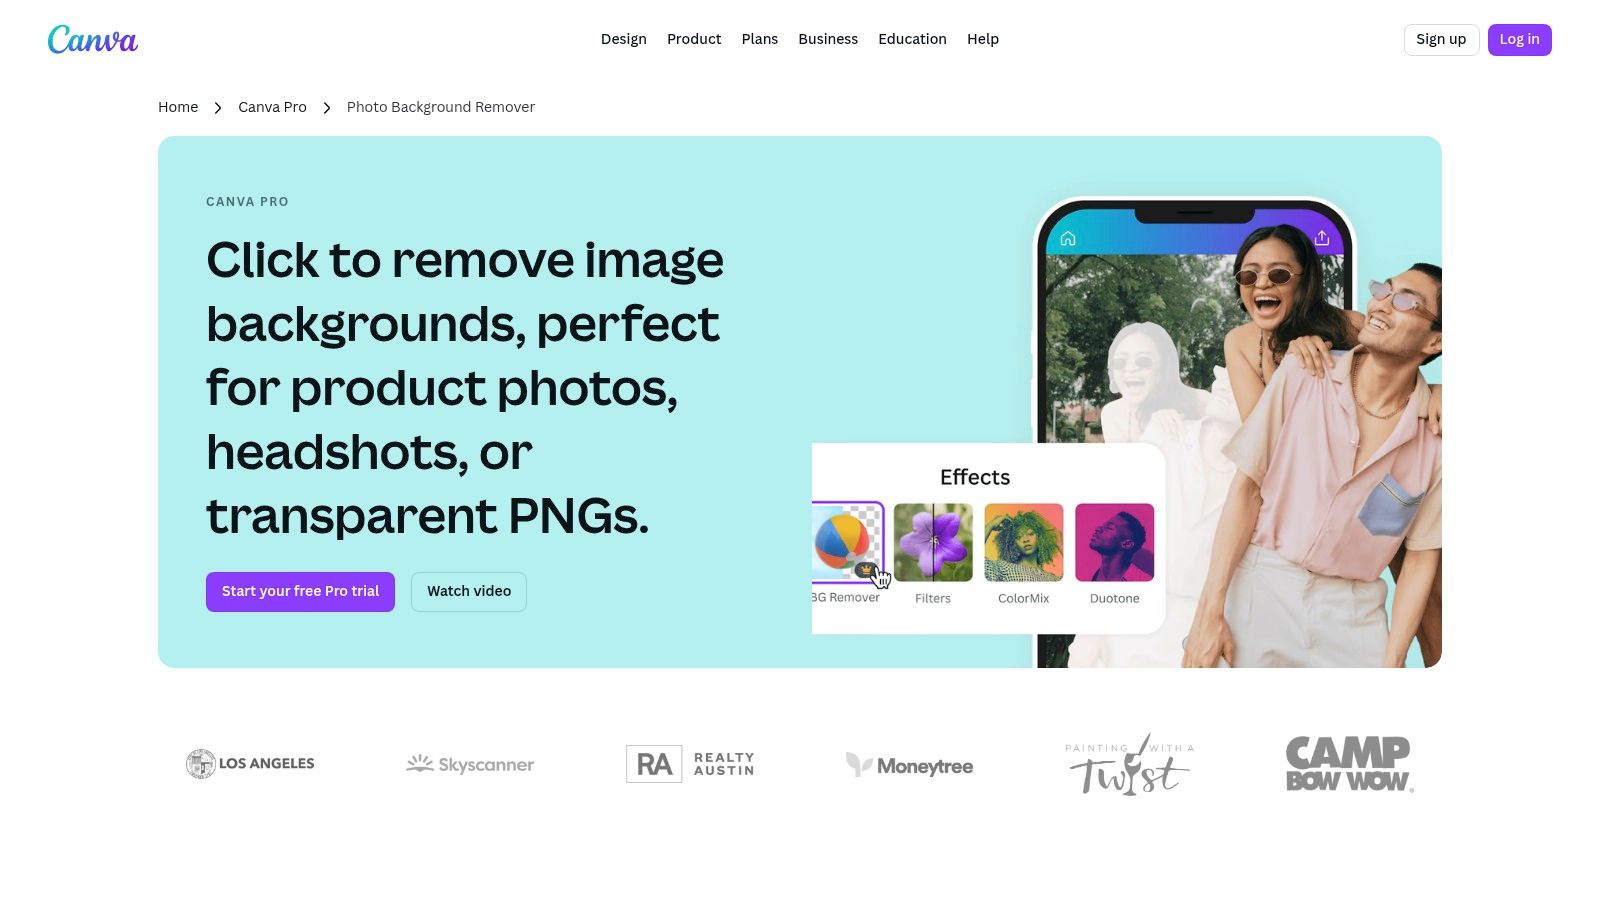
    • Automated Background Removal: The power to instantly generate clean, professional product cutouts for thousands of images without a single click in Photoshop.
    • Intelligent Resizing and Cropping: A system smart enough to automatically create the perfect image specs for every single channel, from Amazon's specific aspect ratios to the square format needed for your Instagram feed.
    • AI-Powered Tagging and Organization: Using AI to automatically add relevant tags to images makes them instantly searchable and easy to find, saving your team hundreds of hours of manual, tedious work.

    These features have a direct, immediate impact on your team's productivity and how quickly you can get new products to market. The market for these systems is blowing up for a reason. Valued at USD 2.14 billion, the global Catalog Management System market is on track to hit around USD 3.96 billion by 2030. A huge chunk of that growth is coming from businesses demanding smarter automation. You can find more details about this market growth on grandviewresearch.com.

    Making the Final Decision

    Once you have a shortlist of contenders, it’s time to get your hands dirty. Schedule personalized demos and make sure to bring the people who will be living in this software every day. This is your chance to ask the hard, scenario-based questions.

    Don't just sit through the standard sales pitch. Go in with a list of your most common and frustrating workflows, and make the vendor show you exactly how their platform would solve them.

    To help guide your final evaluation, here’s a practical checklist to keep in your back pocket.

    Software Evaluation Checklist

    This table breaks down what you should be looking for as you compare your final options.

    Evaluation Criteria What to Look For Why It Matters
    Data Governance Role-based user permissions, version history, and approval workflows. This prevents unauthorized changes and ensures your product data stays accurate and consistent across all teams.
    Vendor Support Responsive technical support, a dedicated account manager, and clear, easy-to-find documentation. A strong support system is your safety net. It's crucial for a smooth setup and for solving problems down the road.
    Total Cost of Ownership Look beyond the monthly fee to implementation costs, training, and any potential add-ons. You need to understand the full financial picture to avoid sticker shock later. Check out different pricing models and what they include to get a feel for the market.

    Ultimately, choosing the right software is about finding the best fit for your business's unique DNA. By focusing on your core needs, prioritizing game-changing functions like image automation, and conducting a really thorough evaluation, you can confidently pick a solution that will be a true catalyst for your growth.

    Mastering Integration and Implementation

    https://www.youtube.com/embed/WXsD0ZgxjRw

    Even the most powerful product catalog management software is just an isolated island of data until it’s plugged into your other business-critical systems. A successful rollout isn’t about just installing a new tool; it's about weaving it into the very fabric of your operations to create a truly connected ecosystem. The real goal is to build automated data highways between platforms, finally getting rid of the slow, error-prone manual work that drains your resources.

    This process is what turns the software from a simple database into the central hub of your entire commerce strategy. When your catalog can talk fluently with your other tools, you unlock a new level of efficiency and accuracy that’s just impossible to reach with siloed systems.

    The Role of APIs in Building a Connected Ecosystem

    Think of an Application Programming Interface (API) as a universal translator and messenger for your software. It’s the behind-the-scenes magic that lets completely different systems—like your ERP, CRM, and e-commerce storefront—communicate, share data, and trigger actions in each other without anyone lifting a finger.

    For example, when your product team updates inventory levels in the ERP system, a well-configured API instantly sends that new number to your catalog software. The catalog then automatically pushes the update to your Shopify and Amazon listings. This seamless flow means your stock levels are always accurate everywhere, which stops you from overselling and disappointing customers.

    Key API-driven connections usually include:

    • ERP Systems: For syncing inventory, pricing, and supplier information.
    • CRM Platforms: Linking product data to customer purchase histories for better personalization.
    • E-commerce Platforms (Shopify, Magento): Pushing updated product descriptions, images, and attributes directly to your storefront.
    • Marketing Automation Tools: Supplying accurate product details for email campaigns and ads.

    The power of a modern product catalog management system lies in its ability to listen and respond. APIs are the ears and mouth of this system, ensuring it hears changes from one platform and speaks the right language to another.

    The process of choosing and implementing software really boils down to three core pillars: scalability, integrations, and intelligent automation like Image AI.

    A diagram illustrating a horizontal software selection process flow with steps: Scalability, Integrations, and Image AI.

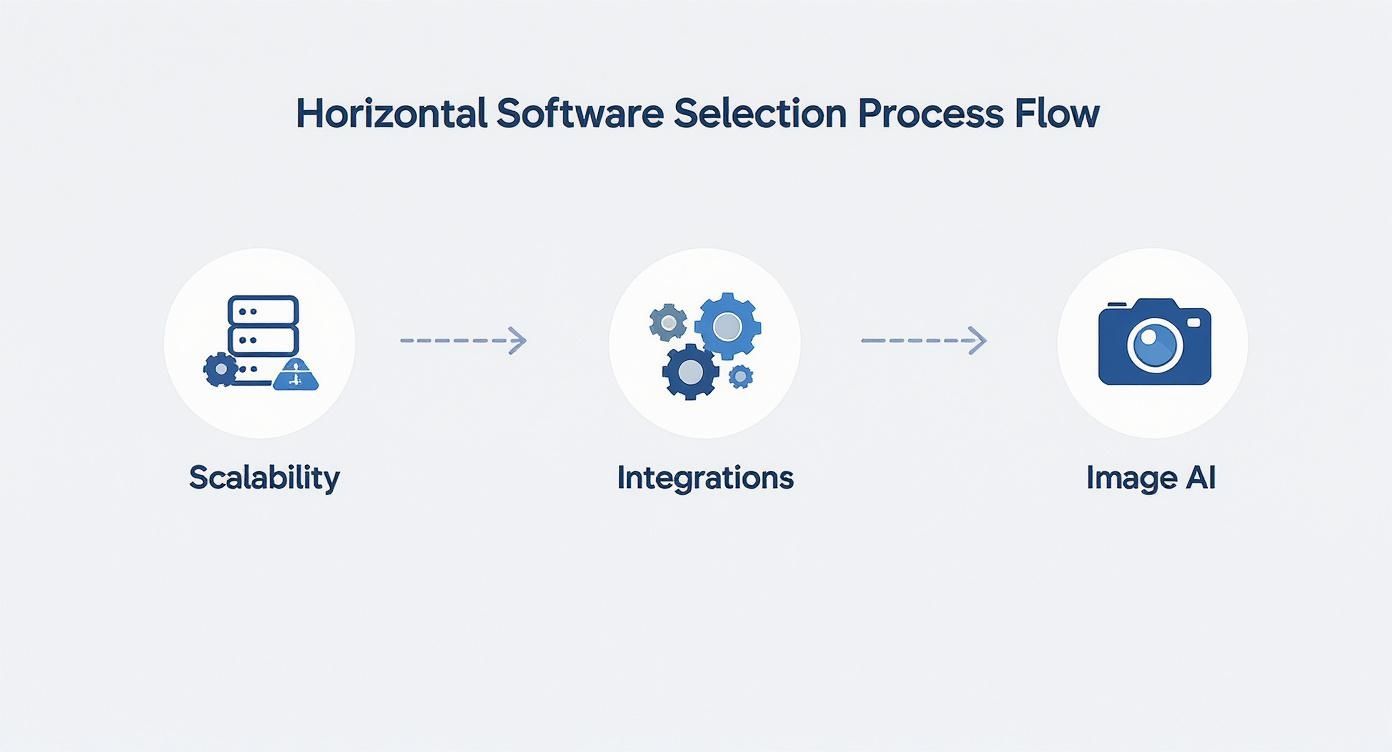
    As you can see, powerful integrations aren't just an add-on; they are a foundational piece for any system that's truly built for growth.

    A Practical Implementation Roadmap

    A smooth rollout doesn't happen by accident—it takes a clear, phased plan. While every business is unique, a typical implementation follows a structured path to minimize disruption and maximize value from day one. Breaking it down into manageable stages helps you set realistic timelines and ensures your team is ready for the transition.

    For developers looking to build custom connections, reviewing the API documentation is a critical first step. You can explore how our API works and see what’s possible by visiting the PixelPanda developer hub.

    Here's a common four-step roadmap for getting your new system live:

    1. Discovery and Planning: This is where it all starts. You'll do a deep dive into your existing data structures, workflows, and pain points. In this phase, you define the project scope, identify key people from different departments, and map out exactly which systems need to talk to each other.

    2. Data Migration and Cleansing: Be prepared, as this is often the most intensive step. It involves pulling product data from all its current sources (like spreadsheets and old databases), cleaning it up to remove duplicates and fix errors, and then importing it into the new catalog software in a standardized format.

    3. Integration and Configuration: Now the technical work begins. Your team or implementation partner will set up the APIs to connect the catalog software with your other platforms. This means establishing the automated workflows, defining the data mapping rules, and rigorously testing every connection to make sure data is flowing correctly.

    4. Team Training and Go-Live: The final stage is all about empowering your users. You’ll hold comprehensive training sessions for your marketing, e-commerce, and product teams so they feel comfortable with the new system. After one last round of testing, you flip the switch and go live, with ongoing support ready to handle any questions that pop up.

    Real-World Use Cases and Measurable ROI

    Theory is great, but what really matters are the results you can see and measure. The true power of product catalog management software shines when you see it solve messy, real-world business problems and deliver a clear return on investment (ROI). It's the operational engine that helps all sorts of companies get their act together and actually grow.

    Let’s step away from the feature list and look at the real-world impact. We can see its value in action everywhere, from the fast-paced world of retail to the highly detailed field of manufacturing.

    From Fashion Retail to B2B Manufacturing

    Think about a fast-fashion brand trying to launch a new collection every season. Before they had a proper catalog system, their team would spend weeks manually updating thousands of product listings across their website, app, and various social media storefronts. It was a slow, painful process that led to pricing mistakes, mismatched images, and products hitting the market late. They were consistently missing out on that initial sales buzz.

    Once they brought in a centralized platform, everything changed. They could:

    • Update entire collections with a single click, pushing all the changes to every sales channel at the same time.
    • Slash their time-to-market for new products by an average of 65%.
    • Cut data entry errors by over 90%, which meant customers saw the right information every time.

    Now, imagine a B2B manufacturer that makes industrial parts. Their problem was different, but just as serious. They had to give their distributors incredibly precise, constantly updated technical specs and compliance documents. Relying on a chaotic mess of spreadsheets and PDFs was a recipe for disaster, causing wrong orders and ticking off their partners.

    A solid catalog system gave them one single source of truth for all that technical data. Distributors could suddenly log into a portal and get accurate, real-time information, which dramatically cut down on order mistakes and made for much happier partners.

    A strong product catalog is the foundation for an effective online presence. It ensures that every product is presented accurately and consistently, no matter where a customer discovers it.

    A well-oiled product catalog system is the bedrock of any successful digital shelf strategy and optimization, making sure your products look their best everywhere online.

    Calculating the Tangible Business Value

    The ROI you get from this kind of software isn't just about feeling more organized; it's about hard numbers that hit the bottom line. There's a reason the market for these tools is booming—the value is crystal clear. The Catalog Management System Market is on track to be worth USD 1.9 billion in 2025 and is expected to more than double to USD 4.2 billion by 2035. That kind of growth only happens when businesses see real financial returns. You can dig into these market trends on futuremarketinsights.com.

    So, how do you measure that return? Here are the key metrics:

    • Increased Team Productivity: Automating all that manual data entry often frees up hundreds of employee hours every month. Your skilled people can stop fixing spreadsheets and start focusing on big-picture work like marketing, merchandising, and product innovation.
    • Reduced Product Return Rates: When your product descriptions, specs, and images are consistently accurate, customers know exactly what they’re getting. This clarity leads directly to fewer returns, saving you a fortune in shipping and restocking fees.
    • Faster Time-to-Market: Just like our fashion retailer example, getting products live on your site faster means you start making money sooner. In a competitive market, that speed can be the difference between being a leader and always playing catch-up.

    At the end of the day, putting money into product catalog management is an investment in your company’s operational backbone. It pays you back with huge gains in efficiency, better accuracy, and a much smoother experience for your customers.

    Enhancing Your Catalog with Automated Image Workflows

    In e-commerce, product images aren't just decorative fluff; they are the product in the customer's mind. High-quality, consistent visuals are what drive buying decisions. Yet, for most teams, managing these images at scale quickly spirals into a massive operational headache, bogging down the entire process of getting products to market.

    This is precisely where automated image workflows change the game.

    Instead of getting lost in the endless loop of manual photo editing, you can plug modern solutions directly into your product catalog management software to handle the most time-consuming tasks. This turns a slow, mistake-ridden process into a highly efficient production line for perfect product visuals.

    A photographer takes pictures in a studio while working with a laptop displaying image catalog software.

    AI-powered tools are built to automate these exact workflows, offering specialized functions like background removal and upscaling that are absolutely vital for creating clean, professional product listings at scale.

    From Manual Drudgery to Automated Excellence

    Think about what it takes to get just one product ready for five different sales channels. Instagram wants a square crop, Amazon demands a specific aspect ratio, and your own website needs a high-resolution version for the zoom feature. Now, multiply that by hundreds or thousands of products. Manually creating every single variation isn't just inefficient—it’s a colossal drain on your creative team’s time and energy.

    Automated image workflows tackle these repetitive jobs in an instant, making sure every image is perfectly tailored for its destination. This automation typically covers a few key areas:

    • Background Removal: Instantly strips away cluttered backgrounds and replaces them with the clean, white backdrop required by most online marketplaces. This creates a professional, uniform look across your entire catalog.
    • Smart Cropping and Resizing: Takes a single master image and automatically generates all the different versions you need, perfectly formatted for every channel’s unique specs.
    • Color Correction: Guarantees that product colors are true-to-life and consistent across all your photos, which helps cut down on customer confusion and costly returns.
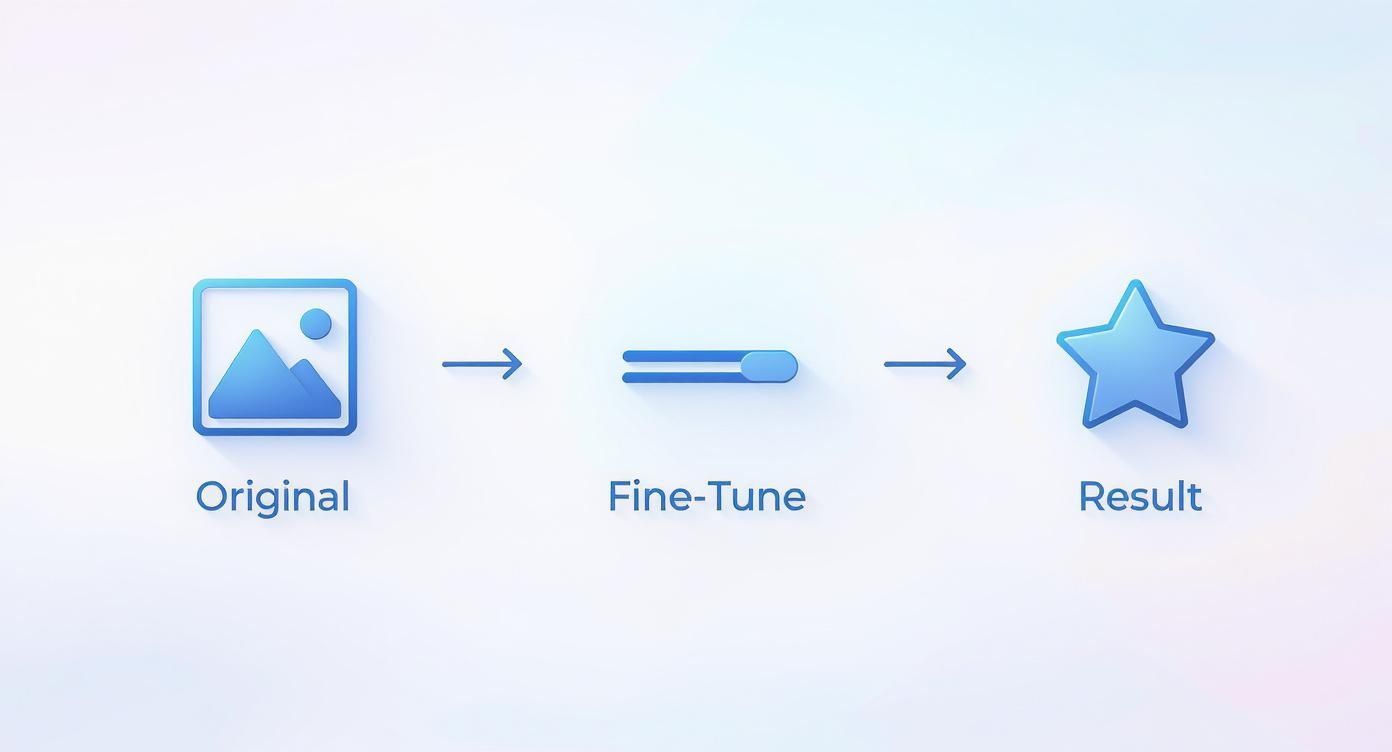
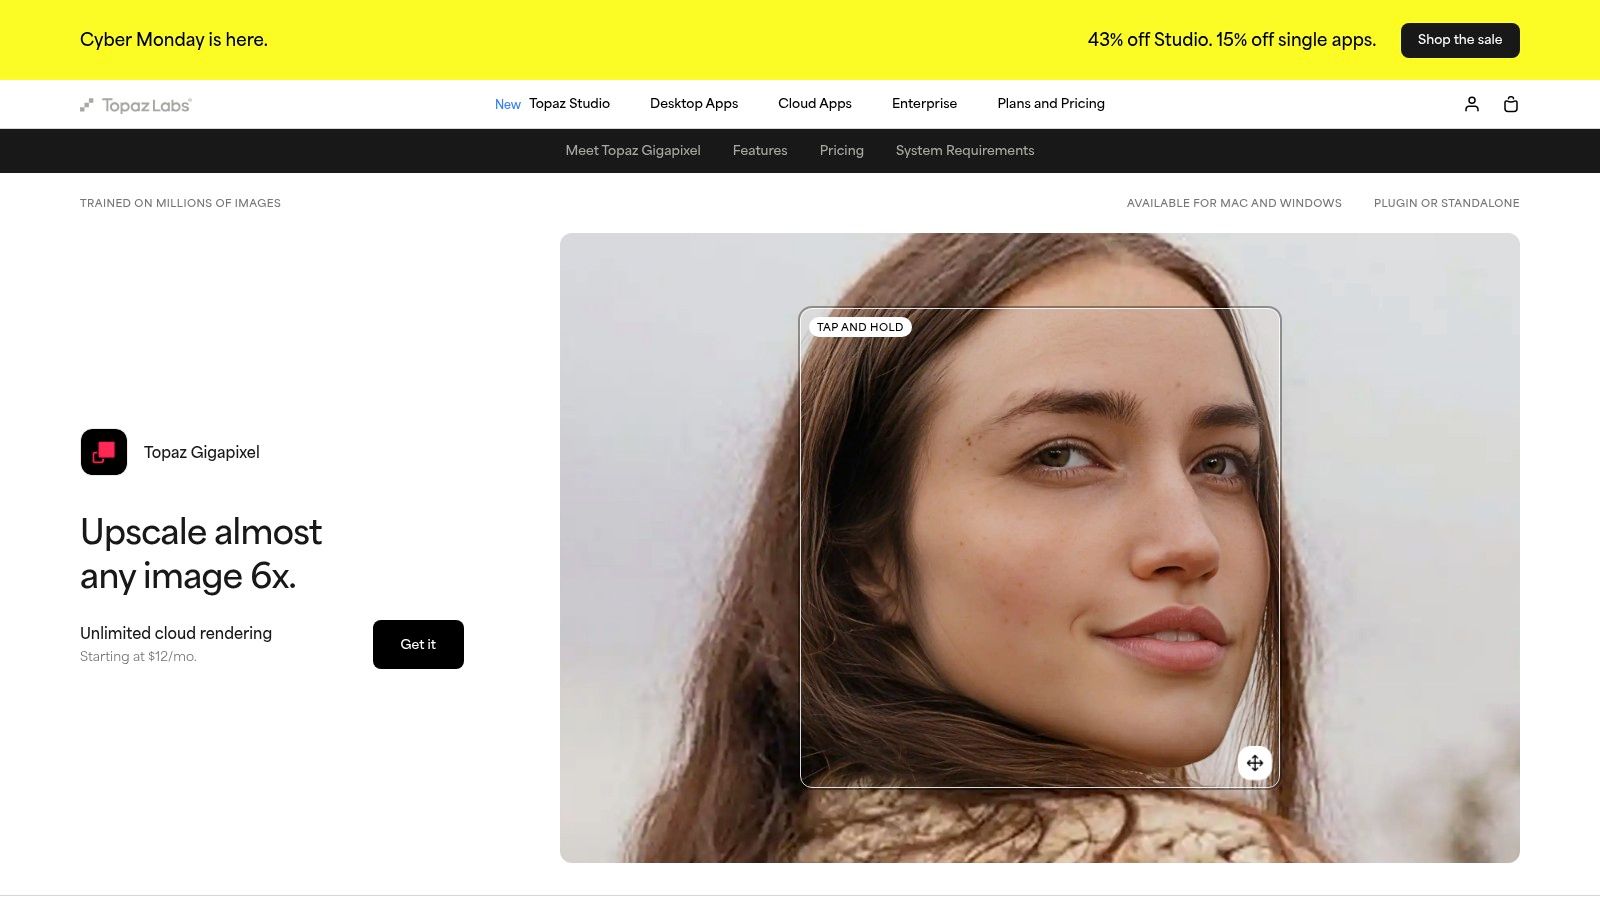
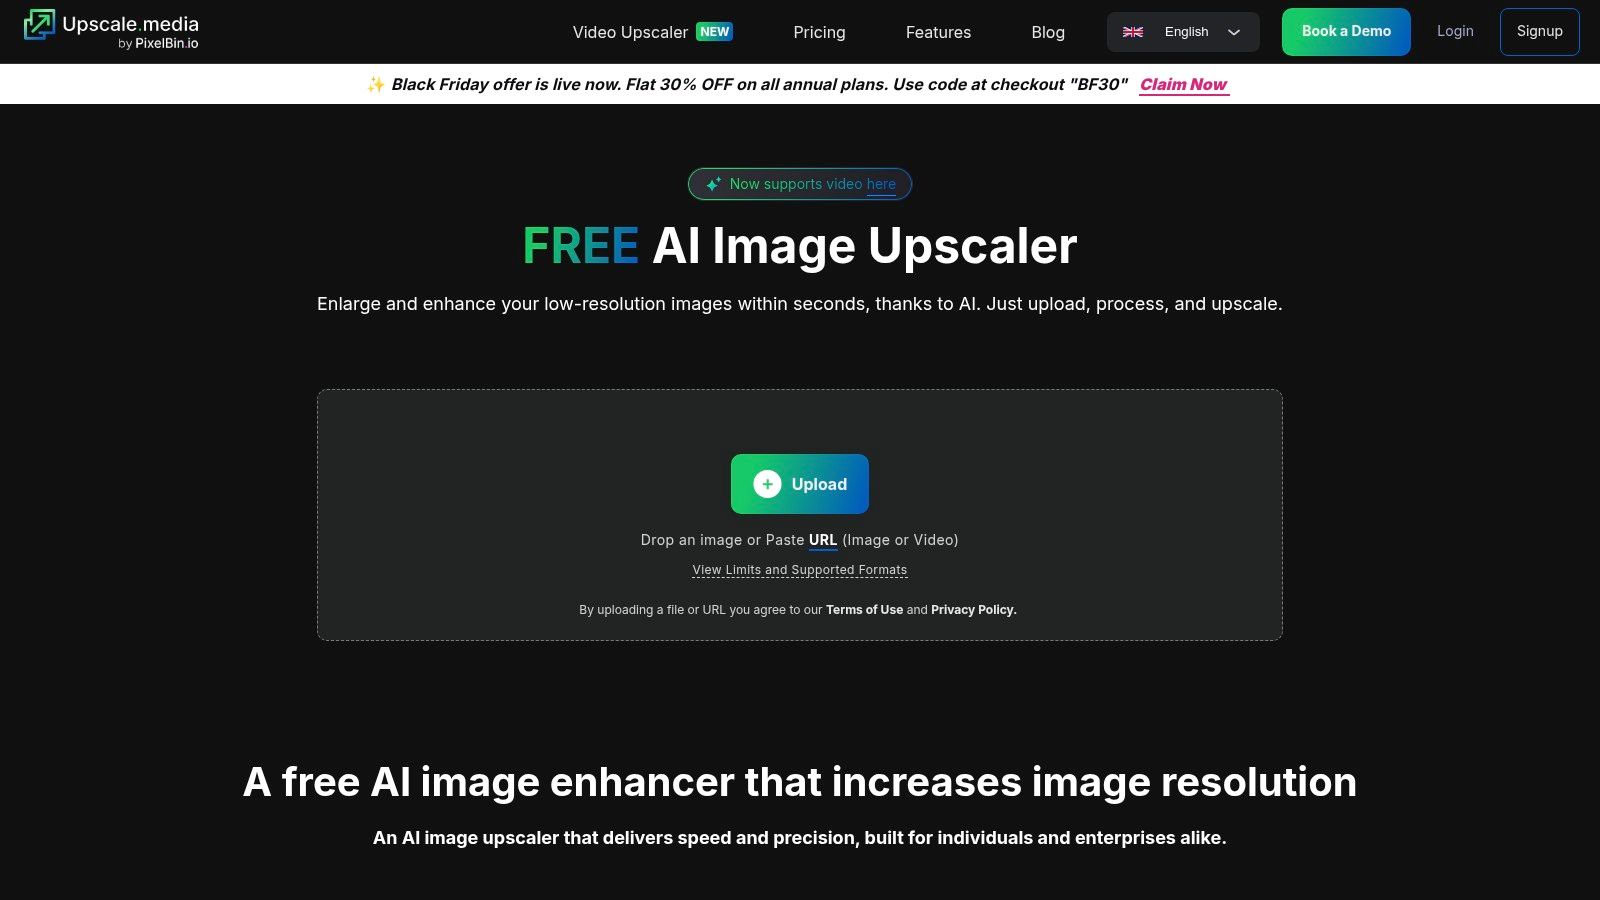
    • Image Upscaling: This is a lifesaver. It sharpens lower-quality images, making them crisp and clear enough for detailed zoom views without forcing you to do a costly reshoot. If you’ve ever struggled with pixelated source images, you can see exactly how this works with an AI-powered image upscaling demo.

    By automating visual production, teams can finally stop spending their days on repetitive editing and start focusing on strategic merchandising. The real goal is to hit a level of quality and consistency that doesn't just save time but actively drives more sales.

    PixelPanda as a Complementary Solution

    This is where specialized tools like PixelPanda come in. Think of them as a powerful extension for your main product catalog management software, laser-focused on visual automation. By integrating a solution like this through its API, you create a seamless pipeline. New product photos are automatically processed, perfected, and then linked to the right SKU in your catalog without anyone lifting a finger.

    This approach gives your team the power to generate thousands of professional, on-brand product photos in minutes, not weeks. It’s about more than just being efficient; it’s about elevating your brand’s entire visual identity and ensuring every customer touchpoint is polished and compelling. This kind of automation transforms your product catalog from a simple database into a dynamic, visually stunning sales machine.

    Frequently Asked Questions

    Jumping into the world of product data management can feel overwhelming, and you've probably got questions. We've compiled some of the most common ones we hear to give you clear, straightforward answers and help you feel more confident about your next steps.

    What’s the Difference Between PIM and Product Catalog Management?

    It's easy to get these two mixed up, but the distinction is pretty important. Think of a Product Information Management (PIM) system as your company's master product library. It’s the central vault for everything—we’re talking supply chain specs, logistics data, internal part numbers, marketing copy, and technical details. It's the one true source of all product information for the entire organization.

    Product catalog management software, on the other hand, is much more focused on the customer experience. It pulls the relevant, customer-facing information from the PIM (or wherever it lives) and gets it ready for prime time. Its job is to shape that data into compelling, accurate catalogs for specific sales channels, whether that's your e-commerce site, an Amazon storefront, or a social media shop.

    So, in short: PIM manages the raw data, while catalog management crafts the final presentation.

    How Long Does It Take to Implement a New Catalog System?

    This is a classic "it depends" scenario, but I can give you some real-world context. For a small business with a few hundred products and well-organized data, you could be up and running in a few weeks. But for a large enterprise juggling a massive, messy catalog and needing to connect to multiple other systems, the timeline is more likely to be in the three to nine-month range.

    The biggest factors that will stretch or shrink your timeline are:

    • Data Quality: If your data is a mess, a lot of time will be spent cleaning, standardizing, and mapping it before you can even start. This is often the biggest bottleneck.
    • Integration Complexity: Hooking the new system into your existing ERP, CRM, and e-commerce platforms requires careful planning and thorough testing.
    • Team Resources: Having a dedicated internal team ready to work with the software vendor can make a world of difference and seriously speed things up.

    Can This Software Help with My SEO Efforts?

    Absolutely. In fact, it's one of the most underrated benefits. High-quality, consistent, and rich product data is the bedrock of good e-commerce SEO, and this is where a catalog management system shines.

    By centralizing your data, you can finally enforce SEO best practices across your entire product line. Imagine standardizing all your product titles, automating unique meta descriptions, and making sure every single image has descriptive alt-text. These aren't just small tweaks; they are crucial ranking factors.

    It's also a powerful tool for fighting duplicate content penalties. Instead of just copying and pasting descriptions everywhere, you can create unique product feeds for each channel. This tells Google that every listing offers unique value, making your whole catalog far more attractive to search engines and, ultimately, to your customers.


    Ready to supercharge your product visuals and eliminate manual editing? PixelPanda integrates seamlessly with your workflow, providing AI-powered image automation that delivers studio-quality results in seconds. Explore the possibilities and start your free trial today.

  • How to Remove Text from Images Like a Pro

    How to Remove Text from Images Like a Pro

    Getting text out of an image really comes down to a few core approaches. You can go the manual route with tools like Photoshop's Clone Stamp for pixel-perfect control, use automated AI features like Content-Aware Fill for a quick fix, or even lean on an API for bulk processing. The right choice always hinges on how complex your image is and what you need in terms of quality and speed.

    Why Removing Text from Images Is a Common Need

    Ever find the perfect stock photo, only to have it marred by a cheesy "Your Text Here" placeholder? Or maybe you've got a great user-generated shot for a social media campaign, but it's plastered with emojis and captions. These are the exact moments when knowing how to cleanly remove text becomes a vital skill.

    The real goal isn't just to delete the words. It's to rebuild the area behind them so seamlessly that no one would ever suspect text was there in the first place. This can be deceptively simple or incredibly tricky, all depending on the background. Lifting a logo off a clear blue sky is a walk in the park compared to removing a sentence from a patterned shirt or a textured brick wall.

    Common Scenarios for Text Removal

    This skill pops up in more places than you might think, from professional workflows to personal projects. You'll often find yourself needing to clean up images for:

    • Marketing and Branding: Taking great stock photos and making them your own by removing generic text or watermarks (with proper licensing, of course).
    • E-commerce: Creating clean, consistent product shots from supplier photos that often come with distracting logos or promotional text.
    • Photo Restoration: Giving old family photos a new life by digitally removing handwritten notes or dates that cover up important parts of the picture.
    • Content Creation: Repurposing a meme or a social media screenshot for a blog post without the distracting original text.

    For the really tough jobs, a professional tool like Adobe Photoshop is usually the weapon of choice. Its interface is built for this kind of detailed work.

    The layer-based workflow and deep toolset are what give you that fine-grained control, which is non-negotiable when you're trying to get a professional result on a complex image.

    Choosing the Right Method

    So, which tool should you grab? It really depends on the job at hand. Throughout this guide, we’ll break down the best techniques for different situations, from precise manual editing to lightning-fast AI solutions.

    The best technique is always the one that matches the image's background complexity. A simple background might just need a quick AI touch-up, but a detailed, textured surface will almost always demand careful manual cloning to look right.

    To help you get your bearings, let's start with a quick overview of the main methods we'll be covering.

    Comparing Text Removal Methods at a Glance

    This table breaks down the most common approaches, giving you a sense of what each one is good for, how hard it is to master, and how quickly you can get the job done.

    Method Best For Difficulty Level Speed
    Manual Cloning & Healing Complex backgrounds, high-quality results, artistic control High Slow
    Content-Aware/Magic Fill Simple or moderately complex backgrounds, speed Low Fast
    AI Inpainting Tools Quick edits, social media content, non-critical images Very Low Very Fast
    API/Batch Processing High-volume tasks, e-commerce, automated workflows Medium (to set up) Instant (per image)

    Think of this as your starting point. Now that you have a high-level view, we can dive into the nitty-gritty of each technique and show you exactly how to put them into practice.

    Mastering Manual Edits with Professional Software

    When you need absolute, pixel-perfect control, nothing beats rolling up your sleeves and doing the work manually in professional-grade software. While AI tools are fantastic for speed, they can sometimes get tripped up by tricky textures or subtle lighting. Knowing how to do it by hand gives you the power to tackle any image and make the text vanish without a trace.

    An Apple iMac displaying photo editing software with a woman walking in a field, and 'CLONE AND HEAL' text.

    This kind of detailed control isn't new; it's the modern version of a craft that's over a century old. Before computers, retouchers would painstakingly use airbrushes, hand-coloring, and even physically splice negatives together. The game completely changed when Adobe Photoshop arrived in 1990, digitizing these techniques and introducing incredible tools like layers. This meant artists could finally work non-destructively, removing unwanted elements with more ease than ever thought possible. You can explore the full history of how photo editing evolved from the darkroom to the digital powerhouse it is today.

    Your Essential Toolkit: The Clone Stamp and Healing Brush

    At the core of any manual text removal job are two powerhouse tools you’ll find in both Adobe Photoshop and its excellent free alternative, GIMP: the Clone Stamp Tool and the Healing Brush Tool. They might sound similar, but they're used for very different things.

    The Clone Stamp Tool is your precision instrument. It does exactly what its name implies: it copies pixels from a source area you choose and pastes them directly over another area. This makes it perfect for rebuilding parts of an image with sharp, defined patterns, like wood grain, brickwork, or the weave in a piece of fabric.

    The Healing Brush Tool, on the other hand, is a bit smarter. It also samples pixels from a source, but it doesn't just copy-paste. Instead, it intelligently blends the source texture with the color and lighting of the area you're painting over. This creates a much more seamless, natural-looking result, which is why it's the go-to for organic surfaces like skin, skies, or any area with subtle gradients.

    Pro Tip: My workflow almost always starts with the Healing Brush because of its superior blending. I only switch over to the Clone Stamp when I need to reconstruct a hard edge or a specific texture that the Healing Brush might make too soft.

    A Real-World Example: Removing a Logo from Fabric

    Let's tackle a common problem: getting a printed logo off a t-shirt. The fabric has a clear texture, so just painting over the logo will look flat and obviously fake. This is where manual tools really prove their worth.

    First thing’s first: always work non-destructively. This is a crucial habit for any serious editor. Instead of editing your image directly, create a new, blank layer on top of it. You'll do all your cloning and healing on this separate layer, which means your original photo stays perfectly intact underneath.

    With your new layer active, grab the Clone Stamp Tool. Hold down Alt (or Option on a Mac) and click a clean patch of fabric right next to the logo to set your source point. Now, start painting over the logo. The key here is to constantly resample from different spots around the text. If you don't, you'll create a repetitive, artificial-looking pattern that screams "edited."

    Speeding Things Up with the Patch Tool

    For larger blocks of text, the Patch Tool can be a huge time-saver. It works like a hybrid of a selection tool and the Healing Brush. You start by drawing a selection around the entire piece of text you want to get rid of.

    Then, you just click inside that selection and drag it over to a clean, text-free part of the image. When you let go, Photoshop automatically takes the texture and lighting from the clean area and blends it perfectly into the spot where the text used to be. It’s an incredibly efficient way to handle bigger removal jobs.

    Habits for Flawless Manual Edits

    Getting a consistently professional result comes down to a few core habits. Make these a non-negotiable part of your workflow.

    • Work on a New Layer: Seriously, I can't stress this enough. It lets you experiment, easily erase mistakes, and fine-tune your edits without ever damaging your original image.
    • Use a Soft-Edged Brush: A hard-edged brush creates obvious, ugly seams. A soft, feathered brush is essential for helping your edits blend invisibly into the rest of the image.
    • Vary Your Sample Source: This is what separates the pros from the amateurs. Keep resampling your source (Alt/Option-click) from different nearby areas to avoid that tell-tale "rubber stamp" look.
    • Zoom In, Zoom Out: Don't just work zoomed in at 200%. Constantly zoom back out to 100% to see how your edit looks at a normal viewing distance. What looks perfect up close can sometimes look like a blotchy mess from afar.

    By mastering these manual tools and adopting a clean, non-destructive workflow, you gain total creative control. You’ll be ready to take on any text removal challenge, no matter how complex the background, and produce edits that are truly invisible to the naked eye.

    Using AI for Quick and Intelligent Text Removal

    When manual edits feel like overkill and you just need to get the job done fast, it's time to bring in the AI. Modern photo editors have evolved far beyond simple pixel cloning. They now use sophisticated algorithms to analyze the area around your text and convincingly rebuild whatever is behind it. This approach can easily turn a tedious 10-minute task into a 10-second fix.

    This kind of speed is a direct result of decades of progress. The digital floodgates really opened in the early 1990s with better digital cameras and file standards. A huge milestone was Logitech's Fotoman camera back in 1992, which created JPEG files. That format quickly became the standard and paved the way for the powerful, accessible editing software we rely on today. For a deeper dive, the history of digital photo manipulation is a fascinating look at how we got here.

    The Magic Behind Content-Aware Fill

    The most famous AI feature for this kind of work is undoubtedly Content-Aware Fill, the powerhouse inside Adobe Photoshop. It’s not just slapping a color over the text; it intelligently samples the textures, patterns, and light from the surrounding pixels to create a seamless patch.

    Think of it as a master art restorer who can look at a damaged painting and perfectly mimic the original artist's style. Content-Aware Fill does something very similar with pixels. This makes it incredibly effective for backgrounds that are complex but have organic or repeating elements—a grassy field, a cloudy sky, a textured wall. It literally figures out what should be there and generates it from scratch.

    Getting the Most Out of AI Fill in Photoshop

    Getting started is easy, but a few pro tips can make a world of difference in your final result. The quality of your AI fill is directly linked to the quality of your selection.

    • Make a tight selection. Use the Lasso or Object Selection Tool to draw a clean border right around the text. The key is to include a tiny sliver of the background inside your selection. This gives the algorithm more context to work with.
    • Head to the Content-Aware Fill workspace. With your selection active, just go to Edit > Content-Aware Fill. This opens up a dedicated panel where you can fine-tune the magic.
    • Refine the source area. Photoshop shows you a green overlay indicating which pixels it’s using as a source. If it’s sampling from an unwanted spot (like a person's face next to the text), just paint over that part of the green overlay to tell it, "Don't look here!"
    • Apply and review. Once the preview looks good, hit OK. The tool cleverly generates the fill on a new layer, which keeps your original image untouched.

    This technique is a lifesaver for most backgrounds. But be warned, on images with very distinct, non-repeating objects, the AI can sometimes get confused and pull in bizarre artifacts.

    I once tried to remove text from a photo of a bookshelf, and Content-Aware Fill kept trying to generate these blurry, half-formed book spines in the empty space. In that case, I had to fall back on the manual Clone Stamp for precision.

    Standalone AI Tools for Instant Results

    You don't always need a beast like Photoshop. A whole new crop of web-based tools has popped up, designed to do one thing exceptionally well: remove unwanted objects and text in just a couple of clicks.

    These are perfect for social media managers, marketers, or anyone who needs to clean up an image on the fly without getting bogged down in menus and settings. The workflow is usually dead simple: upload your photo, highlight the text, and let the AI do its thing.

    A Few of My Go-To Web-Based Options:

    • Cleanup.pictures: A wonderfully focused tool. It’s known for its simplicity and delivers surprisingly good results on all sorts of backgrounds.
    • Fotor's Object Remover: This is part of a larger editing suite, but its object removal feature is fast, effective, and gets the job done.
    • PixelPanda: This one is built for scale. It offers a powerful, API-driven inpainting service that's ideal for developers and businesses that need to automate text removal across thousands of images. You can see it in action in some of the PixelPanda interactive demos.

    AI vs. Manual: Making the Right Call

    So, when should you lean on AI, and when is it better to roll up your sleeves and do it manually? The image itself will usually tell you what it needs.

    Let the background be your guide.

    Background Type AI Performance My Go-To Tool
    Simple Solid Colors Flawless Any AI Tool
    Organic Textures (Grass, Sky, Water) Excellent Content-Aware Fill
    Repeating Patterns (Brick, Fabric) Good to Great Content-Aware Fill
    Complex Scenes (Cityscapes, Crowds) Hit or Miss Manual Cloning (usually)
    Gradients Pretty Good Content-Aware Fill

    AI-powered tools offer incredible speed and have become an indispensable part of my workflow. By understanding how they think and where they shine, you can pick the right tool for the job every time, saving yourself a ton of effort while still producing clean, professional images.

    Automating Text Removal for Large-Scale Projects

    Manual edits and one-click web tools are great for a handful of images, but they simply don't scale. What happens when you're an e-commerce marketplace trying to moderate thousands of user-submitted photos a day? Or a marketing team localizing hundreds of ad creatives for different regions? Editing each image by hand becomes a massive bottleneck.

    This is where you bring in the heavy machinery: programmatic text removal. It transforms that manual grind into a fast, automated, and scalable workflow.

    The whole process hinges on a powerful two-step punch handled by an API. First, the system uses Optical Character Recognition (OCR) to find and map the exact coordinates of any text in the image. Once the text is locked on, a sophisticated inpainting algorithm swoops in to intelligently rebuild the background pixels, seamlessly covering the spot where the text used to be.

    This is the basic flow most AI-powered tools follow.

    A three-step diagram illustrating the process of AI text removal: Select, Generate, and Refine.

    As you can see, the AI handles the selection, generates the replacement background, and then refines the result to make it look natural.

    The Role of OCR in Automated Workflows

    The secret sauce that makes this automation so effective is OCR, a technology that translates text within an image into machine-readable data. It feels incredibly modern, but its origins go back over a century. Believe it or not, back in 1914, Emanuel Goldberg built a machine that could read characters and turn them into telegraph code. Fast forward to 1978, and the first commercial OCR software was digitizing huge legal and news archives.

    Today's OCR systems can hit accuracy rates well above 98%, providing a rock-solid foundation for this kind of automated editing. You can read more about the fascinating evolution of OCR technology to see how far it's come. By pinpointing the text first, the API avoids any guesswork and knows exactly where to apply the inpainting, giving you much cleaner results without accidentally messing up other parts of the image.

    A Real-World Scenario: E-commerce Product Moderation

    Let's make this practical. Imagine you run a peer-to-peer marketplace where users upload their own product photos. You’ve probably seen it before—sellers plastering phone numbers, social media handles, or "SALE!" text all over their images, which violates your platform's rules. Manually screening and editing every single photo would require a full-time team and create frustrating delays for sellers.

    An API-driven solution handles this in seconds.

    • A user uploads their product photo.
    • Your system automatically sends that image to an image processing API.
    • The API’s OCR engine immediately flags the forbidden text.
    • Its inpainting model erases the text and reconstructs the background.
    • The clean, compliant image is returned and goes live on the listing.

    The whole round trip takes just a few moments. This not only keeps your marketplace looking clean and professional but also drastically cuts down the time it takes for a seller's item to go live.

    Automating this process isn't just about efficiency; it's about creating a scalable system that can handle growth without a proportional increase in operational costs. It turns a potential moderation nightmare into a smooth, hands-off workflow.

    Putting It Into Practice with an API Call

    Plugging this kind of power into your own application is surprisingly straightforward. Services like PixelPanda offer a simple REST API that you can work with using just a few lines of code. For any developer wanting to dive in, the first stop should always be the API documentation to get familiar with the available endpoints and parameters.

    To give you an idea, here’s what a basic API call to remove text might look like using Python:

    import requests

    api_key = 'YOUR_API_KEY'
    image_url = 'https://example.com/image_with_text.jpg'

    response = requests.post(
    'https://api.pixelpanda.ai/v1/inpainting/remove-text',
    headers={'Authorization': f'Bearer {api_key}'},
    json={'image_url': image_url}
    )

    if response.status_code == 200:
    # Save the cleaned image
    with open('cleaned_image.png', 'wb') as f:
    f.write(response.content)
    print("Text removed successfully!")
    else:
    print(f"Error: {response.text}")

    This little snippet shows how you can send an image URL to the service and get a cleaned-up version right back. By building a system around an API like this, businesses can process a massive volume of images, ensuring everything stays on-brand and high-quality at a scale that manual editing could never touch.

    Handling Difficult Backgrounds and Preserving Quality

    Making text disappear is one thing, but making the edit truly undetectable is another art form entirely. Once you move past simple, flat-colored backgrounds, you’ll find the real challenge is in preserving the fine details and textures of the original image. The goal is to avoid those tell-tale blurry spots or unnatural, repeating patterns that scream "this has been edited."

    Close-up of blue and white striped fabric next to wood, with 'PRESERVE DETAIL' text overlay.

    Successfully removing text from a complex surface requires a more thoughtful approach than just a quick AI fill. Let's dig into how you can turn a good edit into a great one by tackling the toughest backgrounds head-on.

    Working with Fine Textures Like Wood and Fabric

    Surfaces with a lot of detail—think wood grain, textiles, or brushed metal—are incredibly unforgiving. A lazy clone job or a confused AI will leave behind a smudged mess that’s instantly noticeable. The key here is to work with the existing pattern, not against it.

    When you're using a tool like the Clone Stamp, your main job is to maintain the direction and flow of the texture. For something like wood grain, that means sampling pixels from an area where the grain is running in the same direction as the spot you're covering. It sounds obvious, but it’s a detail many people miss in the moment.

    To keep the texture looking organic and not like a cheap copy-paste job, you have to constantly resample your source point. This is crucial for preventing that "rubber stamp" effect where the same little detail appears over and over. A good rule of thumb I follow is to resample every few brush strokes.

    Strategies for Complex Surfaces

    Let's break down the approach for some of the trickiest backgrounds you'll run into. Each one demands a slightly different technique.

    • Gradients: Trying to remove text from a sunset or a smoothly lit wall is tough because any tiny imperfection in the color transition will stand out. For this, I reach for a large, very soft-edged Healing Brush. It allows the tool to sample a wide area of color information and create a seamless blend across the gradient.
    • Hair and Fur: This is arguably the most difficult texture to work with. The Clone Stamp is often too harsh and clumsy. Your best bet is to work on a new, separate layer, use a tiny, soft Healing Brush, and painstakingly rebuild the area by sampling adjacent strands of hair. It’s slow, tedious work, but it’s the only way to get a result that looks real.
    • Transparent or Reflective Surfaces: Think glass, chrome, or calm water. Here, you're not just rebuilding the surface itself but also whatever is being seen through or reflected in it. This usually requires a combination of cloning background elements and then carefully painting in subtle highlights and shadows to recreate the reflection.

    My personal rule for difficult textures is to build the edit up in layers. I'll start with a base layer using a soft Healing Brush to match the color and light. Then, I add another layer on top where I use the Clone Stamp at a low opacity (around 20-30%) to gently paint the texture back in. This gives me maximum control over the final result.

    The Importance of Feathering Selections

    Whether you're using an AI tool like Content-Aware Fill or setting up a manual edit, the "hardness" of your selection edge is critical. A sharp, unfeathered selection creates a harsh line between your edited patch and the original image—it's a dead giveaway.

    Feathering creates a soft, transitional edge on your selection, allowing the edit to blend smoothly and naturally into the surrounding pixels. In Photoshop, you can add feathering when you first make a selection (Select > Modify > Feather) or adjust it on the fly. A tiny feather of just 1-3 pixels is often enough to make a massive difference.

    This simple step ensures there are no hard lines, making your work much harder to spot. It’s an essential technique for achieving that invisible finish.

    Preserving Detail at High Resolution

    Finally, always start with the highest quality image possible. The more pixel data you have, the more information your editing tools have to work with, which almost always leads to cleaner, more believable results.

    If your source image is low-resolution, any edits you make will only amplify the existing pixelation and blurriness. If you're stuck with a lower-quality file, it’s worth running it through an upscaler first. Modern tools that use AI can intelligently increase the resolution and sharpen details, giving you a much better canvas to start with.

    You can even try an image upscaling demo to see how AI can enhance a photo before you begin the text removal process. This one extra step can dramatically improve the final quality of your edit.

    Ethical and Legal Considerations for Image Editing

    https://www.youtube.com/embed/uDDrCNP3G-k

    The ability to seamlessly remove text from an image is a powerful skill, but it also carries some serious responsibilities. Before you even think about editing, you absolutely have to consider the legal and ethical lines you might be crossing, especially when it comes to copyright law.

    From the moment an image is created, it's the intellectual property of its creator. It’s that simple.

    Think you can just erase a watermark or a photographer's credit from a stock photo you bought? Think again. That's a classic mistake. Your license almost always gives you the right to use the image as-is, not to fundamentally alter it by stripping away attribution. Removing that text isn't just a minor tweak; it directly undermines the creator's ownership and could land you in legal trouble.

    Navigating Fair Use and Deceptive Edits

    You might have heard of fair use, which can sometimes permit using copyrighted work without permission for things like parody, commentary, or news reporting. But tread very carefully here. Fair use is a notoriously gray legal area and it almost never applies to commercial situations where you’re just trying to make an image fit your brand better.

    Beyond the black-and-white of the law, there's the simple matter of ethics. There’s a world of difference between, say, restoring a damaged old family photo and deceptively altering a news image to mislead people. Using these editing skills responsibly means respecting the work of others and preserving the integrity of the original image.

    Before you make a single edit, stop and ask yourself this one critical question: "Am I misrepresenting the original work or infringing on the creator's rights?" Your honest answer will guide you toward making the right choice.

    Common Questions About Removing Text

    We've covered a lot of ground, but a few questions always pop up. Let's tackle some of the most common hurdles people face when trying to get text out of an image.

    What's the Best Free Tool for the Job?

    If you're looking for professional-level control without spending a dime, GIMP is the clear winner. Think of it as a free, open-source version of Photoshop. It gives you the powerful Clone Stamp and Healing Brush tools you need for precise, manual work.

    But what if you just need something fast and simple? For those quick jobs on images with fairly simple backgrounds, an automated web tool is your best bet. Services like Cleanup.pictures or Fotor's Object Remover can get you a surprisingly good result in just a few clicks.

    How Do I Remove Text Without Blurring the Background?

    Ah, the dreaded smudge effect. Avoiding it all comes down to picking the right tool for the specific background texture you're dealing with.

    • For backgrounds with sharp, repeating patterns or distinct details (like brick walls or fabric), the Clone Stamp Tool is your best friend. It gives you pinpoint control, letting you copy an exact texture from a clean area and paint it over the text.
    • For softer, more organic surfaces like skies, skin, or smooth gradients, the Healing Brush is a better choice. It intelligently blends the texture, color, and lighting from the source area, creating a much more seamless and natural-looking patch.

    Pro Tip: The single best habit you can build is to work non-destructively. Always, always do your edits on a new layer above the original image. This way, you never permanently damage the source photo and can easily erase or adjust your changes without starting over.

    Is It Possible to Remove Text from a Low-Resolution Image?

    Technically, yes, but it's a real challenge. A low-resolution image just doesn't have enough pixel information for the software to analyze and rebuild the background convincingly. When there's not much data to work with, you often end up with blurry, artificial-looking spots where the text used to be.

    AI-powered features like Content-Aware Fill can sometimes pull off a minor miracle on lower-quality files, but don't expect perfection. The quality of your starting image will always be the biggest factor in how good the final result looks. For the cleanest edit, you absolutely need to start with the highest-resolution photo you can find.


    Tired of spending hours on manual edits? PixelPanda offers a powerful API that automates text removal, watermark cleanup, and background editing at scale. Get professional-grade results in seconds, not hours. Explore our demos or start your free trial today.

  • How to Remove Objects From Photos for a Perfect Shot

    How to Remove Objects From Photos for a Perfect Shot

    We've all been there. You capture a fantastic photo—the lighting is perfect, the composition is spot on—but a stray tourist or a misplaced coffee cup ruins the whole shot. It's frustrating. But the good news is you don't have to settle for "almost perfect." Learning how to remove objects from photos has become a surprisingly accessible skill, with tools available for everyone from a casual smartphone user to a seasoned professional.

    Your Guide to Flawless Photo Edits

    A man editing a landscape photo on a laptop with a camera and plants on a wooden desk.

    The drive to create a clean, distraction-free image is nothing new. Long before digital editing, photographers were already masters of manipulation. As far back as the 1840s, they would painstakingly scrape away at negatives with fine needles or apply opaque paints to hide unwanted details.

    By the turn of the century, it was common practice for darkroom pros to retouch 60–70% of professional portraits, meticulously blending away skin blemishes and cleaning up cluttered backgrounds. It was a craft that demanded incredible patience and skill, laying the foundation for the digital techniques we rely on today. If you're curious, you can dive deeper into the fascinating history of photo retouching on fixthephoto.com.

    Thankfully, technology has made this entire process faster and more powerful. Instead of hours of manual labor in a darkroom, you can get incredible results in just a few minutes, sometimes even seconds. This guide will walk you through the different ways to tackle object removal so you can pick the best method for any situation.

    Photo Object Removal Methods at a Glance

    Choosing the right tool is the first and most important step. Your choice will depend on what you're trying to remove, how much detail is in the background, and frankly, how much time you want to spend. This table breaks down the main options to help you decide.

    Method Type Best For Skill Level Speed and Effort
    Mobile & Web Apps Quick fixes, simple backgrounds, social media posts. Beginner Fast and easy, often just a single click or swipe.
    Desktop Software (Manual) Complex objects, detailed textures, professional work requiring precision. Intermediate to Advanced Slower and more involved, requires patience and skill.
    AI Inpainting Tools Difficult removals (hair, complex patterns), batch processing, saving time. Beginner to Advanced Very fast for complex tasks, with high-quality results.

    Ultimately, the best approach is often the one that fits your workflow. For complex jobs, I often use a combination—letting a powerful AI tool do the heavy lifting and then jumping into Photoshop or GIMP to polish the finer details for a truly seamless finish.

    The best method is the one that fits your workflow. For many, a hybrid approach works wonders: use a powerful AI tool for the heavy lifting and then fine-tune the small details manually for a truly professional finish.

    Throughout this guide, we'll get into the nitty-gritty of each method. You'll learn not just the how but, more importantly, the why—so you’ll know exactly when to reach for a simple healing brush versus a sophisticated AI algorithm. By the end, you’ll have the confidence to tackle any unwanted object and make your photos look exactly how you imagined them.

    Quick Fixes: Using Mobile and Web Apps

    Let's be honest, you don't always need to fire up a heavyweight desktop program for every little photo fix. Sometimes you just need to zap a photobomber out of a great vacation shot or erase a distracting power line from an otherwise perfect city scene. That's where mobile and web apps truly shine. They're built for speed and simplicity, letting you get surprisingly good results right from your phone.

    Many of the photo editors you might already have, like Snapseed or YouCam Perfect, come with powerful one-tap removal features. There are also specialized apps, like the fantastic TouchRetouch, that make object removal feel like pure magic. They use clever algorithms to look at what's around the object you want to remove and then intelligently fill in the blank space.

    Your First Object Removal with an App

    The best part is that you don't need to be a photo editing pro to get a clean result. The process is pretty much the same no matter which app you choose.

    Instead of a rigid step-by-step, think of it as a simple flow:

    • Load your photo: First, just pull the image you want to work on from your camera roll into the app.
    • Find the right tool: Look for a feature called "Heal," "Object Removal," or even "Magic Eraser." The icon is often a little bandage or a magic wand.
    • Paint it out: Use your finger to brush over the object you want to get rid of. Most apps let you pinch and zoom, which is a huge help for getting those smaller, tricky details.
    • Let the app do its thing: As soon as you lift your finger, the app's AI gets to work, replacing your selection with a brand-new background.
    • Touch-ups: Sometimes a little smudge or artifact gets left behind. No big deal. You can usually go back over the area with a smaller brush to clean it up until it looks perfect.

    This whole process is ideal for handling those common distractions. Picture this: you took a gorgeous beach photo, but a stranger's bright pink umbrella is totally killing the peaceful vibe. With an app, you'd just open the image, tap the "Healing" tool, and swipe over the umbrella. Seconds later, it's gone—replaced by sand and waves.

    The beauty of these mobile tools is their accessibility. Anyone can learn how to remove objects from photos without getting bogged down by a steep learning curve.

    Knowing When an App Isn't Enough

    As great as these quick-fix tools are, they do have their limits. It's important to know what they can and can't do well.

    They work best when the unwanted object is small and sits against a fairly simple background—think clear skies, a big patch of grass, or a sandy beach. In these cases, the app has plenty of simple texture to copy from, making the final result look natural.

    But they can definitely stumble when things get more complicated.

    • Complex Textures: Trying to remove something from a busy pattern, like a brick wall or a detailed carpet, can leave behind a tell-tale blurry patch.
    • Large Objects: If an object takes up a huge chunk of the photo, the app simply doesn't have enough background information to create a believable fill.
    • Tricky Edges: Things with fine details like hair, tree branches, or wire fences are notoriously difficult for simple removal tools to handle without looking messy.

    For those situations where you're trying to separate a subject with complex edges like hair or fur from its background, a more specialized tool is a game-changer. You can see how advanced AI handles these exact challenges by checking out this background removal demo to really appreciate the difference.

    When a quick mobile fix just isn't cutting it, that’s your sign to graduate to more powerful desktop software or dedicated AI tools, which we’ll jump into next.

    Mastering Manual Removal in Photoshop

    When you need absolute, pixel-perfect control over an edit, nothing beats the power of professional desktop software. Mobile apps are great for a quick fix on the go, but programs like Adobe Photoshop are the industry standard for a reason—they give you the tools to tackle complex object removals with incredible precision.

    This kind of control has a long history. The whole concept of digital object removal grew out of early tech breakthroughs, like the first digital image scanner back in 1957. But it wasn't until Photoshop 1.0 launched in 1990 that these powers became widely available. It quickly became the go-to for pros, and by the year 2000, an estimated 70–80% of professional photographers in Western markets were using it for this very task. You can see the whole story unfold in this timeline of photography technology on Wikipedia.

    Today, mastering Photoshop's manual tools isn't just about knowing what each one does, but having the experience to know when and why to use it.

    Your Core Object Removal Toolkit

    Don't get overwhelmed by all the menus and options. For most object removal jobs, you really only need to get comfortable with three core tools. Each has its own specialty, and learning to combine them is where the real magic happens.

    • The Clone Stamp Tool: This is your direct copy-and-paste tool. It duplicates pixels from a source area you choose and stamps them directly onto your target area. It’s perfect for extending patterns with hard edges, like brick walls, wood grain, or architectural lines where you need the pattern to continue perfectly.

    • The Healing Brush Tool: Think of this as the Clone Stamp's much smarter cousin. It also samples pixels from a source, but as you paint, it intelligently blends the texture, lighting, and shading of the source pixels with the color and tone of the destination. This makes it ideal for organic surfaces like skin, grass, or skies, where a seamless blend is far more important than a perfect pixel copy.

    • Content-Aware Fill: This is Photoshop’s most powerful automated feature for manual work. You just draw a selection around the object, and Photoshop analyzes the surrounding area to invent a brand new, seamless fill from scratch. It’s a lifesaver for removing large objects from complex, non-repeating backgrounds—think a person in a busy field or a boat on choppy water.

    I see a lot of beginners make the mistake of relying on just one tool. The best results almost always come from a hybrid approach. For instance, I'll often use Content-Aware Fill for the initial heavy lifting, then grab the Healing Brush to smooth out any mismatched textures, and finish up with the Clone Stamp to rebuild any sharp lines the other tools might have softened.

    This basic workflow—selecting, removing, and saving—is the foundation of good editing, whether you're on a desktop or a phone.

    A visual guide showing steps to select, remove objects with a magic wand, and save a photo.

    The key is to have a structured process. It just makes editing faster and more efficient.

    A Practical Workflow for Tough Removals

    Let's walk through a common, challenging scenario: removing a person standing in front of a building that has both brick and glass textures.

    First, a pro tip: always work non-destructively. Create a new, blank layer on top of your photo. This keeps your original image safe and untouched while you work on the new layer.

    Start with a loose selection around the person using the Lasso Tool. Don't worry about being too precise; give it a little breathing room. Now, head to Edit > Content-Aware Fill. Photoshop will show you a preview of its work. If it looks good, hit apply. This single step will probably handle 80% of the job for you.

    Now comes the cleanup. You’ll probably see some soft or smudged areas where the brick meets the glass. This is where the Clone Stamp shines. On your new layer, select the Clone Stamp tool and make sure the "Sample" option in the top bar is set to "Current & Below." Now you can carefully rebuild the hard edges of the window frames and brick lines by sampling (Alt-clicking) from nearby clean areas.

    The detailed interface in Photoshop is what gives you this granular control over every part of the removal.

    Finally, switch to the Healing Brush to blend any last imperfections in the larger textures. Sample from a clean patch of brick to paint over any blurry spots, and then do the same for the glass. By bouncing between the right tools for the right texture, you end up with a final result that’s clean, sharp, and completely believable.

    Using AI for Effortless Object Removal

    If you've ever spent an hour meticulously cloning out a background object pixel by pixel, you'll know why AI has completely shaken up the world of photo editing. While manual tools give you the final say, they can be slow. Modern AI tools are a different beast altogether.

    https://www.youtube.com/embed/FSy_4xEHXTM

    This technology, often called inpainting, doesn't just copy and paste pixels from one area to another. It actually analyzes the entire context of your photo—the lighting, the textures, the perspective—to intelligently reconstruct what's behind the object you're removing.

    The results can be stunning. An edit that would have taken a professional a good chunk of their afternoon can now be done in seconds. This isn't just a party trick; it's a powerful and incredibly efficient way to clean up your photos. Tools like Adobe Photoshop's Generative Fill and dedicated apps like TouchRetouch have made this magic accessible to everyone, turning a once-tedious job into a simple click or two.

    The Power of Generative AI in Photo Editing

    So, how does it really work? The core idea is simple but incredibly clever. When you tell the AI what to remove, it doesn't just look at the pixels right next to your selection. It studies the whole scene to figure out what should have been there.

    Think about removing a car parked on a cobblestone street. A basic clone tool would likely leave you with repetitive, blotchy patterns that scream "edited!" An AI, on the other hand, understands the concept of a "cobblestone street." It generates entirely new, unique cobblestones that perfectly match the lighting, angle, and texture of the real ones, creating a far more believable scene.

    This contextual awareness is what makes AI such a game-changer:

    • Speed: Seriously, complex removals that used to be a major time-sink are often done in less than a minute.
    • Quality: For busy, organic backgrounds like forests, crowds, or water, AI often produces a cleaner, more natural result than you could achieve by hand.
    • Accessibility: You no longer need to be a Photoshop wizard to tackle tough edits. A simple selection is often all it takes.

    The real magic of AI inpainting shines when you're dealing with visual chaos. For any background that's too complex or unpredictable for manual cloning, AI can generate a plausible fill that looks completely natural, saving you from a tedious and often frustrating editing session.

    For a fantastic live demonstration of how AI can intelligently remove distracting elements like text from a complex background, check out this interactive text removal demo and see it in action.

    Manual vs AI Object Removal

    Deciding between a manual tool and an AI-powered one really comes down to the job at hand. Neither approach is a silver bullet; they just excel at different things. Knowing when to use which will make your workflow faster and your results better.

    Here’s a direct comparison to help you choose the right tool.

    Feature Manual Tools (Photoshop) AI Tools (Generative Fill, APIs)
    Precision Gives you pixel-perfect control over every detail, edge, and texture. Can sometimes soften details or misinterpret very complex scenes.
    Speed Can be slow and methodical, especially for large or intricate objects. Incredibly fast, delivering results for complex edits in seconds.
    Best Use Case Perfect for replicating hard lines, geometric patterns, and fine-tuning small details. Ideal for removing objects from organic, irregular, or busy backgrounds.
    Consistency The final result is entirely dependent on your skill and patience. Provides consistently good results with very little user input required.
    Learning Curve Steeper. Mastering tools like the Clone Stamp takes real practice. Almost none. It often just requires a simple selection or brush stroke.

    In my own work, I’ve found that the best approach is often a hybrid one. I'll frequently use Generative Fill to get rid of a large, distracting element in a landscape photo, which gets me 90% of the way there in an instant. Then, I'll jump over to the Clone Stamp or Healing Brush on a separate layer to clean up any tiny artifacts the AI might have left behind. It’s the best of both worlds.

    Automating Object Removal at Scale with an API

    For anyone managing a large volume of images—think developers, marketers, or e-commerce businesses—the true potential of AI lies in automation. Imagine needing to remove watermarks from thousands of user photos or clean up an entire catalog of product shots. Doing that one by one is a non-starter.

    This is where an Application Programming Interface (API) changes the game. An API lets your own software or website "talk" directly to an AI image service like PixelPanda, automating the entire object removal process. Instead of you opening an editor, your system sends an image to the API and gets a cleaned-up version back moments later.

    This is a massive time-saver for:

    • E-commerce platforms that need to automatically remove props from seller-uploaded product photos.
    • Social media apps that want to clean up user-generated content to maintain a consistent brand look.
    • Real estate sites that have to erase clutter from thousands of property photos in bulk.

    Using an API is more straightforward than it sounds. Here’s a quick conceptual example of what the code might look like using a cURL command to talk to an object removal API.

    curl -X POST
    -H "Authorization: Bearer YOUR_API_KEY"
    -F "image_file=@/path/to/your/image.jpg"
    -F "object_mask=@/path/to/your/mask.png"
    https://api.pixelpanda.ai/v1/inpaint

    In this snippet, you're sending three things: your unique API key, the image you want to edit, and a "mask" file—which is just a simple black-and-white image that tells the AI exactly what to remove. The API does all the heavy lifting on its servers and sends you back a link to the finished, clean image. This level of automation can save hundreds of hours of manual work and ensure visual consistency across a huge library of images.

    Pro Tips for Tackling Complex Edits

    A creative workspace with a camera, laptop, magnifying glass, and plants, featuring 'PRO EDITING TIPS' text.

    Sure, anyone can get rid of a stray pole on a simple, flat background. But the real test of skill comes when you’re faced with the tricky stuff—the edits that make most people throw in the towel. We’re talking about fine hair, complex textures, and tricky lighting that can instantly betray a sloppy removal job.

    This is where you graduate from simply using a tool to thinking like a professional retoucher. It takes a bit more patience and a keen eye, for sure, but mastering these challenges is what separates a decent edit from a truly invisible one. The goal is to make it look like the object was never there to begin with.

    Working with Hair and Fine Details

    Removing something tangled up in hair, delicate tree branches, or a chain-link fence is probably one of the biggest headaches in photo editing. A clumsy approach with a standard healing brush just creates a blurry, smudged mess that screams "fake."

    The secret here is all about precision and layering. Don't try to remove the object in one huge swipe. Instead, work in small, careful sections. I've found the best approach is often a combination of the Clone Stamp tool on a low opacity and a very small, soft brush. This lets you slowly rebuild the background through the strands of hair instead of just painting over them.

    Another great technique is to lean on layer masks. You can often get a much cleaner result by cloning a larger piece of the background onto a new layer, then using a mask to meticulously paint it back in around those tricky fine edges.

    Reconstructing Shadows and Reflections

    A massive giveaway of a poor edit is messed-up lighting. When you remove an object, you have to remember to remove its shadow and any reflections it casts. Forgetting this step leaves a ghostly artifact that our eyes are hardwired to notice immediately.

    But it’s not just about removing—it’s about reconstructing. You have to stop and think about how the light in the scene would actually behave if that object were gone.

    • Shadows: Once the object is gone, look at the other shadows in the photo. Which way are they falling? How soft or hard are their edges? You might need to use a soft, black brush on a new layer with a low opacity to gently paint in a new, subtle shadow where the background is now exposed.

    • Reflections: Erasing something from a reflective surface like water, glass, or polished metal is even more challenging. You have to rebuild what would have been reflected in its place. This is where you’ll rely heavily on the Clone Stamp tool to sample from other parts of the reflection and blend them in seamlessly.

    The ultimate goal is to maintain the lighting's consistency across the entire image. If you remove a person standing on a sunny sidewalk, the patch of ground you create to replace them must be just as bright as the surrounding pavement. Any mismatch in brightness or color will instantly break the illusion.

    Your Final Quality Control Checklist

    Before you hit "save," the final step is always a thorough quality check. It's incredibly easy to become blind to small imperfections after staring at the same image for a while. My advice? Step away for a few minutes, then come back with fresh eyes to scrutinize your work.

    Zoom in to 100% or even 200% and slowly pan across the edited area. This is where you'll spot the little mistakes you missed at a normal view.

    Here's a quick checklist to run through:

    • Check for Repetitive Patterns: The Clone Stamp tool can sometimes create an obvious repeating texture—a classic rookie mistake. Go back in with a Healing Brush to break up the pattern and make it look more organic.
    • Look for Blurry or Smudged Edges: Are the edges of your filled-in area as sharp as the rest of the photo? Soft, blurry patches are a dead giveaway.
    • Inspect the Lighting and Color: Does the color temperature of the new patch match its surroundings perfectly? Is the brightness and contrast consistent?
    • Scan for "Halos" or Dark Outlines: Some removal tools can leave a faint outline or "halo" around the edited area. These need to be carefully blended away.

    Maintaining image quality is everything. If your edits leave you with a low-resolution or pixelated final image, it defeats the whole purpose. When heavy editing degrades the original quality, you can often restore sharpness and detail. You can learn more by exploring an AI-powered image upscaling demo to see how it's possible to bring clarity back to your photos.

    Common Questions About Removing Objects From Photos

    As you start digging into photo editing, you'll inevitably run into a few common questions and roadblocks. Getting ahead of these can save you a ton of frustration and help you get much better, much faster. Let's tackle some of the things people ask most often.

    What's the Best Free Tool to Remove an Object From a Photo?

    If you're on a desktop and need some serious editing power without paying a dime, GIMP is the undisputed king. It’s a full-blown photo editor with tools like the Clone Stamp and Heal Selection that go toe-to-toe with what Photoshop offers. It's fantastic for detailed, hands-on work.

    For quick edits on your phone, you can't go wrong with Google's Snapseed. The "Healing" brush is incredibly easy to use and surprisingly effective for getting rid of small distractions, photobombers, or random objects in your shot. It's my go-to for on-the-fly fixes.

    Why Does My Edited Area Look Blurry or Smudged?

    Ah, the classic tell-tale sign of a beginner's edit. This almost always comes down to one of two things. First, you might be using a brush that’s way too soft. This causes the edges to feather out, leaving behind a soft, unnatural-looking patch that just screams "I was edited!"

    The other common culprit is sampling from the wrong place. The tool might be grabbing pixels from a smooth, textureless area (like a clear sky) to fill a spot that needs more detail (like blades of grass or gravel). That texture mismatch is what creates the smudge.

    A quick tip to fix this: always match your textures. Use a harder-edged brush when you’re working near sharp lines. Most importantly, make sure you're cloning or healing from an area with nearly identical texture and lighting. The Clone Stamp tool gives you the most control here.

    Can AI Completely Replace Manual Editing?

    AI tools have gotten ridiculously good. They can handle complex removals in seconds—jobs that used to take me hours of painstaking manual work. For a lot of scenarios, especially with busy backgrounds like forests or crowds, AI often delivers a better result, and it does it way faster.

    But manual editing isn't going anywhere. It still offers the ultimate degree of control. There are plenty of times when an AI gets the interpretation just slightly wrong, and you need to jump in with a manual tool to rebuild a sharp edge, correct a weird artifact, or just nudge a detail into place.

    The best workflow I've found is a hybrid one. Let the AI do the heavy lifting for 90% of the job, then switch over to your trusted manual tools to polish that last 10% to perfection.


    Ready to see what AI can do for your own projects? With PixelPanda, you can automate object removal and background cleanup with a simple API. You can start building with our free trial today and see just how easy it is to get studio-quality results.

  • 12 Best AI Background Remover Tools (2025 Developer Guide)

    12 Best AI Background Remover Tools (2025 Developer Guide)

    In today's visually driven market, clean, professional product photos and marketing assets are non-negotiable. Manually cutting out backgrounds is a bottleneck; it’s slow, expensive, and simply doesn't scale for modern workflows. This is precisely the problem AI-powered background removers were built to solve, revolutionizing visual production for ecommerce brands, development teams, and creative agencies.

    However, the market is crowded, and not all tools deliver the same quality or functionality. Choosing the best AI background remover depends entirely on your specific needs. Some platforms offer powerful APIs designed for high-volume, automated processing in applications, making them ideal for developers. Others excel at handling notoriously difficult details like hair, fur, and transparent objects, which is critical for product photography. Many are bundled into larger creative suites, offering a one-stop-shop for marketing and social media teams.

    This comprehensive guide cuts through the noise to help you find the perfect fit. We will analyze 12 of the top solutions, evaluating their core strengths, honest limitations, and practical applications. Each review includes direct links and visual examples to illustrate performance. We will compare key features like:

    • API availability and developer support
    • Batch processing capabilities
    • Accuracy with complex edges (hair, fur, etc.)
    • Pricing models and cost-per-image

    Whether you need a simple tool for a few images or a robust, scalable solution to integrate into your platform, this list provides the detailed insights required to make an informed decision. Let’s dive into the platforms that can streamline your workflow and elevate your final images.

    1. PixelPanda

    PixelPanda stands out as a powerful, developer-centric solution that excels far beyond simple background removal. It functions as a comprehensive AI-powered image processing suite, offering an API designed for scalability and seamless integration. This makes it a top-tier choice for teams needing to automate high-volume visual production without sacrificing the nuanced quality demanded by professional use cases, positioning it as one of the best AI background remover platforms available.

    A demonstration of PixelPanda's AI background removal on a car, showing a clean cutout with precise edges.

    The platform is engineered to handle complex subjects with exceptional precision. Its AI models are specifically trained for studio-quality edge detection, preserving fine details like hair, fur, and delicate transparencies that often challenge other tools. This focus on detail ensures that product photos, portraits, and marketing assets maintain a professional, clean look ready for any application. Teams can test these capabilities directly using the platform's hands-on demo; you can explore the background removal tool on pixelpanda.ai to see the results firsthand.

    Key Features & Advantages

    • Comprehensive Toolset: PixelPanda is not a one-trick pony. It bundles background removal with 4x upscaling, watermark removal, face enhancement, and smart inpainting, all accessible via a single, unified API.
    • Developer-First Design: The platform prioritizes ease of integration with a simple REST API, official SDKs, and clear documentation. This allows development teams to quickly embed its capabilities into web, mobile, or backend workflows.
    • Built for High-Volume Workflows: With robust batch processing capabilities and support for transparent PNG exports, PixelPanda is optimized for ecommerce product catalogs and large-scale marketing campaigns.
    • Low-Risk Evaluation: A generous free trial is available without requiring a credit card, allowing teams to fully evaluate the API's performance and integration fit before making a commitment.

    Potential Considerations

    The primary drawback is the lack of public, detailed pricing tiers on the website. To understand the cost for high-volume usage, teams will likely need to sign up for the trial or contact the sales department. Additionally, while the AI is highly advanced, very complex or brand-specific imagery may still benefit from a final manual review to ensure perfect alignment with creative standards.

    2. remove.bg (Kaleido/Canva)

    A veteran in the AI background removal space, remove.bg remains a top contender due to its mature platform and consistent, high-quality results. Acquired by Canva, it focuses purely on background removal and does it exceptionally well, making it one of the best AI background remover tools for users who need reliability and predictability, especially for product photos and portraits. The platform is built for both individual use and high-volume, automated workflows.

    A screenshot of the remove.bg pricing page showing various credit-based subscription plans and pay-as-you-go options.

    Its core strength lies in its robust API and extensive integrations, which allow developers and businesses to seamlessly incorporate background removal into their existing applications. The service offers dedicated desktop apps for Windows, Mac, and Linux, plus a Photoshop plugin, facilitating efficient batch processing for designers and e-commerce teams.

    Standout Features & Use Cases

    The platform’s edge detection is particularly refined for clearly defined subjects like products, logos, and people, delivering clean cutouts with minimal manual intervention. The credit-based system allows users to pay for high-resolution downloads as needed, offering a free preview for every upload.

    • Best For: E-commerce sellers, developers needing a stable API, and marketing teams requiring bulk processing.
    • Pricing Model: Offers a free plan with one free credit and 50 free API previews per month. Paid plans are credit-based, available via subscription or pay-as-you-go bundles.
    • Not Ideal For: Users needing advanced creative editing tools beyond simple background replacement. The credit model can also become expensive for extremely high-volume, cost-sensitive projects.
    • Website: https://www.remove.bg

    3. Adobe Express Background Remover

    Positioned within a comprehensive creative suite, Adobe Express offers more than just a standalone tool; it integrates one of the best AI background remover functions directly into a full-fledged design platform. This browser-based editor is ideal for users who need to remove a background and immediately use the resulting image in a larger project, like a social media post, marketing banner, or product mockup. It leverages Adobe's trusted imaging technology, making it a reliable choice for creators already familiar with the Adobe ecosystem.

    A screenshot of the Adobe Express pricing page, displaying the Free and Premium plan options and the features included in each.

    The primary advantage of Adobe Express is its context. Instead of downloading a transparent PNG and re-uploading it elsewhere, users can transition seamlessly from background removal to applying templates, adding text, accessing Adobe Stock assets, or using brand kits. This unified workflow, available on both desktop and mobile, significantly accelerates content creation for marketing teams and solopreneurs.

    Standout Features & Use Cases

    The platform excels at providing an all-in-one solution. After removing the background, users can instantly resize assets for different social platforms, apply filters, and even schedule posts directly from the app. The AI-powered background remover is highly effective for common subjects, producing clean edges that integrate well into new designs without obvious artifacts.

    • Best For: Social media managers, content creators, and small businesses needing a complete design and publishing tool.
    • Pricing Model: Offers a free plan with core features and limited assets. The Premium plan unlocks all features, premium templates, Adobe Stock photos, and provides a monthly allowance of Generative Credits for AI actions.
    • Not Ideal For: Users who only need a simple, high-volume background removal API or those who prefer not to work within a subscription-based design suite.
    • Website: https://www.adobe.com/express/pricing

    4. Canva Background Remover (within Canva Pro)

    Integrated directly into the world’s most popular design platform, Canva’s Background Remover is a powerful feature for users who need to create polished visuals quickly. Rather than a standalone tool, it’s an essential part of the Canva Pro subscription, designed to streamline the entire content creation workflow from start to finish. This makes it one of the best AI background remover options for marketers, social media managers, and small business owners already using Canva for their design needs.

    A screenshot showing the Canva editor interface with the "Background Remover" button highlighted, demonstrating its one-click functionality on a product image.

    Its primary advantage is convenience. With a single click, users can remove the background from an image and immediately use the cutout in a social media post, presentation, or advertisement using Canva’s vast library of templates and assets. While it lacks the dedicated API or advanced fine-tuning of specialized services, its seamless integration makes it unbeatable for rapid, end-to-end design tasks.

    Standout Features & Use Cases

    The tool excels at handling simple to moderately complex images, like product shots and portraits for social media graphics. The value extends beyond just removal; users gain access to the entire Canva Pro suite, including the Brand Kit, Magic Resize, and an extensive stock media library, creating a comprehensive content creation hub.

    • Best For: Social media managers, marketers, and small business owners who need an all-in-one design and background removal solution.
    • Pricing Model: Included as a feature within Canva Pro and Canva for Teams subscriptions. There is no standalone or pay-as-you-go option for just the background remover.
    • Not Ideal For: Developers needing an API, users requiring high-volume batch processing, or designers who need precise control over complex edges like fine hair. As noted in some user reviews, the pricing changes for team plans have also been a point of contention.
    • Website: https://www.canva.com/pro/background-remover/

    5. PhotoRoom

    PhotoRoom has carved out a niche as an all-in-one AI photo studio designed specifically for e-commerce. It moves beyond simple background removal, offering a comprehensive suite of tools to create professional, marketplace-ready product images. Available on web, iOS, and Android, and supported by a robust API, PhotoRoom is built to scale, serving everyone from individual sellers to large enterprises needing automated image processing.

    PhotoRoom

    Its core advantage is the seamless integration of its excellent background remover with product-centric features. Users can instantly place items into AI-generated scenes, add realistic shadows, retouch imperfections, and export images that meet the specifications for platforms like Amazon, eBay, and Shopify. The batch mode further enhances its utility, allowing users to process up to 250 images at once on higher-tier plans.

    Standout Features & Use Cases

    PhotoRoom excels at creating clean, consistent product shots with minimal effort. The AI background generation and instant shadow features are particularly powerful for staging products without a physical studio. Its API offers a generous free sandbox with 1,000 test images, making it an attractive option for developers building e-commerce solutions. This focus makes it one of the best AI background remover tools for anyone selling products online.

    • Best For: E-commerce sellers, online marketplace vendors, and developers creating product photography workflows.
    • Pricing Model: A free plan is available with watermarked exports. The Pro plan unlocks batch mode and higher-quality exports, while the Business plan offers API access and team collaboration features.
    • Not Ideal For: Users needing a simple, one-off background removal without additional editing features. The "unlimited" exports on paid plans are subject to fair use quotas.
    • Website: https://www.photoroom.com/pricing

    6. Clipdrop (by Stability.ai)

    Backed by Stability.ai, Clipdrop is an ecosystem of AI-powered visual editing tools rather than just a standalone background remover. It positions itself as a versatile creative suite, offering features like image upscaling, object cleanup, relighting, and text removal alongside its core background removal functionality. This makes it a strong candidate for users who need a multi-purpose tool for both product-focused and creative editing tasks, combining several AI capabilities into one streamlined interface.

    A screenshot of the Clipdrop pricing page, showing a free plan and a Pro subscription option with details on credits and features.

    Clipdrop offers one of the best AI background remover APIs for developers seeking a broad range of image manipulation functions beyond simple cutouts. The platform's API is usage-based, providing flexibility for applications with variable demand. This all-in-one approach appeals to creators and businesses looking to consolidate their AI image editing toolkit and avoid subscribing to multiple specialized services. To explore similar developer-focused solutions, you can find more information about AI image processing APIs.

    Standout Features & Use Cases

    The primary advantage of Clipdrop is its comprehensive feature set. Users can remove a background, clean up imperfections with the "Cleanup" tool, and then use "Relight" to adjust the lighting on the subject for a more natural composite. This integrated workflow is ideal for creating polished marketing assets and professional-looking product photos without switching between different applications.

    • Best For: Creative professionals, developers, and marketers needing a suite of AI editing tools, not just background removal.
    • Pricing Model: Includes a free tier with limitations. The Pro plan is a subscription that provides higher resolution, priority processing, and access to all tools with generous usage quotas. API access is billed based on usage.
    • Not Ideal For: Users who require extremely precise cutouts for complex subjects like fine hair, as specialized tools may offer more refined edge detection.
    • Website: https://clipdrop.co/pricing

    7. Pixelcut

    Pixelcut has carved out a niche as an all-in-one AI photo editor tailored for small businesses, creators, and social media managers. While it offers a suite of tools like an AI upscaler and generative backgrounds, its core background removal feature is fast, reliable, and exceptionally user-friendly, particularly on mobile devices. Its strong iOS and Android apps make it a go-to for on-the-fly editing, setting it apart from more desktop-centric or API-focused solutions.

    A screenshot of the Pixelcut pricing page showing a free plan, a Pro plan, and a Business plan with features and monthly/yearly costs.

    The platform is designed for practical, everyday business use. Features like the Magic Eraser, team-based plans with included seats, and a commercial license in paid tiers directly address the needs of e-commerce sellers and marketing teams. Pixelcut also provides a developer API, allowing its powerful editing tools to be integrated into other applications, though its primary strength remains its cohesive, creator-focused platform.

    Standout Features & Use Cases

    Pixelcut excels by combining a powerful AI background remover with other essential creative tools in a single, accessible package. The generative background feature is particularly useful for creating unique product mockups and social media posts without needing complex software. This combination makes it a highly efficient tool for users who need more than just a cutout.

    • Best For: Small e-commerce businesses, social media managers, and content creators who primarily work on mobile devices.
    • Pricing Model: Offers a free plan with limited access. The Pro plan provides unlimited background removals and a monthly credit allowance for AI tools. A developer API is also available with per-endpoint pricing.
    • Not Ideal For: Users needing advanced API features or those on a tight budget for generative tools, as API credits do not roll over.
    • Website: https://www.pixelcut.ai/pricing

    8. Pixlr

    Pixlr positions itself as a powerful, browser-based suite of image editing tools, with its AI background remover being a core feature. It mimics the familiar layout of traditional photo editors like Photoshop but eliminates the need for software installation, making it highly accessible. This platform is more than just a single-task tool; it's a full-fledged editor where background removal is one step in a larger creative workflow. The integration of templates, stock assets, and AI-powered features makes it a one-stop-shop for quick yet comprehensive edits.

    Its main advantage is offering a familiar, layer-based editing environment directly in the browser. Users can remove a background and immediately start adding new elements, text, or filters without switching applications. Batch background removal is also available within the toolset, streamlining workflows for users handling multiple images. While the free version is robust, its AI features are metered by credits, which refresh monthly on paid plans.

    Standout Features & Use Cases

    Pixlr excels by combining a solid AI background remover with a complete editing suite, including an AI object eraser and image expander. This makes it an excellent choice for content creators who need to do more than just isolate a subject. The large template library on premium tiers further accelerates the design process for social media posts, ads, and other marketing collateral.

    • Best For: Content creators, social media managers, and small businesses needing an all-in-one online editor.
    • Pricing Model: Offers a free, ad-supported plan with limited features. Premium plans start at a very low monthly price, providing more AI credits, batch processing, and access to a vast asset library.
    • Not Ideal For: Users seeking a dedicated, high-volume API for programmatic background removal or those who dislike credit-based limits on AI features.
    • Website: https://pixlr.com/remove-background/

    9. Fotor

    Fotor positions itself as an all-in-one visual creation platform, bundling its AI background remover with a comprehensive suite of editing and design tools. Unlike single-purpose removers, Fotor is built for users who need to not only remove a background but also immediately use the resulting image in a new design, social media post, or creative project. This integrated approach makes it a strong contender for content creators and marketers who want a streamlined workflow within a single application.

    Fotor pricing plans, including a free tier and Pro/Pro+ subscriptions that offer AI credits, HD downloads, and batch processing.

    Its strength lies in its consumer-friendly interface and a vast library of templates, which allow users to quickly create professional-looking visuals. The platform offers desktop and mobile apps with cloud storage, ensuring projects are synced across devices. While the core removal tool is effective, advanced features like batch processing and high-resolution, transparent exports are reserved for paid subscribers, making the Pro tiers a necessity for serious users.

    Standout Features & Use Cases

    Fotor’s one-click background remover is complemented by manual refine tools for fine-tuning edges on more complex images. The platform also includes an AI upscaler and various background replacement effects, adding significant value beyond simple cutouts. It’s an excellent choice for users who need a versatile tool that handles multiple AI-driven editing tasks, from background removal to image enhancement.

    • Best For: Social media managers, content creators, and small business owners needing a multi-functional design tool.
    • Pricing Model: Offers a free basic plan with limited features. Pro and Pro+ subscriptions unlock batch processing, HD downloads, and a monthly allowance of AI credits for various tools.
    • Not Ideal For: Developers needing API access or users who require unlimited, high-volume background removals without a subscription model.
    • Website: https://www.fotor.com/pricing/

    10. Icons8 Background Remover

    Part of the larger Icons8 ecosystem of design assets, the Icons8 Background Remover offers a straightforward and powerful tool with one of the most flexible pricing structures available. It provides fast, clean cutouts and is designed for users who need both scalability and simplicity. The platform’s main appeal is its clear, tiered access, which accommodates everyone from one-time users to developers requiring high-volume processing via an API.

    Icons8 Background Remover

    This tool stands out by demystifying pricing. Users can choose prepaid per-image packs, limited monthly plans with rollover credits, or a truly unlimited plan for heavy-duty needs. This makes it an excellent choice for businesses with fluctuating demands or those who want to avoid the complexities of credit-based systems. Its integration with the wider Icons8 suite also provides added value for subscribers who need icons, photos, and illustrations.

    Standout Features & Use Cases

    The core offering is a no-fuss, high-quality background removal service powered by robust AI. Its API is well-documented and easy to integrate, making it a solid choice for automated workflows. The transparent pricing and unlimited option are significant differentiators, providing cost predictability that many competitors lack. This makes it one of the best AI background remover options for budget-conscious teams.

    • Best For: Freelancers, small businesses, and developers looking for flexible, predictable pricing and a reliable API.
    • Pricing Model: Offers a free plan with 3 free images. Paid options include prepaid packs, limited monthly subscriptions with credit rollover, and an unlimited monthly plan.
    • Not Ideal For: Users seeking a comprehensive, all-in-one photo editor with advanced creative features beyond background removal.
    • Website: https://icons8.com/bgremover/pricing

    11. Slazzer

    Slazzer is a dedicated AI background removal service that carves out its niche by offering a wide array of integrations and a pricing model that becomes highly competitive at scale. Positioned as a versatile tool for both individual creators and large enterprises, it provides desktop applications, plugins for popular design software like Photoshop, Figma, and Sketch, and a robust API for automated workflows. Its focus is on delivering clean cutouts efficiently across multiple platforms.

    A screenshot of Slazzer's pricing page, detailing its subscription plans and pay-as-you-go credit packs with per-image cost breakdowns.

    The platform’s strength lies in its ecosystem of tools designed to fit into existing creative and e-commerce processes. Beyond simple background removal, it offers supplementary features like object upscaling, relighting, and shadow generation, adding value for users who need more than just a basic cutout. This combination makes it a strong contender in the best AI background remover market for users seeking an all-in-one solution.

    Standout Features & Use Cases

    Slazzer’s credit system is particularly user-friendly, with a clear policy for rolling over unused credits on subscription plans and simple top-up options. This flexibility appeals to users with fluctuating monthly needs. The batch processing tools available in the desktop apps are a significant time-saver for anyone handling large volumes of images, from product catalogs to event photography.

    • Best For: Designers using Figma/Sketch, e-commerce businesses needing bulk processing, and developers looking for a flexible API.
    • Pricing Model: Includes a free plan with limited previews. Paid options are available as monthly/yearly subscriptions or one-time credit packs. Subscriptions offer the best per-image value and credit rollover.
    • Not Ideal For: Users who find tiered credit systems (previews vs. full-resolution downloads) confusing or who only need occasional, single-image edits.
    • Website: https://www.slazzer.com/pricing

    12. Kapwing

    Kapwing positions itself as a comprehensive online content creation suite rather than just a dedicated background remover. It offers a powerful AI background remover for images, but its main appeal lies in integrating this feature within a broader ecosystem of video and image editing tools. This makes it an excellent choice for social media managers, content creators, and marketing teams who need an all-in-one platform for mixed-media projects without juggling multiple applications.

    A screenshot of the Kapwing pricing page detailing the Free, Pro, and for Teams subscription plans.

    The platform shines with its video editing capabilities, including a green-screen style tool that effectively removes video backgrounds. This versatility, combined with access to stock assets, templates, and collaborative team workspaces, provides a cohesive workflow for producing polished visual content. While some AI tools are metered by a credit system, the core functionality is robust for everyday creative tasks.

    Standout Features & Use Cases

    Kapwing’s strength is its convenience, allowing users to remove a background from an image and immediately use it in a video thumbnail, social media post, or animation, all within the same interface. The collaborative features also enable teams to work on projects simultaneously, streamlining the review and approval process. It's an ideal tool for users who view background removal as just one step in a larger creative process.

    • Best For: Social media teams, content creators, and marketers who need a versatile image and video editor with reliable background removal.
    • Pricing Model: Offers a free plan with watermarks and export limits. The Pro plan provides an all-inclusive solution for solo creators, while custom plans are available for teams.
    • Not Ideal For: Users seeking a dedicated, high-volume API for programmatic background removal or those who only need a simple, single-purpose tool.
    • Website: https://www.kapwing.com/pricing

    Top 12 AI Background Removers — Feature Comparison

    Product Core features Quality (★) Price / Value (💰) Target (👥) Unique (✨)
    PixelPanda 🏆 Dev‑friendly API: bg/text/watermark removal, 4x upscaling, face enhance, smart inpaint, depth‑aware edits, text→image, batch ★★★★★ studio‑quality; hair/fur edge accuracy 💰 Free trial (no CC); contact sales for large volume 👥 Developers, ecommerce & marketing teams ✨ Edge‑preserving models, demos gallery, transparent PNGs
    remove.bg (Kaleido/Canva) One‑click cutouts, bulk apps, Photoshop plugin, API, high‑res downloads ★★★★☆ consistent edge handling 💰 Credit‑based downloads; can be costly at scale 👥 Ecommerce sellers & developers ✨ Mature desktop/plugins + fast cutouts
    Adobe Express Background Remover Background removal inside full design suite with templates, stock & brand tools ★★★★☆ easy for non‑designers 💰 Subscription required for premium assets 👥 Marketers, social teams, non‑designers ✨ Integrated stock, templates & brand kits
    Canva Background Remover (Canva Pro) One‑click remover, transparent PNG export, templates, team sharing ★★★★☆ very easy & fast 💰 Included in Canva Pro/Teams (paid) 👥 Creators, social & marketing teams ✨ End‑to‑end design + team workflow
    PhotoRoom Background remover, batch processing, product staging, API sandbox ★★★★☆ product‑focused precision 💰 Free sandbox; paid tiers for batch/HD 👥 Sellers, product photographers ✨ Marketplace‑ready exports & virtual staging
    Clipdrop (Stability.ai) Bg removal, cleanup, relight, upscale, usage‑based API ★★★☆☆ broad toolset; variable on complex edges 💰 Pro + usage‑based API; quota limits 👥 Creatives & product editors ✨ Relight & multi‑tool creative suite
    Pixelcut Bg removal, Magic Eraser, generative backgrounds, upscaler, API ★★★★☆ strong mobile UX 💰 Clear tiers & team seats; credits per endpoint 👥 Small businesses & creators ✨ Mobile‑first app + commercial licensing
    Pixlr Browser editor with bg removal, object eraser, batch & templates ★★★☆☆ Photoshop‑style UI; low cost 💰 Low entry price; free tier with ads/limits 👥 Quick editors & budget users ✨ Familiar interface without installs
    Fotor One‑click bg remover, batch, upscaler, template‑rich suite ★★★☆☆ user‑friendly workflow 💰 Pro unlocks HD/transparent exports; credits limited 👥 Creators needing multiple AI tools ✨ Generous templates + simple tools
    Icons8 Background Remover Per‑image prepaid, monthly limited/unlimited plans, API ★★★☆☆ fast & simple 💰 Clear prepaid/subscription options; flexible 👥 Devs & teams needing predictable pricing ✨ Flexible pricing (prepaid → unlimited)
    Slazzer Web + desktop apps, plugins (Photoshop/Figma/Sketch), batch, relight ★★★☆☆ competitive per‑image value at scale 💰 Credit subscriptions with rollover; cost‑effective at volume 👥 High‑volume ecommerce teams ✨ Design tool plugins + clear rollover policy
    Kapwing Image bg remover inside online editor; video green‑screen, templates, team workspaces ★★★☆☆ versatile for mixed media 💰 Pro for watermarkless/limits; free has watermarks 👥 Social teams & mixed‑media creators ✨ Combined image + video editing in one tool

    Making Your Final Choice: How to Pick the Right Tool for Your Workflow

    Navigating the crowded market of AI-powered image editing tools can feel overwhelming. We've explored a dozen powerful solutions, from developer-centric APIs to all-in-one creative suites. The journey to finding the best AI background remover for your specific needs concludes not with a single "winner," but with a clear understanding of your own workflow, priorities, and technical requirements. The ideal tool is the one that seamlessly integrates into your existing processes, saves you the most time, and delivers consistently high-quality results for your unique image types.

    Recapping the Core Takeaways

    The key insight from our comprehensive review is that these tools are highly specialized. A one-size-fits-all solution is rare. For instance, developers and engineering teams requiring robust, scalable, and automated image processing will find that API-first platforms like PixelPanda or remove.bg offer unparalleled control and integration capabilities. Their focus on speed, reliability, and advanced features like inpainting makes them a cornerstone for programmatic workflows.

    Conversely, marketing teams, content creators, and social media managers often benefit most from integrated design ecosystems. Tools like Canva Pro and Adobe Express embed their background removers within a larger suite of creative features. Here, the value isn't just the cutout itself, but the ability to immediately use that isolated subject in a new design, social media post, or promotional graphic without ever leaving the platform.

    A Decision-Making Framework for Your Team

    To make a final, confident choice, move beyond feature lists and consider these critical dimensions of your operational needs. Your selection process should be a strategic evaluation, not just a feature comparison.

    1. Define Your Primary Use Case:

    • High-Volume Ecommerce: If you're processing thousands of product photos, prioritize tools with excellent batch processing capabilities, consistent edge detection for common objects, and perhaps template features. PhotoRoom and Pixelcut excel here.
    • Developer Integration: For those building an application or automating a pipeline, the API is paramount. Scrutinize the documentation, SDK availability, webhook support, and pricing per API call. This is where PixelPanda and Slazzer are built to shine.
    • Creative and Marketing Content: If your goal is to create assets for campaigns, social media, or presentations, an all-in-one platform is your best bet. The convenience of removing a background and immediately adding text, graphics, and branding elements within Canva or Adobe Express is a massive workflow accelerator.
    • Precision and Complex Edits: For photographers or designers working with challenging subjects like fine hair, fur, or semi-transparent objects, the absolute quality of the cutout is the top priority. Tools leveraging advanced models, like Clipdrop or dedicated desktop software, often provide more granular control.

    2. Conduct a Practical "Stress Test":
    Every tool on our list offers a free trial or a limited number of free credits. Use this opportunity to conduct a meaningful test. Do not just upload a simple, high-contrast image. Instead, challenge the AI with your most difficult real-world examples:

    • An image with wispy hair against a busy, multi-colored background.
    • A product shot featuring a glass or transparent plastic object.
    • A low-light photo with blurry or poorly defined edges.
    • A complex scene with multiple overlapping subjects.

    Evaluate not only the final cutout quality but also the speed of processing and the ease of making manual refinements if needed. This hands-on testing will reveal more about a tool's capabilities than any marketing copy ever could. The best AI background remover for you is the one that handles your specific edge cases gracefully.

    3. Look Beyond the Cutout:
    The final step is to consider the tool's long-term impact on your efficiency. A slightly less accurate tool that integrates perfectly into your workflow and saves your team hours each week may be more valuable than a pixel-perfect tool that requires manual uploading and downloading for every image. Think about the entire lifecycle of an image in your organization. The right tool optimizes the entire chain, not just a single step.


    Ready to move from evaluation to implementation with a tool built for scale, precision, and developer-first workflows? PixelPanda provides a robust API designed for high-volume background removal, inpainting, and advanced image processing tasks. Explore the PixelPanda API and see how you can automate your creative pipeline with confidence.

  • How to remove background api: Quick Dev Guide

    How to remove background api: Quick Dev Guide

    At its core, a remove background API is a service that uses AI to automatically find and isolate the main subject in a photo, cutting it out and leaving a clean, transparent background. Think of it as outsourcing a tedious Photoshop task to a smart, incredibly fast robot. For anyone working with e-commerce, marketing automation, or user-generated content, this is a game-changer.

    Why Developers Use a Remove Background API

    A man in a black polo shirt holds a laptop in a professional photo studio setup.

    Tapping into a remove background API isn't just about saving a few minutes here and there. It's a strategic decision that directly impacts scalability, consistency, and pure speed. For a developer, this means you can build powerful visual features without ever having to get your hands dirty with the deep, complex world of computer vision.

    Instead of trying to build and maintain your own image processing libraries (a massive undertaking), you just make a simple API call. Seconds later, you get back a professional, studio-quality cutout. This completely frees up your engineering team to focus on what they do best: building the core features of your application.

    The Business Case for Automation

    Let's be honest: manual background removal is a huge bottleneck. A skilled designer might spend 5-10 minutes wrestling with a single complex image in Photoshop. That’s simply not an option for an e-commerce marketplace handling thousands of new product uploads every single day. An API, on the other hand, handles this instantly.

    Here's where it really makes a difference:

    • Slash Time-to-Market: Product photos can go from a photographer's camera to live on your website in minutes, not hours or days.
    • Guarantee Visual Consistency: Every single image is processed with the same high-quality algorithm, creating a polished, uniform look across your entire product catalog or social media feed.
    • Drive Down Operational Costs: The math is simple. Automating this work dramatically cuts the payroll hours required for manual photo editing, which hits the bottom line in a big way.

    The market is clearly moving in this direction. Global demand for these services is skyrocketing, with a projected market size of USD 1.47 billion by 2025. This explosive growth is fueled by businesses that are automating their image workflows to cut manual editing time by up to 45%, particularly in the e-commerce and digital content sectors. You can explore more of these industry trends over at 360iResearch.

    Key Takeaway: An API turns background removal from a manual, unpredictable chore into a scalable, automated component of your software infrastructure.

    A Clear Advantage Over Manual Work

    When you put an API head-to-head with manual editing, the advantages become crystal clear, especially when it comes to handling images at scale.

    To see the difference, let's break it down in a quick comparison.

    API Automation vs Manual Editing at a Glance

    Feature Remove Background API Manual Editing
    Speed Seconds per image 5-15 minutes per image
    Scalability Processes thousands of images concurrently Limited by the number of available editors
    Consistency Uniform results every time Quality can vary between editors and tasks
    Cost Low per-image cost, predictable pricing High hourly or per-image cost
    Availability 24/7, on-demand Limited by human work hours and availability
    Integration Seamlessly fits into existing workflows Requires a separate, disconnected process

    The bottom line is that a human editor's output is finite. An API, however, can process a flood of images simultaneously without breaking a sweat. This makes it an absolutely essential tool for any platform that depends on a high volume of visual content—from social networks moderating user uploads to marketing tools that generate dynamic ad creative on the fly.

    Making Your First API Call

    Laptop displaying code, coffee cup, smartphone, and plant on a desk with 'FIRST API CALL' text.

    Alright, let's get our hands dirty. Theory is great, but the real magic happens when you send that first request and see a perfectly processed image come back. It's surprisingly straightforward. At its core, every call you make will have the same three ingredients: your secret API key, the image you want to work on, and the right API endpoint.

    First things first, that API key is your golden ticket. Treat it like a password. Once you sign up for a service, you’ll usually find it sitting in your account dashboard.

    Crucial Tip: Never, ever hardcode your API key directly into your app. I've seen this mistake sink projects. The best practice is to store it as an environment variable (e.g., API_KEY). This keeps it out of your source code and safe from prying eyes if your code ends up in a public repository.

    Modern AI has made these tools incredibly fast—a good remove background API can chew through over 500 images per hour. This isn't just for big corporations anymore; this kind of speed makes automation a reality for small businesses and solo creators. In fact, North America now accounts for about 40% of the global market for this tech.

    Your First Test: A Simple cURL Request

    Before you even write a line of application code, the easiest way to kick the tires is with a simple cURL command right from your terminal. It’s my go-to method for quickly checking if my API key is working and getting a feel for the request structure without the overhead of a full script.

    You'll typically send a multipart/form-data payload. This just means your request will bundle up the image file along with any other parameters. Authentication is usually handled with a custom header, something like X-API-Key.

    Here’s a practical example using cURL:

    curl -X POST
    -H "X-API-Key: YOUR_API_KEY"
    -F "image_file=@/path/to/your/image.jpg"
    -o "processed-image.png"
    https://api.pixelpanda.ai/v1/remove-background

    This single line tells the API to grab your image, authenticate your key, do its thing, and save the result as processed-image.png on your machine. Pretty cool, right? For a deeper dive, the official PixelPanda developer documentation has language-specific examples and more advanced guides.

    Moving From a Test to Real Code

    Once you've confirmed everything works with cURL, it's time to bring that logic into your actual application.

    Python Example

    If you're a Python dev, you’re probably already familiar with the requests library. It makes sending HTTP requests feel almost trivial. The code is a direct translation of the cURL command, but now you can build logic around the response.

    import requests

    api_key = 'YOUR_API_KEY'
    image_path = '/path/to/your/image.jpg'

    response = requests.post(
    'https://api.pixelpanda.ai/v1/remove-background',
    files={'image_file': open(image_path, 'rb')},
    headers={'X-API-Key': api_key}
    )

    if response.status_code == 200:
    with open('processed-image.png', 'wb') as out:
    out.write(response.content)
    print("Background removed successfully!")
    else:
    print(f"Error: {response.status_code}")
    print(response.text)

    Pro Tip: I can't stress this enough: always check the response.status_code. A 200 OK means you're good to go. Anything in the 4xx or 5xx range means something went wrong, and your code needs to handle it gracefully instead of crashing.

    Node.js Example

    For those in the JavaScript world, Axios is a fantastic, promise-based client. The approach is similar, but you'll need a library like form-data to handle the multipart request properly, as Node.js works with file streams a bit differently.

    Fine-Tuning Your Cutouts for Tricky Images

    A simple API call is often all you need for a clean subject against a solid background. But real-world photos are rarely that simple. What about the fine wisps of hair on a portrait, the fluff of a wool sweater, or the subtle transparency of a wine glass? This is where the real power of a professional remove background API shines through—in the advanced parameters that give you precise control over the final result.

    Just uploading an image and hoping for the best won't cut it when you're aiming for pro-level quality. To get there, you need to use the optional parameters that let you nudge the AI in the right direction. Think of these as the manual controls on a high-end camera; they're what separate a decent snapshot from a breathtaking photograph.

    Getting Hair and Fur Just Right with Alpha Masks

    Let's be honest: hair and fur are the ultimate test for any background removal tool. A less sophisticated algorithm will often just chop these details off, leaving your subject with a harsh, blocky, and unnatural-looking outline. The solution? Requesting an alpha mask.

    An alpha mask isn't the final image itself, but rather a grayscale map of its transparency. Here's how it works:

    • White areas are 100% opaque—this is your main subject.
    • Black areas are 100% transparent—this is the background you're getting rid of.
    • Shades of gray represent semi-transparency, perfectly capturing the subtle gaps between individual strands of hair or fibers.

    Instead of just getting back a finished PNG, you can ask the API to send this mask as a separate file. This opens up a world of possibilities for designers and developers. You can use it in Adobe Photoshop or other editing software to create incredibly realistic composites. Those subtle gray values are the key to preserving every last detail, ensuring your subject blends perfectly into any new background.

    When you start working with alpha masks, you're moving beyond simple cutouts and into professional compositing. It’s the secret sauce for making your subjects look like they were actually in the scene, not just slapped on top of it.

    Dealing with Transparency and Refining Edges

    What about semi-transparent objects? Think of things like glassware, sheer fabrics, or even faint shadows you might want to keep. A basic background removal process can get confused, either making these areas solid or deleting them completely. This is where you need to check the API documentation for parameters that control how these tricky situations are handled.

    Services like PixelPanda give you options to refine the output directly in the API call, which can be a huge time-saver. For example, you can often add a new background color in the same step. Instead of downloading a transparent PNG and then adding a white layer behind it in a separate process, you can just tell the API to place the subject on a specific hex color (like #FFFFFF) and return the finished image.

    Look for other handy settings that can make a big difference:

    • Edge Feathering: Some APIs let you add a slight softening to the cutout's edge, which helps minimize any sharp or pixelated artifacts.
    • Output Format Control: You should be able to explicitly request a transparent PNG-24 to ensure the alpha channel data is preserved correctly.
    • Region of Interest: For busy photos where the AI might struggle to identify the main subject, some services let you provide coordinates to guide it.

    The best way to really grasp what these controls can do is to play around with them. A hands-on background removal demo is perfect for this. You can upload your own challenging images and tweak the settings to see the impact in real-time. Getting that practical feel for the controls is the fastest way to learn how to get the exact result you need for your project.

    Building an Automated Batch Processing Workflow

    The real magic of a remove background API isn't just cleaning up a single photo; it's when you scale that process to handle entire catalogs automatically. Let's be honest, manually uploading thousands of product photos is a nightmare. This is where a smart, automated workflow comes in, turning a mind-numbing task into a "set it and forget it" background process.

    When you're designing a system for batch processing, you have to think about scale right from the start. A simple script that zips through ten images might completely choke when you throw ten thousand at it. The trick is to pick the right approach based on how many images you have and how quickly you need them, finding a balance between speed and reliability.

    Synchronous vs Asynchronous Processing

    For small batches, a straightforward synchronous loop can work just fine. In this setup, your script sends an image to the API, waits for the processed version to come back, saves it, and then grabs the next one. It's simple to write and even simpler to debug because everything happens in a neat, predictable line.

    But when you're dealing with a massive product catalog, that synchronous method becomes a serious bottleneck. An AI model can take a few seconds to process a high-res image, and waiting for each one to finish sequentially is painfully slow. A far better way to handle large volumes is to go asynchronous using webhooks.

    This is the basic idea: you automate the transformation from a raw input into a polished output, and that cycle becomes incredibly powerful when you repeat it thousands of times.

    Process diagram showing an original image input, a fine-tuning step, and a final star result.

    Designing a Scalable Asynchronous Workflow

    With an asynchronous setup, you don't hang around waiting for the API. Instead, you send your image along with a callback URL—your webhook endpoint. Your application can then fire off hundreds of requests one after another without getting bogged down. As soon as the API finishes an image, it sends the result to your URL, which triggers your code to save the file.

    This approach is a total game-changer for a few key reasons:

    • Efficiency: Your server isn’t stuck in a waiting game. It’s free to handle other tasks while the API crunches the pixels.
    • Scalability: You can submit a huge queue of jobs without maxing out your own system's resources.
    • Reliability: By separating the request from the response, the whole system becomes more resilient to network hiccups or temporary API slowdowns.

    Asynchronous workflows are absolutely essential for any serious, large-scale integration. They prevent server timeouts and create a much better user experience because your app isn’t frozen while a long process runs in the background.

    Practical Tips for Batch Processing

    Building a truly reliable batch script is about more than just looping through a folder. You have to anticipate real-world problems, like hitting API limits or dealing with corrupted files.

    A classic mistake is blowing past the API's rate limits. Most services cap how many requests you can send per minute. If you just hammer the server with everything at once, you’ll start getting 429 Too Many Requests errors. The professional way to handle this is with an exponential backoff strategy. If a request gets a 429 error, your code should pause for a second, then try again. If it fails a second time, it should double the wait time, and so on.

    Finally, your script needs rock-solid error handling. What if it finds a corrupted image? A brittle script will just crash, stopping the entire batch. A much smarter approach is to wrap each API call in a try...except block (or your language's equivalent). If something goes wrong, you log the problematic filename and the error, then gracefully move on to the next image. This simple step ensures that one bad apple doesn’t spoil the whole batch.

    Putting the API to Work in Real Scenarios

    Connecting code to a real-world product is where a remove background API really shows its true value. It’s not just about running a script—it's about building features that solve genuine business problems. Let’s walk through a couple of common scenarios to see how this kind of integration becomes a fundamental part of an application's core functionality.

    These examples aren't just hypotheticals; they're the kind of features that are driving massive growth in this space. The market for these tools is on track to hit USD 4.7 billion by 2033, which tells you everything you need to know about their importance in e-commerce, marketing, and beyond. This trend is all about giving developers the power to build seamless, on-the-fly editing tools right into their products. You can read the full research on background removal market trends if you want to dive deeper into the numbers.

    E-commerce Product Catalog Standardization

    Picture this: you're running a marketplace where hundreds of vendors upload product photos every day. The results are a mixed bag. Some images have clean, white backgrounds, but others look like they were taken on a cluttered desk. That kind of inconsistency just looks unprofessional and can kill your conversion rates. The only way to fix this at scale is with an automated workflow.

    Here’s how that process typically looks in the real world:

    1. A vendor uploads a new product image to your storage, maybe an Amazon S3 bucket.
    2. That upload event automatically triggers a serverless function, like an AWS Lambda.
    3. The function grabs the new image and sends it off to the remove background API.
    4. A few seconds later, the API sends back a clean, transparent PNG of just the product.
    5. Your function can then composite this cutout onto a standardized background—say, a clean white or light gray canvas.
    6. Finally, this new, polished image is saved, and the product catalog is updated.

    The whole thing happens in a flash, ensuring every single product on your site looks professional and uniform without anyone lifting a finger. If you want to get even better results, you can chain this process with other API calls, like using a tool for image upscaling to enhance resolution before you even send it for background removal.

    By automating this workflow, you turn a chaotic stream of user-generated content into a professional, visually consistent catalog. It's a huge step up in quality control that directly builds user trust and boosts sales.

    Dynamic Marketing Asset Generator

    Let's switch gears to a social media marketing tool. A great feature would be to let users instantly create branded profile banners. The idea is simple: the user uploads their headshot, and your tool seamlessly places it onto a branded template. Doing this manually for every user would be a non-starter.

    This is where the API becomes the engine for your feature:

    • User Action: A user uploads their profile picture through your web app.
    • API Call: Your frontend sends the image to your backend, which immediately forwards it to the remove background API.
    • Compositing: As soon as the transparent cutout of the headshot comes back, your backend programmatically overlays it onto a pre-designed banner template.
    • Final Output: The finished, perfectly branded banner is sent back to the user, ready for them to download and use.

    This kind of workflow transforms a complicated design task into a simple, two-click process for your users. It adds incredible value and makes for a fantastic user experience.

    Answering Your Top Questions About Background Removal APIs

    Whenever you're plugging a new service into your stack, you're bound to have questions. Getting those answers early can save you a ton of headaches and help you build a more solid application right from the start. Let's tackle some of the most common things developers ask when they start working with a remove background API.

    So, What's This Going to Cost Me?

    Most services these days run on a flexible, pay-as-you-go model. You'll typically buy a pack of credits, and the cost per image drops pretty dramatically as your volume goes up. We're talking anywhere from a few cents per image for smaller batches all the way down to a fraction of a cent if you're processing at an enterprise scale.

    Just about every provider also gives you a free tier with a monthly batch of credits. This is your best friend for development, testing out new ideas, and handling low-volume tasks without having to pull out a credit card.

    My Takeaway: This tiered pricing is great because it makes these powerful APIs accessible to everyone, from a developer working on a weekend project to a massive e-commerce site churning through thousands of product photos every day.

    What Kind of Images Can I Actually Use?

    You can bet on universal support for the big three: JPG, PNG, and WEBP. Where you need to pay attention is resolution. To keep processing snappy, most APIs have a ceiling, which usually hovers around 25 megapixels (think an image that's 6250×4000 pixels).

    I can't stress this enough: always check the official documentation for the API you choose. Sending an image that's too big is one of the most common reasons for a failed request. Also, keep an eye out for how they bill—some services will charge you more credits for those high-res images, which is definitely something to factor into your budget.

    How Should I Handle Errors When the API Acts Up?

    Building solid error handling into your code isn't optional, especially for a production app. You have to assume things will go wrong and be ready to catch common HTTP status codes.

    Here’s a quick cheat sheet based on what I see most often:

    • 403 Forbidden: Nine times out of ten, this means your API key is wrong or has been deactivated. First step is always to double-check your credentials.
    • 400 Bad Request: This usually points to a problem with the image file itself. It might be corrupted, in a format the API doesn't support, or you simply forgot to include it in the request.
    • 429 Too Many Requests: You've hit your rate limit. The standard pro move here is to implement an exponential backoff strategy—basically, just wait a moment before trying again, and increase that wait time if it keeps failing.

    Ready to stop wrestling with manual edits and start automating your image workflows? Try PixelPanda for free and see how our developer-friendly API can deliver studio-quality results in seconds. Get your free API key and start building today.

  • How to Remove Watermarks From Photos The Right Way

    How to Remove Watermarks From Photos The Right Way

    Let's be clear from the start: learning how to get rid of a watermark isn't about stealing images. It's a practical skill for anyone who manages digital assets professionally. When you have the legal right to an image, cleaning it up is often just part of the job.

    Why and When You'd Need to Remove a Watermark

    Think about real-world situations. Maybe you're a marketer who bought a stock photo but only have the watermarked preview to work with for a quick mockup. Or perhaps you're an ecommerce manager, and your supplier's product shots are all stamped with their logo.

    In these cases, removing the watermark is a legitimate step. The end goal is to present a clean, professional image that fits your own brand, not someone else's.

    Legitimate Reasons for Removal

    So, when is it okay to remove a watermark? There are a few common scenarios that fall squarely within ethical and legal boundaries.

    • You own the photo outright. This is the most straightforward case. You might need to remove a pesky date stamp your old camera automatically added or a logo from a mobile app you used for a quick edit. It’s your photo, your rules.
    • You've lost the original file. It happens to the best of us. Your company might have a branded graphic from years ago, but the original, clean version is long gone. All that’s left is a watermarked copy, and you need it for a new project.
    • You’ve licensed the image. When you purchase a license from a stock photo site, you're paying for the right to use the clean, high-res version. If you only have the watermarked "comp" file on hand, removing the mark is simply part of getting your project ready.
    • You have explicit permission. The photographer or creator might have given you direct, written permission to use their work without the watermark for a specific campaign or purpose.

    The demand for clean, professional imagery is massive, which is why the global market for watermark removal software is expected to hit $500 million by 2025. This isn't a niche problem; it's a widespread need in marketing and ecommerce. You can dig into more of the data on this trend in research from Market Report Analytics.

    The rule of thumb is simple: if you have the rights to the image, you have the freedom to edit it. If you don't, you're crossing a line into copyright infringement.

    This guide is for those legitimate situations. We’ll cover everything from the hands-on control of Photoshop’s Clone Stamp tool to the almost-magical speed of modern AI platforms. My goal is to give you the skills to handle these tasks correctly, so you can produce high-quality work while respecting intellectual property. It’s about empowerment, not infringement.

    Getting Your Hands Dirty: Manual Removal in Photoshop and GIMP

    While AI tools are great for speed, there are times when you need surgical precision. That's where manual techniques in programs like Adobe Photoshop or its free cousin, GIMP, really shine. When a watermark is slapped over a complex detail—like a face, an intricate pattern, or a tricky texture—an AI can sometimes leave behind a blurry, slightly "off" artifact. Going manual gives you the control to make the edit truly invisible.

    Think of it less as a rigid, step-by-step process and more like an art. The goal is to understand a few core tools and adapt your approach to the photo in front of you. You're aiming for a seamless repair that perfectly preserves the original lighting and texture.

    First, a quick but important reminder: this kind of work should only be done on images you have the rights to. Whether you've purchased a license, own the photo, or are restoring a file where you've lost the original, always make sure you're on solid ethical ground.

    A flowchart demonstrating the ethical process of removing watermarks by obtaining a purchased license.

    Picking the Right Tool for the Job

    Your first stop in Photoshop will often be the Content-Aware Fill. It’s incredibly smart. You just select the watermark, and the software analyzes the surrounding pixels to generate a patch. This thing works magic on simpler backgrounds—think clear skies, open water, or a plain studio backdrop.

    But when a watermark crosses over multiple textures or sharp architectural lines, you need to roll up your sleeves and grab the classic tools. They give you far more control.

    • The Clone Stamp Tool is your precision instrument. You define a source point and literally "paint" with a copy of that area. It's perfect for rebuilding defined patterns, straight edges, or anything where you need an exact duplicate of another part of the image.
    • The Healing Brush Tool is a bit more sophisticated. It also samples from a source point, but it intelligently blends the texture, lighting, and color of your sample with the area you're painting over. This makes it the go-to for organic surfaces like skin, fabric, or wood grain, giving you a much more natural-looking fix.

    Here's a pro tip that makes all the difference: constantly re-sample your source point. If you keep picking new source pixels close to where you're working, you’ll maintain the subtle shifts in lighting and texture. This is how you avoid those repetitive, blotchy patterns that are a dead giveaway of a clumsy edit.

    How to Make Your Edits Invisible

    Just grabbing the right tool isn’t enough. The settings you use are what separate an amateur edit from a professional one. You've probably seen bad edits before—they often have harsh, obvious brush strokes. A good edit, on the other hand, is built up in subtle layers.

    First, adjust your brush. A soft-edged brush with 0% hardness is almost always the right call. It feathers the edges of your work, creating a smooth, undetectable transition between your fix and the original photo.

    Even more important is to lower your brush's Opacity or Flow down to around 20-30%. This is a game-changer. Instead of trying to cover the watermark in one heavy-handed stroke, you build up the repair with gentle layers. It gives you incredible control over the final blend and feels more like painting than patching.

    Always Work Non-Destructively with Layers

    This is probably the single most important habit you can develop in photo editing: never work directly on your original image. Always, always create a new, blank layer on top of it first.

    From there, when you select the Clone Stamp or Healing Brush, look for the "Sample" option in the top toolbar. Change it to "Current & Below" or "All Layers." This setting tells the tool to borrow pixels from the original image below, but to apply your changes only to the new, empty layer you created.

    This workflow is the foundation of professional editing for two huge reasons:

    1. It’s Forgiving: Make a mistake? No problem. You can just erase that section of your new layer without ever touching the original photo.
    2. It’s Flexible: You can lower the opacity of your entire repair layer to tone it down, or just delete it and start over. Your original image remains completely untouched and safe.

    This layered approach protects your asset and gives you the freedom to experiment until the result is absolutely flawless. By combining the right tool with subtle brushwork and a non-destructive workflow, you can tackle even the most stubborn watermarks and get a clean, professional-looking image every time.

    Using AI Tools for Fast and Automated Removal

    When you're short on time or the manual approach just isn't cutting it, AI-powered tools are a game-changer. Forget painstakingly cloning pixels one by one. These platforms use smart algorithms to analyze and completely rebuild the area under a watermark, often getting the job done in seconds. For anyone handling images in bulk, this is a massive time-saver.

    A silver laptop on a wooden desk displays an 'AI tools' interface with a grid of diverse images.

    The tech behind this magic is called inpainting. The AI model has been trained on millions of images, so it understands textures, patterns, and light. When you mark a watermark for removal, the AI doesn't just guess what’s underneath—it intelligently generates new pixels that perfectly match the surrounding context, making the fix look completely natural.

    This is especially clutch for tricky backgrounds that would give you a headache in Photoshop. Think about taking a logo off a patterned shirt, a brick wall, or a field of grass. The AI recreates these organic textures flawlessly.

    AI Inpainting: The Good and The Bad

    The real strength of AI lies in its ability to understand context. It’s not just a fancy blur tool. An inpainting algorithm knows the difference between sky, skin, and fabric, filling the gap with a texture that actually makes sense. The result is a clean patch that blends right in.

    But the technology is in a constant cat-and-mouse game with more advanced protection methods. The global AI watermarking market was valued at $427.2 million in 2024 and is expected to rocket to $3.07 billion by 2033, according to Grand View Research. This growth is fueled by the need to fight deepfakes and protect intellectual property.

    Innovations like Google's SynthID, which embeds an invisible watermark directly into an image's pixels, are a serious challenge for typical removal software. It means that while today's AI tools are incredibly good, they're always playing catch-up to the next big thing in watermarking.

    Top AI Platforms for Watermark Removal

    A few platforms have really nailed user-friendly watermark removal. The process is usually dead simple: upload your image, paint over the watermark with a brush tool, and let the AI do its thing.

    • Cleanup.pictures My go-to for quick, one-off fixes. Its free tier is generous, and it’s incredibly effective on simple to moderately complex watermarks.
    • Fotor This is more of an all-in-one photo editor that happens to have a very reliable watermark remover. A great choice if you need other editing tools too.
    • PixelPanda For more advanced needs, especially with text-based watermarks or objects, our platform offers a seriously powerful solution. You can even try our text removal demo to see how well it cleans up images by intelligently rebuilding the background.

    The biggest win with a dedicated AI tool is the sheer lack of effort. A task that could take 15 minutes of careful clicking in Photoshop is often done in under 30 seconds. For busy professionals, that’s huge.

    Deciding between a manual editor and an AI tool often comes down to your specific needs. Here's a quick breakdown to help you choose the right path.

    Comparing Manual vs AI Watermark Removal Methods

    Factor Manual Methods (Photoshop, GIMP) AI Tools & APIs
    Speed Slow and methodical; can take several minutes per image. Extremely fast; often just a few seconds per image.
    Skill Level Requires patience and technical skill, especially with complex backgrounds. Beginner-friendly; very little skill needed for great results.
    Precision Offers the highest level of control for pixel-perfect edits. Fully automated; control is limited to selecting the area.
    Batch Processing Impractical for large volumes; each image must be edited individually. Ideal for scale; APIs allow for thousands of images to be processed automatically.
    Consistency Results can vary depending on the editor's skill and effort. Highly consistent results across all images.
    Cost Professional software has subscription fees; GIMP is free but has a steep learning curve. Often subscription-based or pay-per-use, but with free tiers available.

    Ultimately, AI tools excel at speed and convenience, while manual methods still hold the crown for absolute creative control.

    Scaling Up with Watermark Removal APIs

    For businesses and developers, the real magic of AI is unlocked through an Application Programming Interface (API). Instead of processing images one by one on a website, an API lets you plug watermark removal directly into your own apps, websites, or internal workflows.

    Picture this: you're an ecommerce manager getting thousands of product photos from suppliers, and they all have different watermarks. Editing each one manually is out of the question.

    With a watermark removal API, you can build a system that automatically:

    1. Ingests a new product image.
    2. Sends it to the AI service to remove the watermark.
    3. Receives the cleaned-up image.
    4. Pushes the clean version live to your product listings.

    This kind of automated pipeline saves an incredible number of hours and keeps your branding consistent. Developers can integrate this with just a few lines of code, turning a mind-numbing manual task into an efficient, hands-off operation. This is exactly how modern businesses manage visual content at scale.

    Navigating Copyright and Ethical Boundaries

    Before you even think about touching a pixel, we need to talk about the legal and ethical side of things. It’s a big deal. A watermark isn't just some annoying graphic layered on a picture; it’s a digital signature that says, "I made this, and it belongs to me." Removing it without permission isn't just a simple edit—it’s copyright infringement.

    This guide is written for professionals who are working with images they have every right to modify. The techniques we'll cover are for legitimate business needs, not for swiping someone else's hard work.

    When Is It Okay to Remove a Watermark?

    Knowing where the line is drawn protects you, your company, and the creative community. The rules are actually pretty clear, and you're generally safe to remove a watermark in a few specific situations.

    • You Own the Image Outright: If you took the photo or designed the graphic yourself, it’s your property. Go ahead and get rid of that old camera date stamp or the logo your editing app accidentally added.
    • You've Purchased a License: When you buy a stock photo, you're paying for the right to use the clean, high-resolution version. Removing the watermark from the "comp" or preview image is exactly what you're supposed to do.
    • The Original File Is Lost: It happens more than you'd think. A company misplaces the original, un-watermarked version of its own logo or a key marketing image. In this case, restoring the asset is a perfectly valid business need.
    • You Have Explicit Written Permission: Sometimes a creator or copyright holder will give you direct permission to use their image without the watermark for a specific project. Just make sure you get it in writing.

    Anything outside of these scenarios is a minefield. Grabbing a watermarked photo from a photographer's portfolio or a stock site's preview without paying is illegal. It also directly hurts the creator’s ability to earn a living.

    The bottom line is simple: If you don't have clear, documented rights to an image, leave the watermark alone. The potential legal fallout and reputational damage just aren't worth it.

    The Real Risks of Unauthorized Removal

    Ignoring copyright law has very real consequences. Creators and stock photo agencies use sophisticated image recognition tools to hunt down unauthorized uses of their work across the internet. It's not a matter of if you'll get caught, but when.

    If they find you, your company could be hit with a demand for licensing fees that are way higher than the original cost. Even worse, you could be facing a lawsuit. The financial penalties can be steep, but the hit to your professional credibility can be permanent. A reputation for misusing creative work is incredibly hard to shake.

    For a full breakdown of your responsibilities when using our service, please review the guidelines in our PixelPanda Terms of Service.

    Watermarks Are Getting Smarter

    The push to protect creative work is driving some serious innovation. The global digital watermarking market was valued at $1.45 billion in 2024 and is expected to hit $3.8 billion by 2033. That explosive growth, which you can read more about in this market report from Grand View Research, shows just how serious creators are about protecting their intellectual property.

    We're moving way beyond just a visible logo in the corner. New techniques embed invisible data directly into an image's pixels. These "forensic" watermarks are designed to survive cropping, compression, and even minor edits, making it easier than ever to trace an image back to its source.

    This evolving technology just reinforces why it's so important to work ethically from the get-go. Making the right choice protects everyone in the long run.

    Don't Let Watermark Removal Ruin Your Photos

    Getting a watermark off an image is one thing. Doing it so cleanly that nobody can tell it was ever there? That’s the real goal. A botched removal can leave behind artifacts, blurs, or weird color patches, making the final image look worse than the original.

    The secret to a professional-grade edit isn't just about the tool you use; it's about the entire workflow. Let's walk through how to keep your photos looking pristine from start to finish.

    A tablet displays a stunning canyon landscape with a winding river and mountains, featuring the text 'Preserve Quality'.

    It all starts with your source file. Seriously. If you begin with a low-resolution, heavily compressed JPEG, you're already at a disadvantage. Every edit you make and every time you re-save the file, you’re just adding more compression and losing more detail, which quickly leads to a blurry, blocky mess.

    So, rule number one: always, always start with the highest-resolution file you can get your hands on. If you’re downloading a licensed stock photo, grab the largest version available. This gives you the maximum amount of pixel data to work with, making your edits far cleaner and more convincing.

    Work Smarter, Not Harder: Use Non-Destructive Layers

    As we touched on earlier, this is probably the most critical habit to develop. Never apply edits directly to your original image layer. That's the digital equivalent of working in permanent ink—one slip-up and your original photo is damaged.

    Instead, get in the habit of creating a new, blank layer right on top of your photo. Do all your cloning, healing, and patching on this separate layer. It feels like an extra step at first, but it saves so much time and frustration.

    By keeping your fixes on a separate layer, you can easily dial back the opacity of your repair, mask out parts that don't look right, or just delete the layer and start over without ever harming the original photo. It’s the cornerstone of professional editing.

    Troubleshooting Common Quality Glitches

    Even when you do everything right, you can still run into annoying problems. You might see a faint "ghost" of the old watermark, the colors in the patched area might not quite match, or you might lose the natural texture of the image.

    Don't worry, these are common hurdles, and each has a fix.

    • Problem: The spot you edited looks too smooth and artificial, losing the original grain.

    • Fix: This is an easy one. Create a new layer, fill it with 50% gray, and change its blend mode to "Overlay." Now, go to Filter > Noise > Add Noise. Add a tiny amount of monochromatic noise to create a subtle grain, then use a layer mask to paint it only over your repaired area. This little trick instantly restores a natural-looking texture.

    • Problem: You can still see a faint outline or "ghost" of the watermark.

    • Fix: This usually happens because the watermark changed the brightness or contrast of the pixels underneath it. The solution is to use the Dodge and Burn tools. Set them to work on a new 50% gray layer in "Overlay" mode, and gently paint over the area to brighten or darken it until the ghosting vanishes.

    Nailing Advanced Texture and Color Matching

    When a watermark sits on top of a complex texture—like wood grain, fabric, or skin—the standard tools might not be enough. This is where a pro technique called frequency separation comes in. It splits your image into two layers: one for color and tone (low frequency) and another for fine details and texture (high frequency).

    This separation is incredibly powerful. It lets you smooth out color blotches without destroying the delicate texture, and vice versa. You can rebuild the texture layer with the Clone Stamp tool with surgical precision, ensuring a completely seamless result.

    Color matching is the other piece of the puzzle. Sometimes, a Content-Aware Fill leaves a patch that's just a slightly different shade.

    • Quick Fix: Add a "Hue/Saturation" adjustment layer and clip it directly to your repair layer. Now you can gently tweak the sliders until the patch blends in perfectly with the surrounding colors.
    • Pro Method: For more control, use a "Curves" or "Color Balance" adjustment layer. This gives you granular control over the reds, greens, and blues in the different tonal ranges of the image.

    Finally, if your source image was a bit lower resolution to begin with, you can give it a final boost with an AI upscaler. These tools can intelligently add detail and increase pixel density after your edits are done, giving you a much sharper, higher-quality final product. You can see what's possible with our AI-powered image upscaling demo and how it can transform your edited photos.

    Clearing Up Your Watermark Removal Questions

    Even when you have a good workflow, some questions are bound to pop up. Let's tackle the most common ones I hear, covering everything from the legal stuff to dealing with those tricky technical issues.

    Is It Actually Illegal to Remove a Watermark?

    This is the big one, and the answer is refreshingly straightforward: it's only illegal if you don't own the rights to the image. That's the golden rule.

    • When you're in the clear: You can absolutely remove watermarks from your own photos, from stock images you’ve properly licensed, or any asset where the creator gave you the green light.
    • When you're crossing the line: Scrubbing a watermark from a stock photo preview to avoid paying for it, or lifting a photographer's work from their portfolio, is straight-up copyright infringement.

    Think of a watermark as the creator's signature. Messing with it on an image you don't have rights to is not just bad form—it's illegal and hurts the people who create the content we all rely on.

    Which Removal Method Should I Use?

    There's no single "best" tool for every job. The real choice comes down to speed versus control—do you need it done fast, or do you need it done perfectly?

    • Go with AI tools when: Speed is everything. If you're clearing dozens of images for an e-commerce site or just need a quick fix without diving into complex software, AI is your best friend.
    • Stick with manual editing when: The watermark sits on something incredibly detailed, like a person's face or a fine-textured fabric. You'll also want to go manual if you need absolute pixel-perfect quality for high-resolution print work or if an AI tool left a few subtle blemishes.

    My rule of thumb? For about 90% of cases, a quality AI tool gets the job done beautifully in seconds. I only break out Photoshop for that last 10% where every single pixel counts.

    Will Removing the Watermark Ruin My Photo's Quality?

    It's a valid concern, but thankfully, modern tools are smart enough to avoid this. A good AI watermark remover doesn't just smudge the area. It uses sophisticated inpainting technology to analyze the surrounding pixels and intelligently rebuild what was underneath the mark.

    But to get the best results, you need to set it up for success:

    • Start with a high-res image. You can't add detail that isn't there. Editing a blurry, low-quality photo will only make its flaws more obvious.
    • Consider the watermark itself. A simple, semi-transparent logo on a plain background is a breeze to remove. A huge, solid-color watermark slapped over a complex pattern is a much tougher challenge for any tool.

    The goal is always a clean, seamless edit. With the right starting image and a good tool, you can get a result where no one would ever know a watermark was there.

    What if the AI Tool Isn't Quite Perfect?

    Even the best AI can stumble, especially on super busy backgrounds. You might occasionally see a small, blurry patch or a subtle artifact where the watermark used to be. Don't sweat it—this is where a simple two-step process comes in handy.

    Let the AI tool do 95% of the work in an instant. Then, just pop that image into a free editor like GIMP or a pro tool like Adobe Photoshop for a quick touch-up. A few clicks with the Clone Stamp or Healing Brush is usually all it takes to fix those tiny imperfections. You get a perfect image with a fraction of the manual effort.


    Ready to automate your image editing and get studio-quality results without the manual work? PixelPanda offers powerful, developer-friendly APIs for watermark removal, background removal, and much more. Try our free demos and see the difference.

  • image upscaling software: Top picks for 2025

    image upscaling software: Top picks for 2025

    In today's visually driven world, a low-resolution image can weaken marketing campaigns, compromise print quality, and undermine user experience. Traditional resizing methods simply stretch pixels, resulting in blurry, artifact-laden images. The solution lies in AI-powered image upscaling software, which intelligently reconstructs and enhances images, adding realistic detail to create crisp, high-resolution results.

    But with a crowded market of desktop apps, web-based tools, and developer APIs, choosing the right solution is critical. This guide cuts through the noise. We have analyzed the 12 best options, from dedicated tools for photographers like Topaz Gigapixel to scalable APIs like Upscale.media, to help you find the perfect software for your specific needs. Whether you're a developer integrating automated enhancements, a marketer preparing assets for high-resolution displays, or a designer restoring vintage photos, this resource is for you.

    This listicle provides an in-depth comparison of each platform's core features, performance, pricing, and ideal use cases. You'll find a clear breakdown of everything from upscaling factors and specialized AI models to API support and integration workflows. Each entry includes direct links and key screenshots to help you quickly evaluate which image upscaling software aligns with your technical requirements and creative goals. We skip the generic marketing copy and focus on practical analysis, so you can make an informed decision and get straight to producing superior, high-resolution visuals.

    1. PixelPanda

    PixelPanda establishes itself as a powerful, developer-first AI imaging platform, moving beyond simple enlargement to offer a complete, automated visual production pipeline. It's designed for engineering teams, e-commerce platforms, and marketers who require consistent, studio-quality results at scale. This service distinguishes itself by integrating multiple AI processes into a single API-driven workflow, making it an exceptional piece of image upscaling software for automated environments.

    The platform combines 4x upscaling with a suite of essential editing tools like background removal, smart inpainting, and text/watermark cleanup. What makes PixelPanda a standout choice is its precision in handling complex subjects. Its depth-aware and edge-preserving models excel at processing challenging details like hair and fur, significantly reducing the need for manual retouching that often plagues automated systems. For developers, this translates to more reliable, production-ready assets straight from the API.

    PixelPanda

    Key Features and Use Cases

    PixelPanda’s toolkit is engineered for high-volume, automated workflows where quality and speed are critical.

    • Integrated AI Toolkit: Beyond its core 4x upscaling, the platform offers face enhancement, content-aware fills, and style transfer. This unified approach allows teams to build complex image processing sequences without chaining together multiple, disparate services.
    • Developer-Centric Design: With a straightforward REST API, SDKs for major programming languages, and comprehensive documentation, integration is streamlined. The system supports reliable batch processing, making it ideal for large-scale operations like updating entire product catalogs or processing user-generated content in real-time.
    • Superior Edge Detection: The platform's ability to accurately isolate subjects with intricate edges (like flyaway hair or fuzzy textiles) and export them as clean, transparent PNGs is a significant advantage for e-commerce and marketing applications.
    • Practical Evaluation: A generous free trial is available without requiring a credit card, complemented by a hands-on demos gallery. This lets technical teams thoroughly vet the API's performance and output quality before any financial commitment.

    Platform Analysis

    PixelPanda is best suited for businesses that need to embed high-quality image processing directly into their applications or internal systems. While it is primarily API-driven, its power lies in enabling non-technical users (like marketers) to benefit from advanced AI editing through integrated tools.

    However, the platform is less ideal for casual users seeking a simple, one-off upscaling tool via a web interface. Its strength is in programmatic control and automation. Additionally, while pricing details are transparent, they are located on a dedicated page rather than the main product page, requiring an extra click to evaluate costs.

    Website: https://pixelpanda.ai

    2. Topaz Gigapixel (Topaz Labs)

    Often hailed as the gold standard in professional photography and design circles, Topaz Gigapixel is a dedicated desktop application (with plugin support) focused exclusively on high-fidelity image upscaling. It stands out by providing an unparalleled level of control through its specialized AI models, allowing users to select algorithms tailored to specific content types like CGI, text, or low-resolution sources. This granular approach makes it a premier choice for tasks requiring maximum detail preservation, such as preparing old photos for large-format printing or restoring compressed digital assets.

    Topaz Gigapixel (Topaz Labs)

    The software operates as a standalone app for macOS and Windows but also integrates seamlessly as a plugin for Adobe Photoshop and Lightroom, fitting directly into established creative workflows. A key feature is its optional cloud rendering, which offloads heavy processing jobs from your local machine, significantly speeding up batch processing or work on less powerful hardware. You can see how its output compares against others in this image upscaling software demonstration.

    Key Features & Considerations

    • Specialized AI Models: Users can choose from models like Standard, High Fidelity, Art & CG, and Face Recovery to achieve optimal results for different image types.
    • Enlargement Factor: Natively supports up to 6× enlargement, with advanced cloud models for more challenging enlargements.
    • Workflow Integration: Functions as both a standalone application and a plugin for Adobe Creative Cloud products.
    • Pricing Model: Operates on a subscription model which provides access to updates and support. This can be a drawback for hobbyists or infrequent users, but is often justified for professionals who rely on its consistent, high-quality output.

    Topaz Gigapixel is best suited for professionals who need the absolute best quality and control over the upscaling process, making it an essential tool for photographers, print designers, and digital artists.

    3. Topaz Photo AI (Topaz Labs)

    Positioned as an intelligent all-in-one photo enhancement suite, Topaz Photo AI bundles the core technologies of Gigapixel AI, DeNoise AI, and Sharpen AI into a single, streamlined workflow. Instead of being just an image upscaling software, it uses its "Autopilot" feature to analyze an image and automatically apply the necessary noise reduction, sharpening, and upscaling in the optimal order. This integrated approach is ideal for photographers and creatives looking to simplify their post-processing pipeline by consolidating multiple tools into one powerful application.

    Topaz Photo AI (Topaz Labs)

    While Autopilot offers a convenient one-click solution, users retain full manual control over every adjustment, allowing for fine-tuning of each enhancement module, including resolution upscaling. This makes it a versatile tool for both quick batch processing and detailed, single-image work. The software operates as a standalone desktop application for Windows and macOS and also functions as a plugin for Adobe Lightroom Classic and Photoshop, ensuring it fits into existing professional workflows.

    Key Features & Considerations

    • Integrated Workflow: Combines industry-leading upscaling, denoising, and sharpening into a single, cohesive interface.
    • Autopilot AI: Automatically detects image quality issues and suggests optimal settings, significantly speeding up editing time.
    • Batch Processing: Efficiently apply consistent enhancements and upscaling across large sets of photos with minimal intervention.
    • Pricing Model: Typically purchased with a one-time payment that includes one year of updates. After the first year, an optional renewal is required to receive new features and model improvements. This can be less cost-effective if only upscaling is needed.

    Topaz Photo AI is best for users who require a comprehensive image quality toolkit, not just enlargement. It excels in environments where correcting noise, softness, and resolution in a single step is a priority.

    4. Adobe Photoshop / Lightroom Classic Super Resolution

    For professionals and enthusiasts already invested in the Adobe ecosystem, the built-in Super Resolution feature offers a streamlined, one-click solution for image upscaling. Integrated directly into Adobe Camera Raw (ACR), Photoshop, and Lightroom Classic, it is not a standalone tool but a powerful function within an existing workflow. Its primary strength lies in its RAW-aware processing, allowing it to leverage the original sensor data to double the linear resolution (quadrupling the total pixel count) with impressive detail and minimal artifacts. This makes it an ideal choice for photographers needing to make tight crops or prepare images for large-scale printing without leaving their primary editing environment.

    Adobe Photoshop / Lightroom Classic Super Resolution

    Activating Super Resolution is as simple as right-clicking an image and selecting "Enhance." The process creates a new Digital Negative (DNG) file, preserving your original image while providing a high-resolution version for further editing. While its simplicity is a major advantage, its fixed 2× linear upscale factor is also its main limitation. This feature is included within the Adobe Creative Cloud Photography plan, which bundles Photoshop and Lightroom. For a comparison of how this bundled pricing model stacks up against dedicated services, you can explore the pricing for various image processing solutions.

    Key Features & Considerations

    • Seamless Workflow Integration: Natively built into Photoshop, Lightroom, and Adobe Camera Raw, eliminating the need for external applications or plugins.
    • Enlargement Factor: Strictly limited to a 2× linear enlargement (4× total pixels). It is not designed for more extreme upscaling needs.
    • RAW-Aware Processing: Excels with RAW files by using the original sensor data to produce a clean, detailed DNG file. It also supports JPEG, PNG, and TIFF formats.
    • Pricing Model: Included with an Adobe Creative Cloud subscription. This provides immense value for existing subscribers but makes it inaccessible for those without a subscription.

    Adobe Super Resolution is best for photographers and designers who require a reliable, high-quality 2× upscale and prioritize workflow efficiency above advanced controls or higher magnification levels.

    5. ON1 Resize AI

    With roots tracing back to the legendary Genuine Fractals plugin, ON1 Resize AI is a purpose-built enlargement tool designed primarily for photographers and print professionals. It excels in preparing images for high-quality printing, offering deep integration and specialized features tailored to physical output. The software uses modern AI models to intelligently upscale images while preserving crucial details and textures, making it a go-to choice for turning digital files into large-format prints.

    ON1 Resize AI

    ON1 Resize AI operates as a standalone application for macOS and Windows or as a plugin for Adobe Photoshop, Lightroom Classic, and Capture One. This flexibility ensures it can fit into nearly any photography workflow. Its key differentiator is the extensive set of print-centric tools, including gallery wrap previews and tiling options for creating multi-panel prints. This focus on the final printed product makes it a powerful piece of image upscaling software for professionals who deliver physical goods.

    Key Features & Considerations

    • Print-Focused Workflow: Includes presets for common print sizes and resolutions, gallery wrap previews, and options for tiling large images.
    • AI Models: Offers a diffusion-based ‘Highest Quality’ AI model for maximum detail and a faster ‘Standard’ model for quicker turnarounds.
    • Workflow Integration: Seamlessly integrates as a plugin for Adobe Lightroom Classic, Photoshop, and Capture One, or can be used on its own.
    • Pricing Model: A significant advantage is the availability of a perpetual license, which appeals to users who prefer a one-time purchase over recurring subscriptions. However, major version upgrades typically require a paid update.

    ON1 Resize AI is ideal for photographers and print studios that need a reliable, high-quality solution for enlarging images specifically for print, bridging the gap between digital editing and physical production.

    6. Skylum Luminar Neo (Upscale AI inside Neo)

    Skylum Luminar Neo positions itself differently by embedding its "Upscale AI" feature within a comprehensive, AI-powered photo editing suite. This approach is ideal for photographers and content creators who want a single application for both creative enhancements and technical improvements like enlargement. Instead of a standalone tool, Luminar Neo offers a streamlined workflow where you can edit colors, apply presets, remove objects, and then upscale your final image without ever leaving the platform, making it a highly efficient all-in-one solution.

    Skylum Luminar Neo (Upscale AI inside Neo)

    The platform is known for its user-friendly interface and a wide array of AI tools that automate complex editing tasks, such as sky replacement and portrait retouching. The integration of Upscale AI means users can rescue low-resolution shots or prepare images for large prints directly within their primary editing environment. This makes it an attractive piece of image upscaling software for hobbyists and professionals looking to simplify their creative process and reduce the need for multiple subscriptions or applications. You can learn more about its current offerings at https://skylum.com/luminar/special-offer.

    Key Features & Considerations

    • Integrated Workflow: Upscale AI is a feature inside a full-fledged photo editor, allowing for seamless creative editing and enlargement in one place.
    • Enlargement Factor: Supports enlargement up to 6×, suitable for most printing and digital display needs.
    • Creative AI Tools: Access to a broad suite of AI-driven features like Enhance AI, Relight AI, and GenErase for comprehensive photo manipulation.
    • Pricing Model: Skylum offers both subscription plans and periodic perpetual (lifetime) licenses, providing flexibility. However, the licensing structure and access to the latest generative features can sometimes be complex or require separate add-ons.

    Luminar Neo is best for photographers and creators who prioritize an integrated, all-in-one editing experience and value the convenience of having upscaling capabilities built directly into their creative workflow.

    7. Pixelmator Pro (ML Super Resolution)

    For Mac users seeking a powerful, integrated solution, Pixelmator Pro offers a comprehensive image editor with an impressive upscaling feature called ML Super Resolution. Rather than being a standalone utility, this tool is built directly into a full-featured creative suite, making it an exceptional value for those already in the Apple ecosystem. Its machine learning algorithm is deeply optimized for Apple Silicon (M1/M2/M3 chips), delivering remarkably fast and efficient performance for enhancing photos, graphics, and illustrations without leaving the application.

    Pixelmator Pro (ML Super Resolution)

    The ML Super Resolution function is designed for simplicity, allowing users to upscale images with a single click while intelligently preserving sharpness and detail. This approach is ideal for designers, photographers, and content creators who need a quick, high-quality boost in resolution as part of their broader editing workflow. Because it is part of a larger editor, it's complemented by other ML-powered tools like Denoise and automatic adjustments, providing a cohesive, AI-enhanced editing experience.

    Key Features & Considerations

    • Integrated Upscaling: ML Super Resolution is a core feature within the Pixelmator Pro editor, not a separate app.
    • Enlargement Factor: Supports intelligent upscaling up to 3×, which is suitable for most web and print tasks.
    • Hardware Optimization: Heavily optimized for Apple Silicon, ensuring best-in-class performance and efficiency on modern Macs.
    • Pricing Model: Available as a one-time purchase from the Mac App Store. This is a significant advantage over subscription-based models for users who prefer to own their software. However, it is exclusive to macOS, with no support for Windows or other operating systems.

    Pixelmator Pro is the perfect choice for Mac-based creators who want a cost-effective, all-in-one editor with a capable and speedy image upscaling software feature built right in. You can learn more and purchase it from the official Pixelmator website.

    8. Icons8 Smart Upscaler

    Icons8 Smart Upscaler offers a highly accessible and flexible approach to AI-powered image enhancement, primarily through its web-based interface. It caters to users who need a quick, no-install solution as well as developers seeking to integrate upscaling capabilities into their own applications via an API. The platform stands out by combining ease of use with powerful batch processing features, allowing users to upload and enhance up to 500 images simultaneously, making it a strong contender for high-volume tasks.

    Icons8 Smart Upscaler

    The service is particularly attractive for its versatile pricing, which includes both prepaid credit packs for occasional use and monthly subscriptions for regular users. This model provides a low-cost entry point and avoids long-term commitments, a significant advantage for freelancers, small businesses, or those with fluctuating needs. With clear API documentation and a commitment not to use uploaded images for model training, Icons8 positions itself as a practical and privacy-conscious piece of image upscaling software. You can get started directly on the Icons8 Smart Upscaler website.

    Key Features & Considerations

    • Batch Processing: Supports large batches of up to 500 images at a time, ideal for e-commerce stores or social media managers.
    • Flexible Access: Available as a web app, a dedicated macOS application, and an API for programmatic integration.
    • Output Resolution: Can upscale images up to a maximum resolution of 7680×7680 pixels.
    • Pricing Model: Offers both prepaid credit packs and recurring subscriptions, making it accessible for a wide range of users without requiring a hefty initial investment. While convenient, the browser-based workflow may be less efficient for professionals who prefer integrated desktop tools.

    Icons8 Smart Upscaler is best suited for developers needing API access, marketers with bulk image tasks, and casual users who want a high-quality, pay-as-you-go upscaling solution without software installation.

    9. Let’s Enhance

    Let’s Enhance is a popular web-based service focused on delivering high-quality AI upscaling through a flexible, credit-based system. It stands out with its specialized modes, particularly the ‘Ultra’ model, which is engineered for generating extremely large outputs up to 512 megapixels. This capability makes it an ideal solution for professionals preparing images for large-format printing, such as billboards or gallery displays, where maintaining clarity at immense scales is non-negotiable. The platform is designed for both individual creators and businesses needing reliable batch processing.

    Let’s Enhance

    The service operates on a straightforward credit system, where users purchase credits to process images. Different operations, like standard upscaling versus using the high-resolution Ultra mode, consume varying amounts of credits. This model offers flexibility, with options ranging from monthly subscriptions with rollover credits to pay-as-you-go plans, catering to both sporadic and high-volume users. You can access the platform and explore its features directly on the Let's Enhance website.

    Key Features & Considerations

    • Credit-Based System: Tiered plans provide flexibility, with options for personal subscriptions that include credit rollover and business-oriented packages for heavier usage.
    • Ultra Quality Mode: A key differentiator, this mode is designed for extreme enlargements, capable of producing files up to 512 megapixels while preserving detail and minimizing artifacts.
    • Batch Processing: The platform includes efficient tools for uploading and processing multiple images simultaneously, streamlining workflows for large projects.
    • Pricing Model: The cost is directly tied to usage and resolution. While flexible, using the Ultra mode for very large outputs consumes more credits, which can increase project costs for users requiring maximum quality.

    Let’s Enhance is best suited for e-commerce businesses, print professionals, and marketers who require consistently high-quality, large-scale enlargements and benefit from a scalable, cloud-based workflow.

    10. VanceAI Image Upscaler

    VanceAI positions itself as a comprehensive, web-based image enhancement suite where upscaling is just one of many available tools. It stands out by offering a unified platform with a shared credit system, allowing users to access a wide array of AI-powered functions like denoising, sharpening, and restoration alongside its core image upscaling software. This "all-in-one" approach is ideal for users who need a versatile toolkit for various image-related tasks without subscribing to multiple specialized services. Its inclusion of anime-specific models also caters directly to a niche but significant audience.

    VanceAI Image Upscaler

    The platform primarily operates through a straightforward web interface but also offers a downloadable PC application for Windows. This provides flexibility, allowing for batch processing and integration into local workflows without relying on a browser. The key operational difference is its credit system: users purchase credits which are then consumed for processing and, importantly, for downloading the final high-resolution images. While this model provides access to a broad toolset, new users should be mindful of how credits are used to avoid unexpected depletion. You can try the tools at https://vanceai.com.

    Key Features & Considerations

    • Wide Range of Tools: Beyond upscaling, the platform includes tools for sharpening, denoising, background removal, photo restoration, and more, all under one account.
    • Specialized Models: Offers dedicated AI models for different content, including a standard model, an anime upscaler (VanceAI Anime Upscaler), and options for text enhancement.
    • Platform Flexibility: Provides both a user-friendly web interface and a downloadable PC application for more demanding, local workflows.
    • Credit-Based System: Operates on a unified credit model where processing and downloads consume credits. This can be cost-effective for varied use but may be confusing at first, as downloading the result is a separate, credit-consuming action.

    VanceAI is best suited for content creators, marketers, and hobbyists who require a diverse set of image enhancement tools in a single, accessible platform and appreciate the option of both web and desktop access.

    11. Upscale.media (by PixelBin)

    Upscale.media, developed by PixelBin, is a cloud-based tool designed for both individual users and automated workflows requiring efficient image upscaling. It distinguishes itself with an exceptionally transparent and flexible credit-based system, making it a strong contender for developers, e-commerce platforms, and marketing teams who need to process images at scale. The platform prioritizes ease of use and programmatic access, offering a straightforward web interface alongside a powerful API for seamless integration.

    Upscale.media (by PixelBin)

    The service is particularly well-suited for bulk transformations and programmatic use cases where predictable costs and reliable performance are critical. Its API-first approach makes it an excellent choice for businesses looking to build image processing pipelines. For developers interested in integrating this kind of image upscaling software, you can explore developer resources and API documentation to see how it fits into custom applications. The generous free tier allows anyone to thoroughly test the service's quality and speed before committing to a paid plan.

    Key Features & Considerations

    • Flexible Pricing Model: Offers a free tier with 3 monthly credits, one-time credit packs (50-1000 credits), and annual subscription bundles, accommodating various usage levels.
    • Developer-Friendly API: Provides a robust API with clear per-credit pricing, designed for easy integration into websites, apps, and automated workflows.
    • Enlargement Factor: Supports up to 4× enlargement, which is suitable for most web and digital marketing applications.
    • Credit System: The credit-based model is transparent but requires users to manage their credit balance and renewals. Note that the platform has a no-refund policy for subscriptions, so testing with the free plan is highly recommended.

    Upscale.media is an ideal solution for businesses and developers seeking a scalable, API-driven image upscaling service with clear, predictable pricing.

    12. Exposure Software Blow Up 3

    For professionals who prioritize clean, artifact-free enlargements for print, Exposure Software Blow Up 3 has been a trusted solution for years. Rather than using AI to generate or "hallucinate" new details, this tool focuses on preserving the clarity of the original pixels during enlargement. It excels at producing predictable, high-quality results that look natural on paper, making it a favorite among photographers and print designers who need reliable image upscaling software for their physical media workflows.

    Exposure Software Blow Up 3

    Operating primarily as a plugin for Adobe Photoshop, Lightroom, and Exposure's own editor, it integrates directly into existing post-processing routines. Its interface is straightforward, offering specialized features like presets for standard paper sizes, output sharpening tailored for ink and paper type, and full support for professional color spaces like CMYK. This focus on the print pipeline distinguishes it from many AI-centric tools that are optimized purely for digital screens. You can learn more about its features at Exposure Software.

    Key Features & Considerations

    • Print-Optimized Workflow: Includes presets for common document sizes, output sharpening, and film grain addition to ensure high-quality physical prints.
    • Seamless Integration: Designed as a plugin for Adobe Lightroom, Photoshop, and Exposure X, allowing it to fit into established editing processes without disruption.
    • Conservative Enlargement: Avoids creating artificial textures or details, focusing instead on scaling existing pixels with maximum clarity and no computer-generated artifacts.
    • Pricing Model: Sold as a perpetual license, which is a significant advantage for users who prefer a one-time purchase over recurring subscriptions. This makes it a cost-effective choice for long-term use.

    Blow Up 3 is best suited for print professionals and photographers who require dependable, clean enlargements and value a traditional, non-destructive plugin workflow over the latest generative AI capabilities.

    Top 12 Image Upscalers — Feature Comparison

    Product Core features ✨ Quality ★ Price/value 💰 Target audience 👥
    PixelPanda 🏆 ✨ background removal, smart inpainting, 4× upscaling, face enh., style transfer, text→image, REST API & SDKs ★★★★★ studio-quality, edge-preserving, fast batch processing 💰 generous free trial (no CC); scalable/enterprise pricing on site 👥 developers, e‑commerce, marketers, design & engineering teams
    Topaz Gigapixel ✨ multiple AI models, up to 6×, desktop + cloud render, plugins ★★★★★ top-tier detail recovery; strong model control 💰 paid app/subscription; pro licensing for multi-seat 👥 photographers, designers needing extreme enlargements
    Topaz Photo AI ✨ integrated denoise + sharpen + upscale, batch, plugins ★★★★ one-click improvements + manual controls 💰 subscription/bundle; higher cost than single upscaler 👥 photographers wanting all‑in‑one enhancement
    Adobe Photoshop / Lightroom Super Resolution ✨ 2× linear (4× pixels), RAW-aware, one-click DNG enhance ★★★★ reliable for prints & RAW workflows 💰 included with Adobe subscription 👥 Adobe ecosystem users, pros & print prep
    ON1 Resize AI ✨ diffusion "Highest Quality" model, face recovery, deep print/export, plugins ★★★★ excellent print sizing; predictable outputs 💰 perpetual license available; paid upgrades 👥 photo labs, studios, print-focused pros
    Skylum Luminar Neo ✨ Upscale AI inside full editor, cross-device assets, creative tools ★★★ creative suite + upscaling; variable feature access 💰 perpetual & subscription promos (variable) 👥 hobbyists, creatives seeking integrated editing
    Pixelmator Pro ✨ ML Super Resolution up to 3×, ML Denoise, Apple Silicon optimized ★★★★ fast & efficient on macOS 💰 one-time Mac App Store purchase 👥 Mac users wanting integrated, low-cost tool
    Icons8 Smart Upscaler ✨ web app + API, batch up to 500, output up to 7680×7680 ★★★ good for occasional bulk; clear privacy 💰 prepaid credits & subscriptions; low entry cost 👥 occasional users, developers needing API access
    Let's Enhance ✨ 'Ultra' mode up to 512 MP, tiered credits, batch tools ★★★★ scales reliably for very large prints 💰 credit-based tiers; pay-as-you-go & business plans 👥 professionals needing very large, clean enlargements
    VanceAI Image Upscaler ✨ multiple modes (including anime), unified credit system, PC app ★★★ broad toolset; mixed quality depending on mode 💰 credit-based pricing across tools 👥 casual pros, users wanting many enhancement tools
    Upscale.media (PixelBin) ✨ free tier + monthly credits, API, annual bundles & one-time packs ★★★ transparent, easy to trial; decent bulk handling 💰 free credits + clear per-credit pricing & bundles 👥 developers, teams needing transparent per-credit billing
    Exposure Software Blow Up 3 ✨ presets for paper sizes, output sharpening, CMYK/16‑bit, plugins ★★★ conservative, artifact‑free & print-ready 💰 perpetual plugin purchase 👥 print professionals preferring predictable, non-AI enlargements

    The Final Frame: Making Your Choice

    Navigating the crowded landscape of image upscaling software can feel overwhelming, but the journey to finding the perfect tool is far more straightforward when you lead with your primary goal. As we've explored, the "best" software isn't a one-size-fits-all solution; it’s a specific answer to a specific problem. The era of accepting blurry, pixelated results from basic bicubic resizing is definitively over. Today’s AI-powered tools offer a remarkable ability to generate new, convincing detail, transforming low-resolution assets into high-quality visuals suitable for any application.

    The key takeaway from our deep dive into these twelve powerful options is the fundamental divide between tools built for individual creative control and platforms engineered for automated, high-volume workflows. Your choice hinges on this distinction. Are you a photographer meticulously preparing a single image for a gallery print, or are you an ecommerce manager processing a batch of 10,000 new product photos? The answer will immediately narrow your options.

    Key Insights Summarized

    Our analysis revealed several critical patterns. Desktop applications like Topaz Gigapixel AI, ON1 Resize AI, and Adobe's Super Resolution offer unparalleled manual control. They allow for granular adjustments, side-by-side previews, and model selection, putting the creative professional firmly in the driver's seat. These are ideal for photographers, digital artists, and designers who need to art-direct the final output and achieve the absolute highest fidelity for a single, important image.

    On the other hand, API-first platforms like PixelPanda, Let's Enhance, and Upscale.media are built for a different paradigm: scale, speed, and integration. Their strength lies in their ability to be seamlessly embedded into existing applications, content management systems, or automated processing pipelines. For marketplaces, SaaS platforms, and large-scale marketing operations, the ability to programmatically upscale, enhance, and deliver images without manual intervention is a game-changer.

    A Practical Framework for Your Decision

    To make your selection, consider these critical factors and how they apply to your unique situation. This isn't just about picking image upscaling software; it's about investing in a solution that aligns with your operational reality.

    • Workflow Integration: If your primary need is automation, your search should begin and end with tools that offer a robust API and clear documentation. Evaluate SDKs, webhooks for notifications, and how easily the service can plug into your existing tech stack (e.g., cloud storage like Amazon S3).
    • Quality vs. Speed: For archival or fine-art purposes, maximum quality is non-negotiable, even if it means longer processing times. For a social media feed or a fast-moving ecommerce site, a slight trade-off in quality for near-instantaneous results might be the smarter business decision.
    • Use Case Specificity: Are you primarily upscaling faces? Look for models with dedicated face restoration features, like those in Topaz Photo AI or VanceAI. Are you working with architectural photos or product shots with fine text? Test how each tool handles straight lines and intricate details.
    • Budget and Pricing Model: Do you prefer a one-time perpetual license for a desktop app, or does a pay-as-you-go credit system for an API make more sense for your fluctuating needs? Subscription models can offer continuous updates, but a single license might be more cost-effective for sporadic use.

    Final Thoughts

    Ultimately, the power of modern image upscaling software lies in its ability to unlock hidden value in your existing visual assets. A forgotten photo can become a stunning print, a small product image can become a full-screen banner, and an entire library of user-generated content can be standardized to a professional quality. By carefully considering your specific requirements against the capabilities we've outlined, you can confidently select a tool that not only solves your immediate resolution problems but also becomes a strategic asset in your creative or business toolkit.


    Ready to move beyond manual edits and unlock automated, high-quality image processing at scale? PixelPanda offers a comprehensive API for developers and a user-friendly platform that integrates seamlessly into any workflow, providing best-in-class image upscaling and a full suite of enhancement tools. Explore the possibilities and start building for free at PixelPanda.