Category: Uncategorized

  • The 12 Best 3D Anatomy App Platforms for 2025

    The 12 Best 3D Anatomy App Platforms for 2025

    Tired of flat diagrams and dense textbooks? The world of anatomical study has gone digital, interactive, and incredibly immersive. A powerful 3d anatomy app can transform how you learn, teach, or develop medical applications, turning complex biological systems into explorable, three-dimensional models. But with so many options, from comprehensive university suites to lightweight mobile atlases, choosing the right one feels like performing surgery in the dark.

    This guide cuts through the noise. We've dissected the 12 leading platforms, evaluating them on key features, target users, pricing models, and practical use cases. Whether you're a med student cramming for exams, an educator building a curriculum, or a developer integrating anatomical visuals, this breakdown will help you find the perfect digital cadaver for your needs. We'll provide direct links and screenshots for each entry, making your decision-making process seamless.

    The impact of these tools goes beyond simple 3D models. They represent a fundamental shift in how we interact with complex information, a trend seen across the healthcare education sector. To understand how deeply immersive technologies are impacting education, especially in healthcare, delve into resources like a comprehensive guide on Virtual Reality for Medical Training. Now, let’s get to the list and find the app that fits you best.

    1. Complete Anatomy (Elsevier)

    If you're looking for the academic heavyweight of the 3D anatomy app world, you've found it in Complete Anatomy. Backed by the publishing giant Elsevier, this platform feels less like a standalone app and more like a digital extension of a medical school curriculum. It’s the tool you choose when you need textbook-level accuracy and structured learning, complete with integrated courses and clinical videos.

    Complete Anatomy (Elsevier)

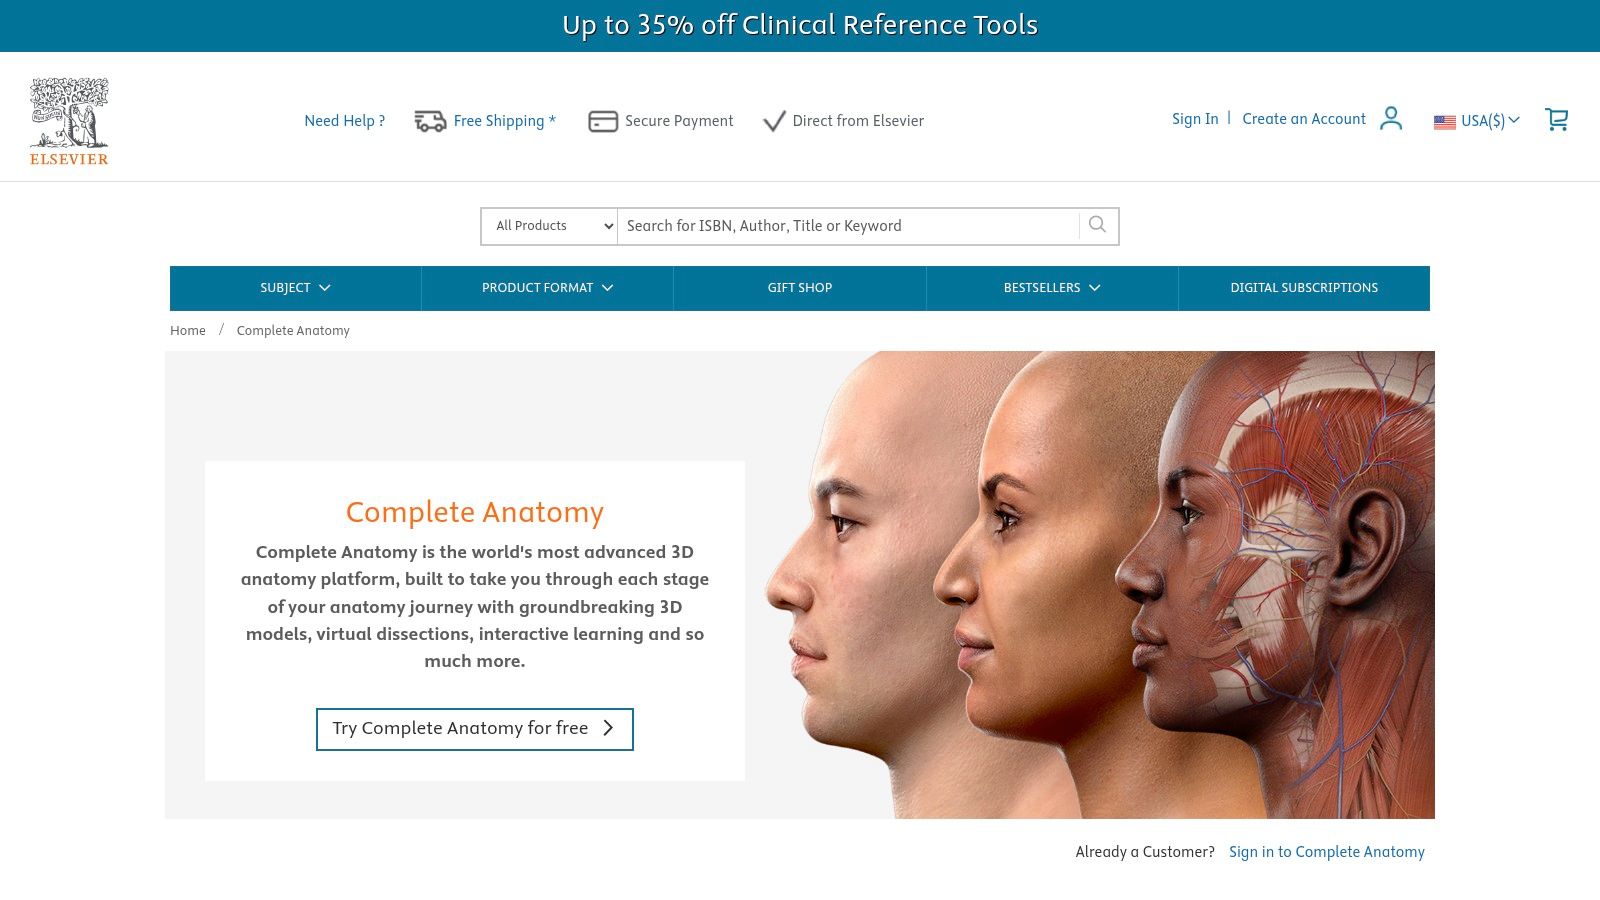
    What makes it stand out is its seamless cross-platform experience. You can start a dissection on your tablet, review flashcards on your phone, and then present a lecture on a desktop, with everything synced. The high-fidelity models, including a stunning real-time beating heart, are exceptional for visualizing complex physiological processes.

    Key Info & User Experience

    Feature Details
    Best For Medical students, educators, and institutions needing curriculum-aligned content.
    Pricing Tiered subscriptions: Student, Professional, and Institutional. A limited free version is available to try.
    Standout Feature Deep integration with Elsevier's extensive library of atlas content and academic courses.

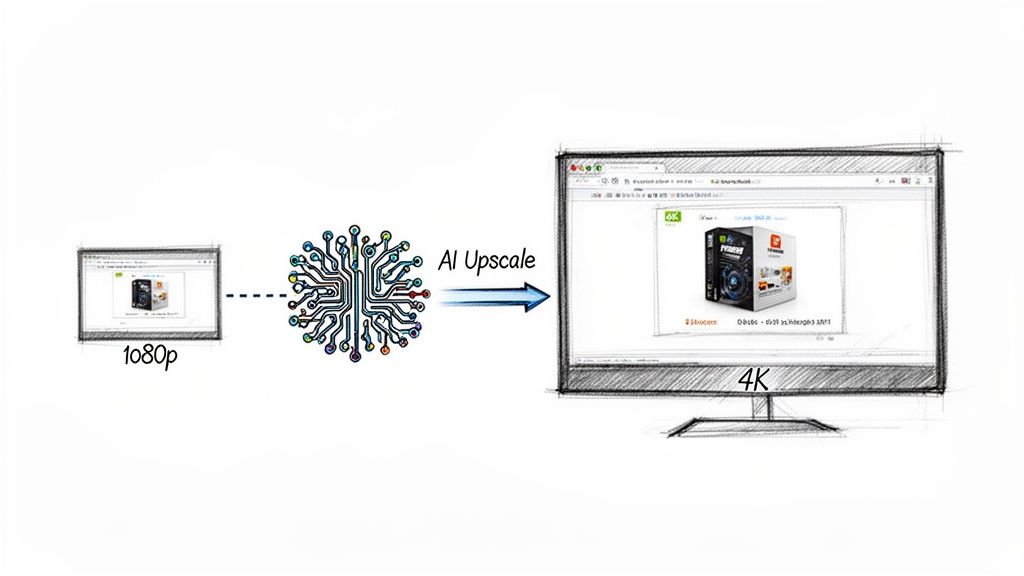
    The user experience is polished and professional, though be prepared for most of the juicy content to be behind a subscription paywall. This is a premium tool with a price to match, but for those serious about their anatomical studies, the investment is often justified. App developers working on ed-tech tools should note the high standard for visual quality here; achieving similar asset clarity often requires powerful image processing, and you can see how services like PixelPanda handle advanced image tasks to meet such demands.

    Website: https://www.us.elsevierhealth.com/complete-anatomy

    2. Complete Anatomy for iPhone/iPad (Apple App Store)

    For those deeply embedded in the Apple ecosystem, the official App Store listing for Complete Anatomy is the most streamlined entry point. It offers the full power of the platform, optimized for the touch-and-go nature of an iPhone or iPad. This isn't a watered-down version; it’s the same robust 3D anatomy app, just conveniently managed through your Apple ID, complete with a risk-free 3-day premium trial to test the waters.

    Complete Anatomy for iPhone/iPad (Apple App Store)

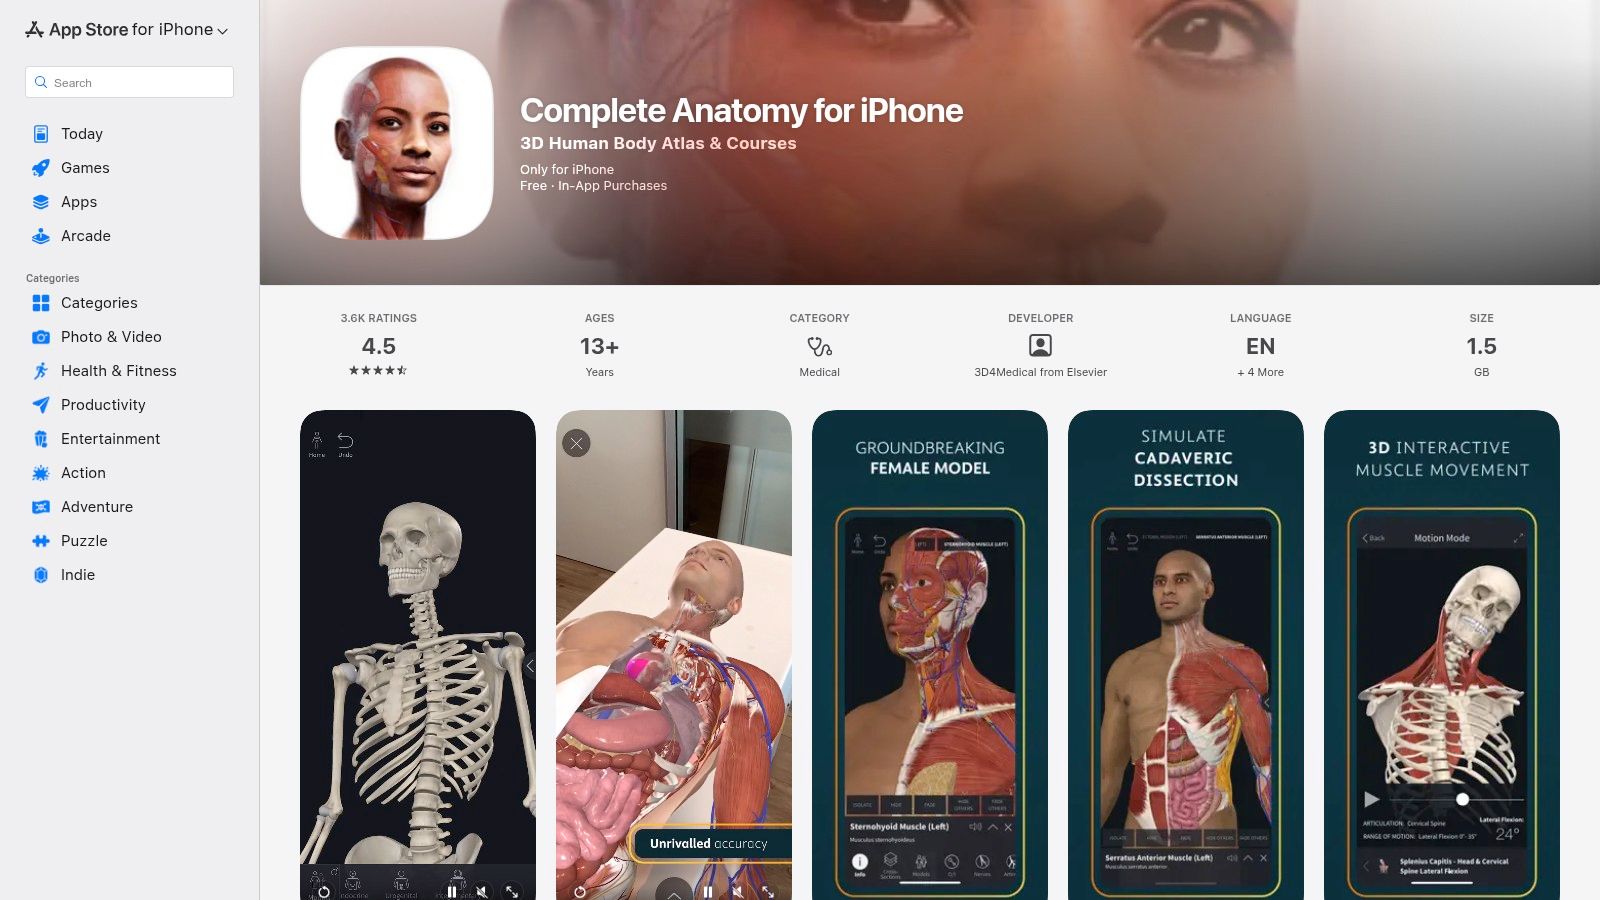
    The standout here is the sheer convenience. Billing is handled through Apple, making subscriptions and restorations a breeze across your devices. The AR mode, in particular, feels right at home on an iPad, allowing you to project a detailed anatomical model onto your desk. It’s the perfect way to quickly access a powerful learning tool without navigating to a separate website or payment portal.

    Key Info & User Experience

    Feature Details
    Best For Students and professionals who primarily use Apple devices and prefer integrated App Store billing.
    Pricing Free download with a 3-day premium trial; requires an in-app purchase for full subscription access.
    Standout Feature Seamless integration with iOS/iPadOS, including AR mode and simple subscription management.

    The user experience is fluid and intuitive on a touch screen, letting you dissect layers, view muscle motion, and explore clinical videos with a few taps. While the best content is locked behind the subscription, the app’s performance and accessibility via the App Store make it a top-tier choice for any on-the-move learner using an iPhone or iPad as their primary study device.

    Website: https://apps.apple.com/us/app/complete-anatomy-23/id1309253074

    3. Visible Body – Human Anatomy Atlas (Apple App Store)

    If subscription fatigue is real for you, Visible Body offers a refreshing alternative in the 3D anatomy app space. Their Human Anatomy Atlas, particularly on the Apple App Store, stands out by offering a comprehensive gross anatomy model for a one-time purchase. This makes it a fantastic, budget-friendly choice for students, clinicians, and curious minds who want a powerful reference tool without the recurring fees.

    Visible Body – Human Anatomy Atlas (Apple App Store)

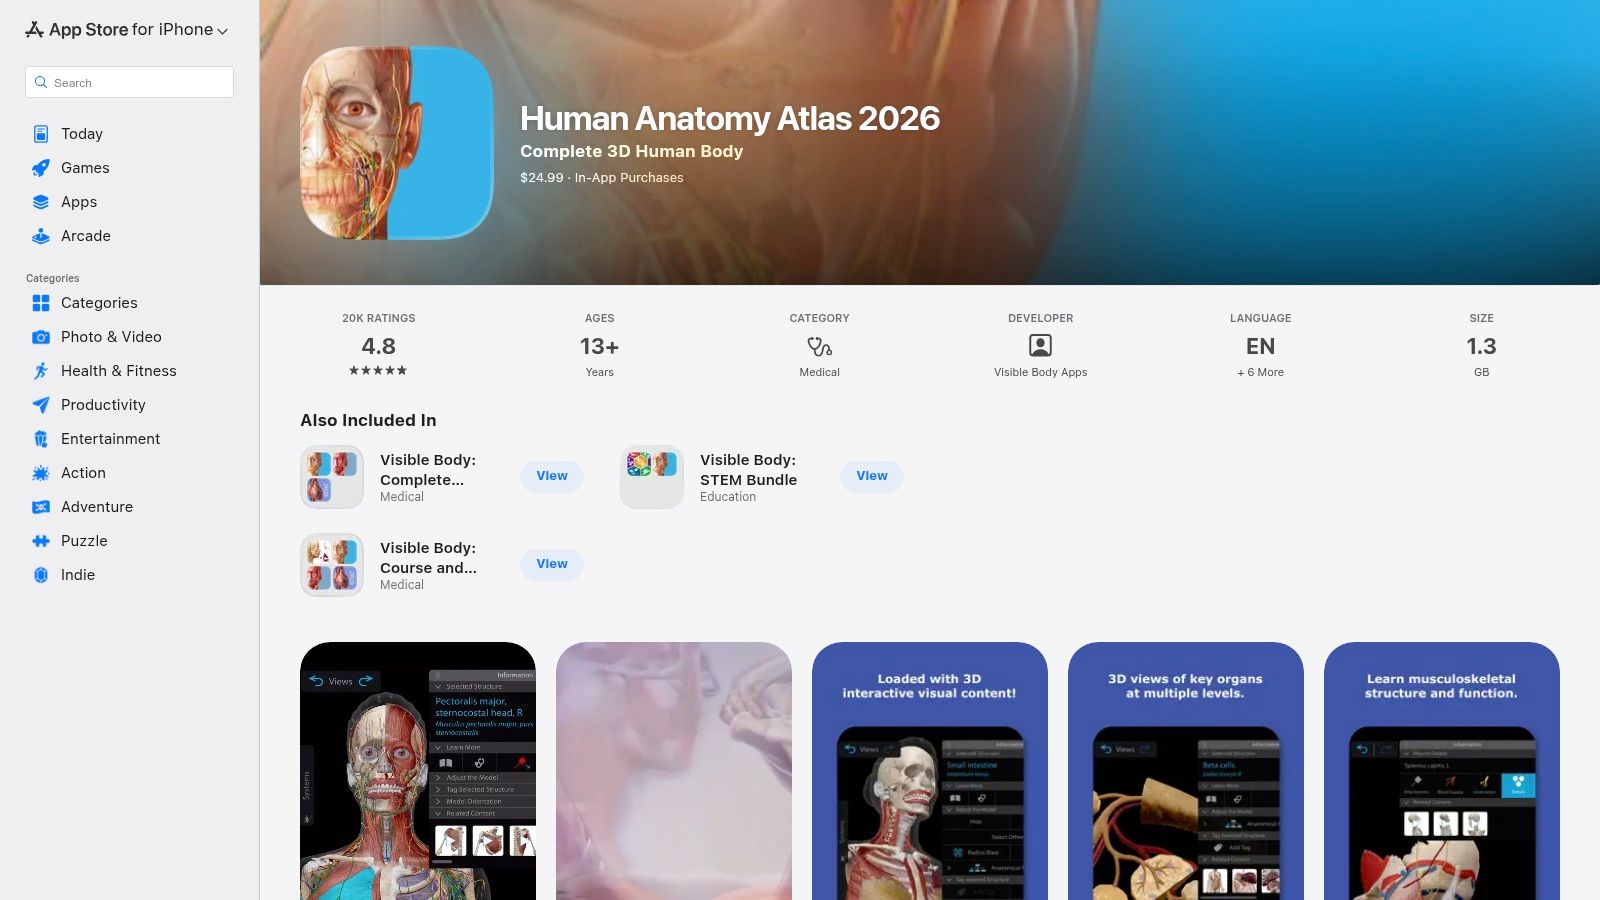
    What makes it stand out is its balance of depth and accessibility. You get detailed male and female models, muscle actions, bone landmarks, and even augmented reality (AR) dissection features right out of the box. While more specialized content like dental anatomy or detailed animations are available as in-app purchases, the core product is robust enough for most learners' needs.

    Key Info & User Experience

    Feature Details
    Best For Students and professionals who prefer a pay-once model for a core anatomical atlas.
    Pricing One-time purchase for the core atlas (currently around $24.99 on the US App Store), with optional add-ons available.
    Standout Feature A high-quality, comprehensive atlas without a mandatory subscription, plus excellent support for Apple devices like Vision Pro.

    The user experience is straightforward and intuitive, designed for quick reference and study. For development teams building similar reference apps, generating clean, consistent imagery from 3D models is a major hurdle. Automating this process can be a game-changer; explore how APIs for developers can streamline the creation of visual assets for educational tools. This is a solid, no-nonsense 3D anatomy app that respects your wallet.

    Website: https://apps.apple.com/us/app/human-anatomy-atlas-2026/id1117998129

    4. Visible Body Suite (Apple App Store)

    If buying individual anatomy apps feels like collecting expensive trading cards, Visible Body Suite is the all-you-can-eat buffet. Instead of picking and choosing, this subscription bundle throws the entire Visible Body library at you, covering not just gross anatomy but also physiology, biology, and even microanatomy. It’s the perfect solution for students or professionals whose needs extend beyond a single subject.

    Visible Body Suite (Apple App Store)

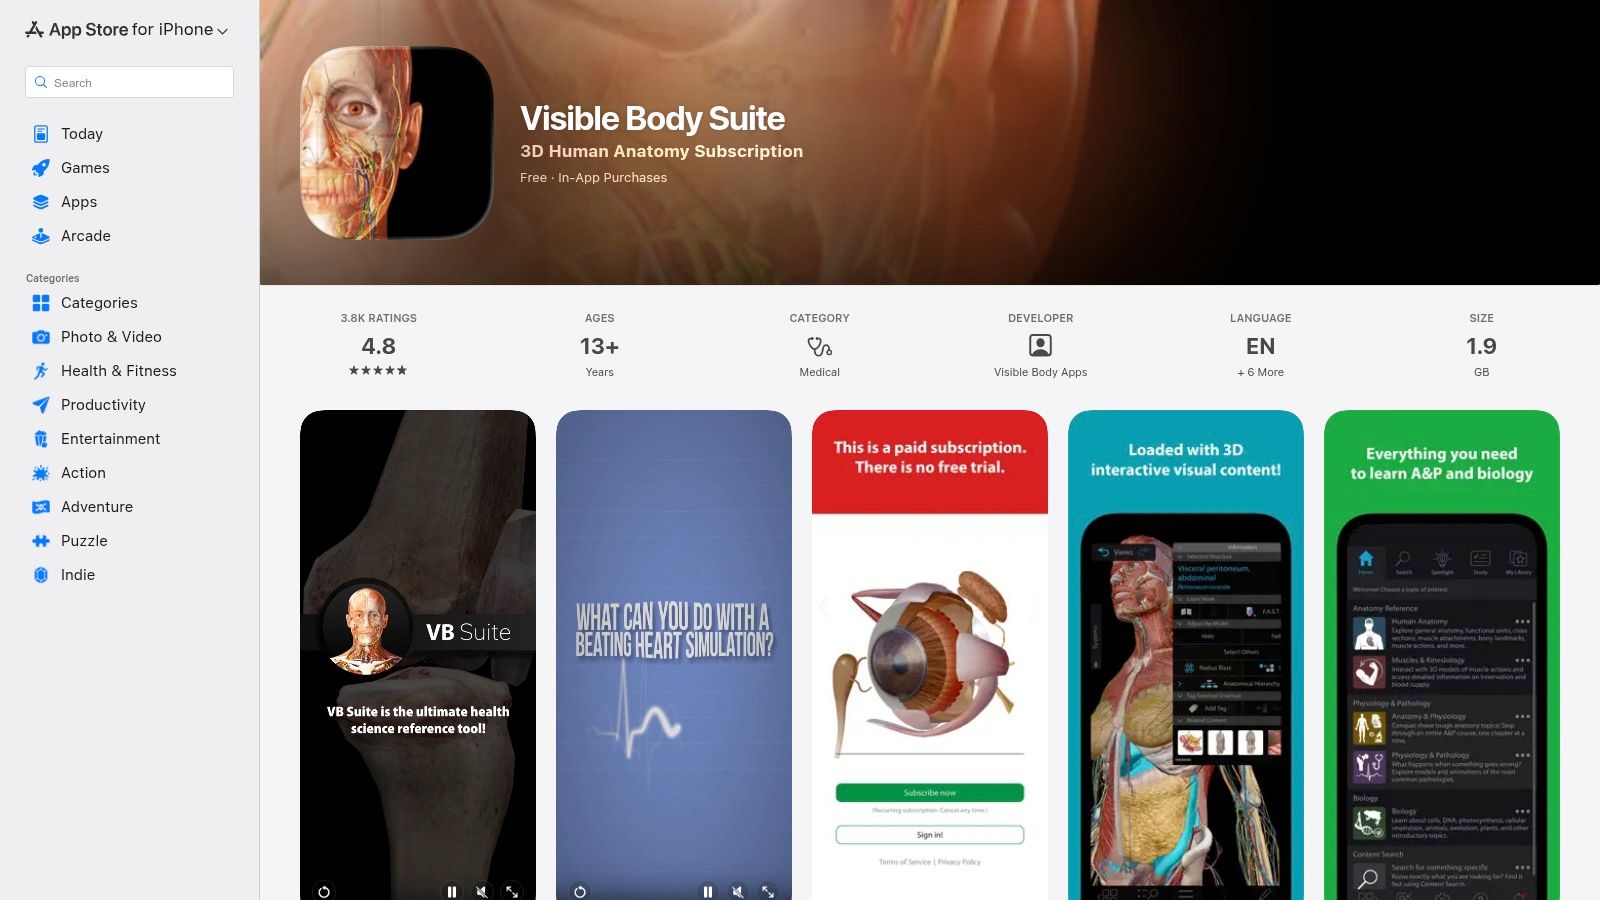
    The key appeal is its incredible value and cross-device access. One subscription unlocks everything on your phone, tablet, and computer, making it ideal for multi-course study or quick reference across different disciplines. This isn't just one 3D anatomy app; it's a comprehensive suite of learning tools designed to work together, from cellular-level explorations to full-system physiological animations.

    Key Info & User Experience

    Feature Details
    Best For Students and professionals needing access to a wide range of biological sciences, not just anatomy.
    Pricing Subscription-based model. The exact price is confirmed in-app via the App Store upon checkout.
    Standout Feature A single subscription unlocks the entire Visible Body library of apps (Anatomy, Physiology, etc.).

    The user experience is classic Visible Body: intuitive, detailed, and easy to navigate. While some may prefer the one-time purchase model of their standalone apps, the subscription offers a much more cost-effective way to access a massive amount of content. Just be prepared to commit to a recurring payment rather than a single upfront cost.

    Website: https://apps.apple.com/us/app/visible-body-suite/id1594705297

    5. BioDigital Human (official site)

    BioDigital Human positions itself as the "Google Maps for the Human Body," and it's a fitting analogy. This web-based 3D anatomy app excels at providing not just anatomical structures but also detailed models of health conditions and treatments. It’s an incredibly versatile tool, useful for a patient explaining a condition to their doctor, a student visualizing physiological processes, or an enterprise creating training materials.

    BioDigital Human (official site)

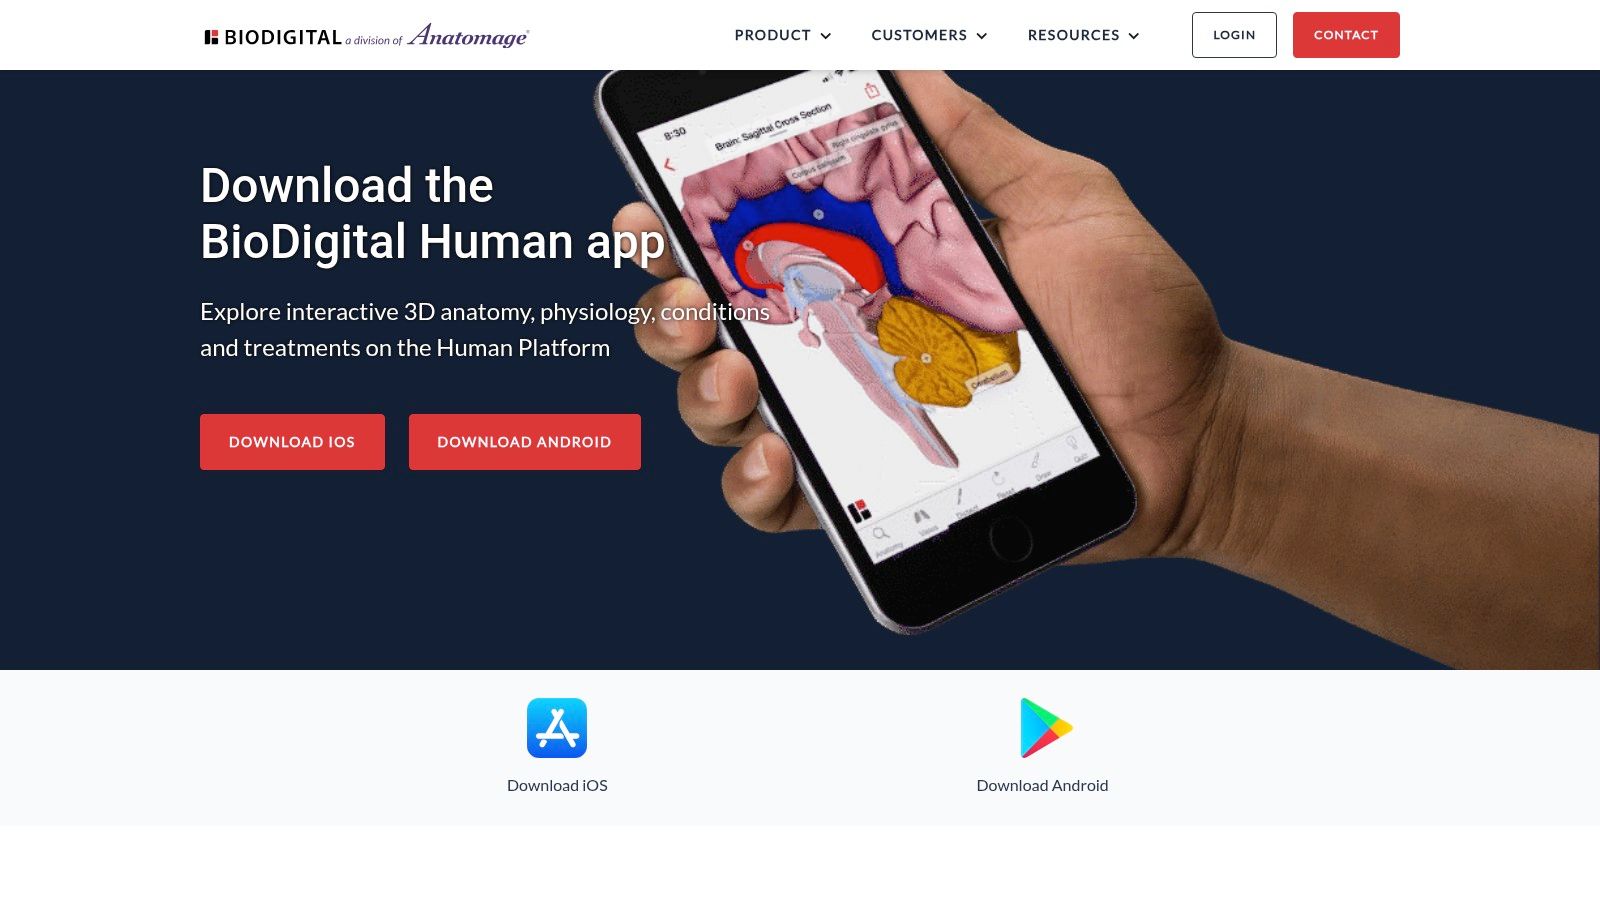
    What makes it stand out is its powerful authoring and publishing suite, "Human Studio." While aimed at enterprise and education clients, these tools allow users to customize, embed, and share interactive 3D models directly in websites or presentations. This focus on shareability and integration makes it a unique resource for content creators and institutions looking to bring anatomy to life outside of a dedicated app.

    Key Info & User Experience

    Feature Details
    Best For Students, educators, and businesses needing embeddable, interactive clinical content.
    Pricing Generous free tier (10 model views/month). Personal Plus plan for individuals, plus more robust School & Business plans.
    Standout Feature Human Studio authoring tools for creating and publishing custom 3D visualizations.

    The platform offers a surprisingly robust free tier, making it highly accessible for casual learners. The user experience is clean and web-native, though some of the more advanced authoring tools are desktop-only. For individuals, the low-cost Personal Plus plan unlocks unlimited viewing, making it a fantastic value. The real power, however, lies in its enterprise solutions, which transform it from a simple viewer into a full-fledged content creation platform.

    Website: https://www.biodigital.com/product/mobile-apps

    6. BioDigital – iOS App Store

    For those who live and learn on the go, the BioDigital app for iOS and iPadOS is the perfect pocket companion to its powerful web platform. It’s designed for quick access and offline study, allowing you to download complex models and dissect them anywhere, from the subway to a study lounge, without needing an internet connection. It’s the ideal mobile extension for any serious anatomy student.

    BioDigital – iOS App Store

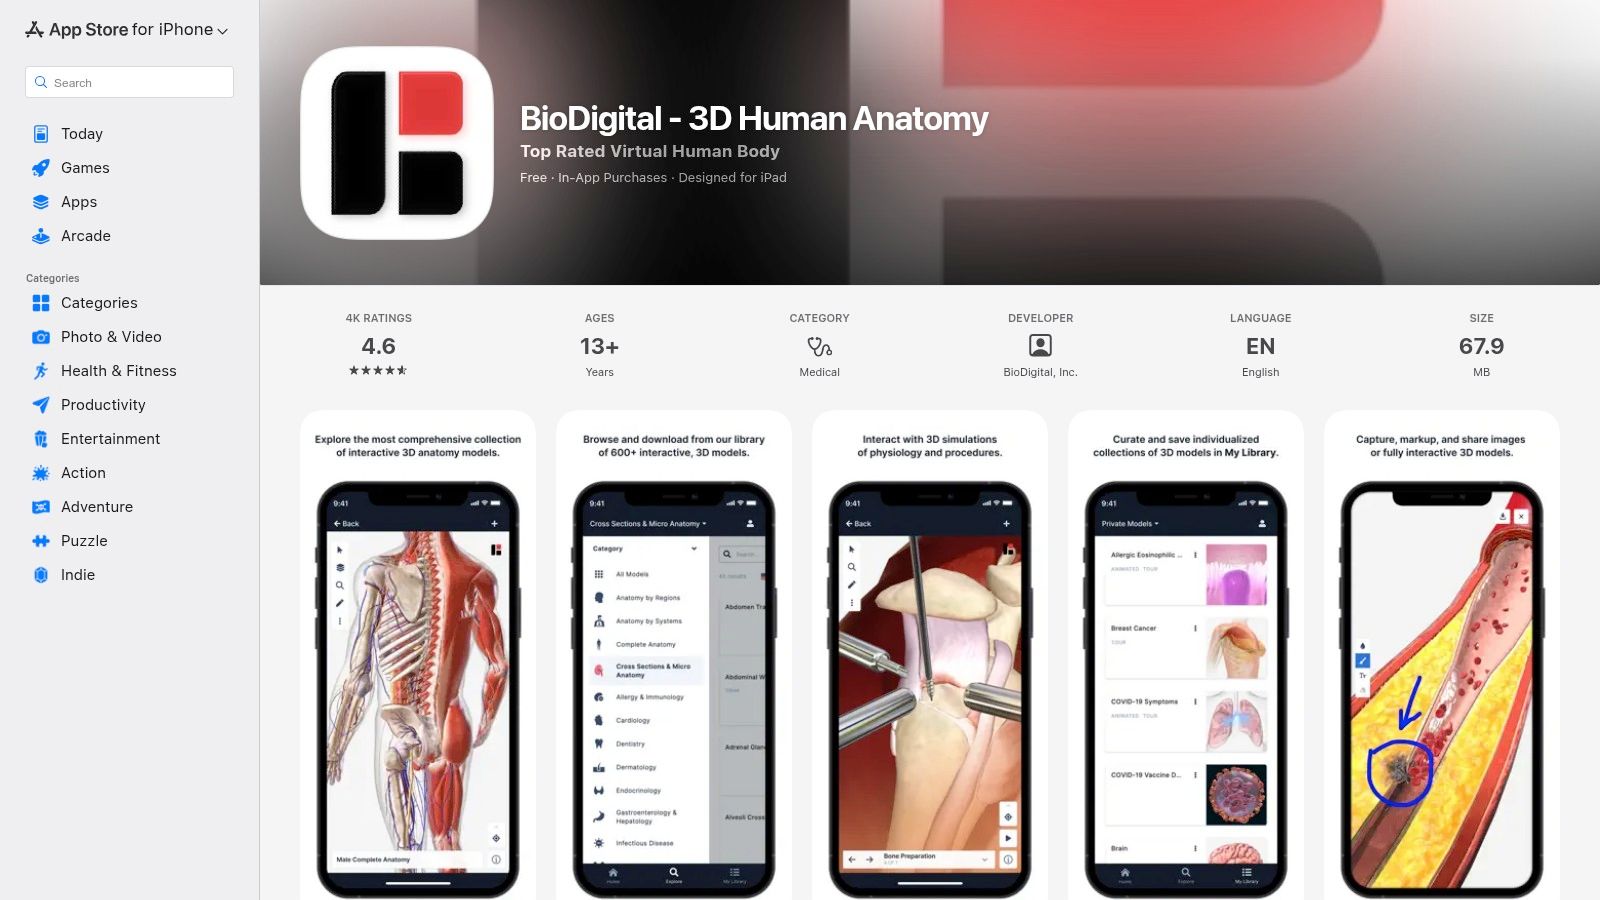
    What makes this a must-have for BioDigital users is the seamless cross-platform synchronization. You can save a customized view on your desktop and instantly pull it up on your iPad to present or review. While the more advanced authoring and publishing tools remain on the web version, the mobile app excels at its core job: making high-quality 3D anatomy accessible anytime, anywhere.

    Key Info & User Experience

    Feature Details
    Best For Students and professionals who use the BioDigital platform and need offline mobile access.
    Pricing Free plan with limited features; Personal Plus subscription available via in-app purchase.
    Standout Feature Robust offline mode for downloaded models, ensuring you can study without a web connection.

    The user experience is fluid and intuitive, focusing on model interaction rather than the deep editing features of its web counterpart. It’s an excellent example of a companion 3d anatomy app that understands its role perfectly. The app is free to download, but unlocking its full potential with a Personal Plus plan is a worthwhile investment for uninterrupted learning.

    Website: https://apps.apple.com/us/app/biodigital-3d-human-anatomy/id771825569

    7. 3D Organon (official store)

    If you're ready to step beyond the 2D screen and literally walk around the human body, 3D Organon is your gateway. This multi-award-winning platform is built from the ground up for virtual reality, making it a standout choice for immersive labs, VR-centric classrooms, and anyone who learns best by "doing." It shifts the learning experience from passive observation to active, spatial exploration.

    3D Organon (official store)

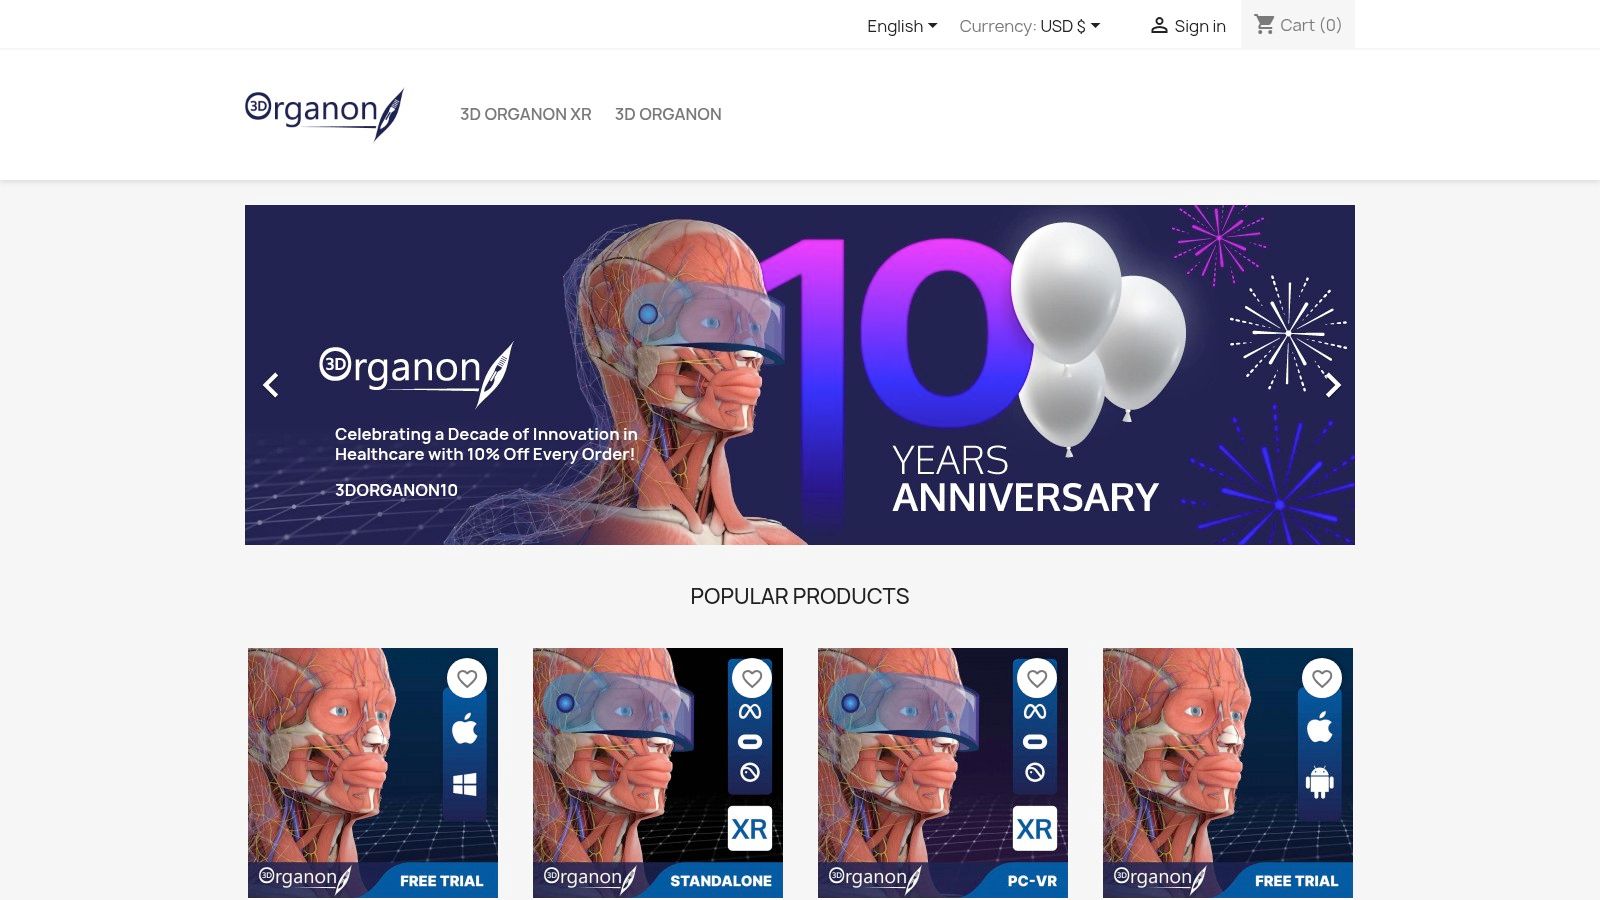
    What sets this 3D anatomy app apart is its deep commitment to the extended reality (XR) ecosystem. With features like multi-user "Medverse" classrooms, support for medical imaging files (DICOM) in VR, and an AI Study Assistant, it's designed for the future of medical education. The platform feels less like an app and more like a virtual anatomy lab you can access from anywhere with a headset.

    Key Info & User Experience

    Feature Details
    Best For Educators building VR labs, institutions, and students seeking an immersive study tool.
    Pricing Multiple license tiers available (Student, Professional, Institutional) via their official store.
    Standout Feature Robust XR feature set including multi-user environments and DICOM viewer for VR.

    The user experience is powerful but hardware-dependent; a smooth session relies on a capable VR headset. While the price is higher than standard mobile apps, the value is in its unparalleled immersion. For developers exploring XR, the visual fidelity is a key lesson; creating clean, focused assets for virtual environments is crucial, and you can see a variety of advanced image processing techniques in these PixelPanda demos that can help achieve that clarity.

    Website: https://store.3dorganon.com/en/

    8. 3D Organon on Steam (Windows/macOS)

    For those who live and breathe on their PC or Mac, 3D Organon’s presence on Steam offers a uniquely accessible entry point into the world of 3D anatomy. This isn't just a port; it's a version tailored for the desktop experience, complete with controller support and VR headset integration for an immersive dive into the human body. It’s the perfect choice for gamers, tinkerers, and students who prefer the power and familiarity of their computer setup.

    3D Organon on Steam (Windows/macOS)

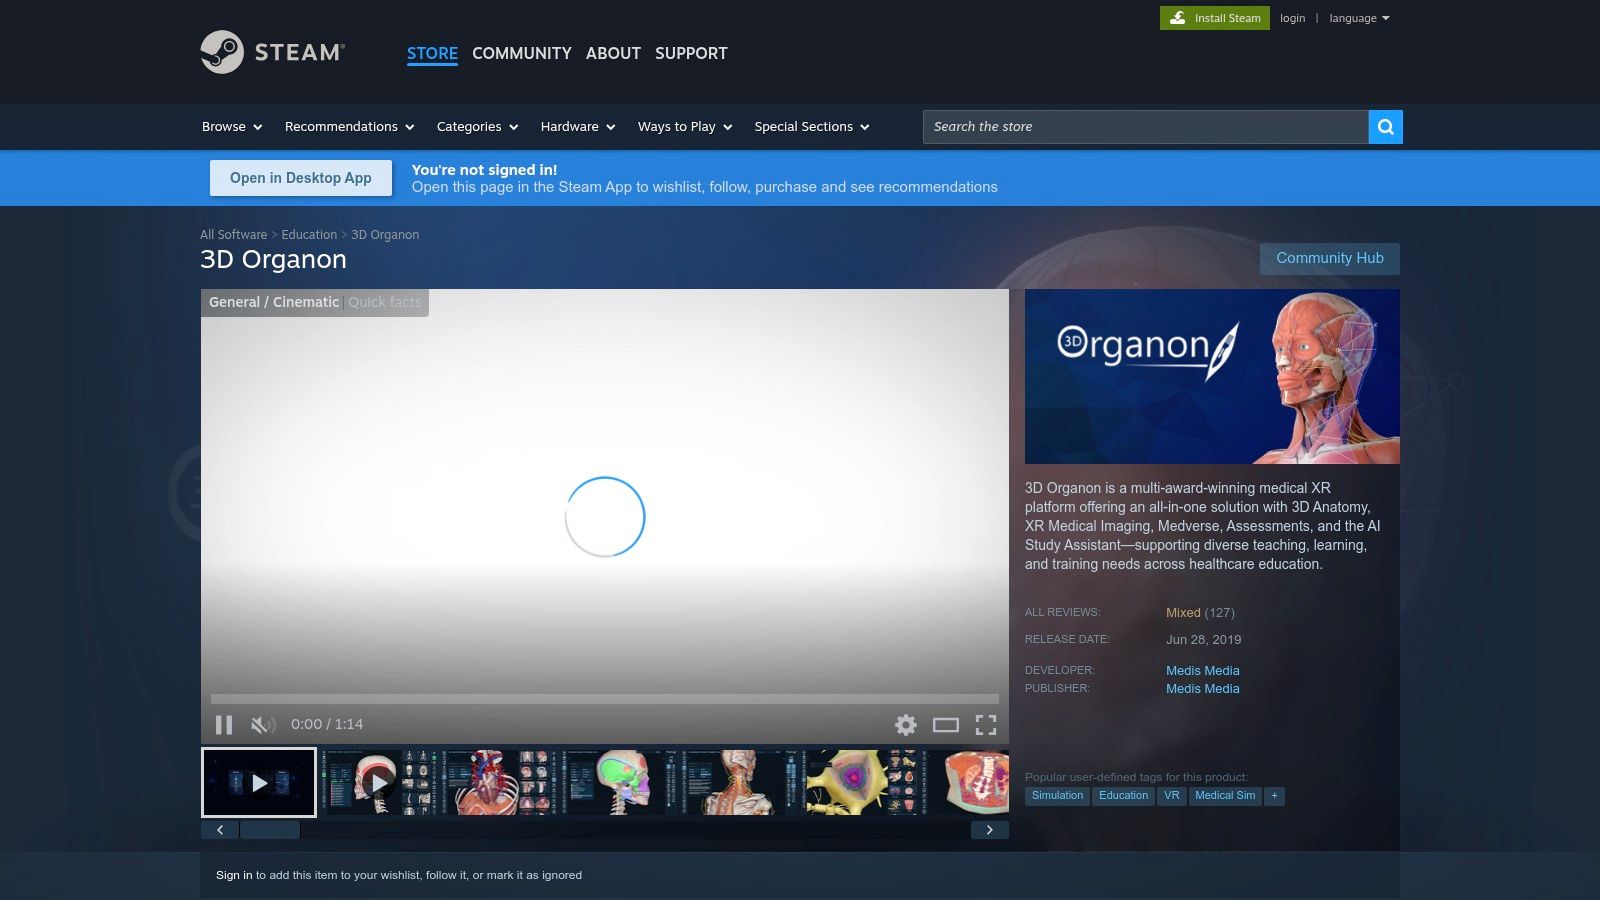
    What makes the Steam version compelling is its "try before you buy" model. The Guest Mode grants two hours of full access, letting you explore every feature before committing. After that, it reverts to a limited free version. This low-friction approach, combined with Steam’s straightforward purchase, update, and refund policies, makes it an excellent, hassle-free way to test a powerful 3D anatomy app.

    Key Info & User Experience

    Feature Details
    Best For PC/Mac users, VR enthusiasts, and anyone wanting a low-risk trial via Steam.
    Pricing Free Guest Mode with 2 hours full access. Paid subscriptions/editions available to unlock permanent full features.
    Standout Feature Seamless integration with the Steam ecosystem for easy installation, updates, and VR support.

    The user experience leverages the strengths of the Steam platform, though navigating the different editions and their features can sometimes be confusing. The mixed user reviews often reflect this, as expectations can vary. However, for a convenient and powerful desktop-based anatomical tool, the Steam version of 3D Organon is a strong contender that’s incredibly easy to get started with.

    Website: https://store.steampowered.com/app/1099550/3D_Organon/

    9. Anatomy.app (by Anatomy Next)

    For those who want to jump straight into learning without downloads or installations, Anatomy.app offers a sleek, browser-based solution. This 3D anatomy app is built for speed and accessibility, delivering a comprehensive learning experience directly through your web browser. It’s the perfect tool for quick study sessions, exam prep on the go, or anyone who prefers a lightweight, no-fuss approach to anatomical exploration.

    Anatomy.app (by Anatomy Next)

    What sets it apart is its focus on structured learning paths and progress tracking. Instead of just giving you a model to explore, it guides you through topics with an encyclopedia and tests your knowledge with integrated quizzes. This makes it feel less like a sandbox and more like a dedicated study partner, keeping you on track to master complex subjects.

    Key Info & User Experience

    Feature Details
    Best For Students and learners who need a fast, web-accessible tool with built-in study aids.
    Pricing Subscription-based for full access to the content library. A free version with limited models is available.
    Standout Feature Its purely web-based platform means instant access on any device with a modern browser, no app installation needed.

    The user experience is clean and intuitive, designed to minimize friction so you can focus on learning. While it might lack the sheer depth of some native desktop applications, its convenience is a major win. The full library is behind a paywall, but the free preview is generous enough to see if its streamlined, goal-oriented approach is right for you.

    Website: https://anatomy.app/

    10. Anatomyka

    Anatomyka steps in as the pragmatic choice for individuals who want a solid 3D anatomy app without being locked into a single ecosystem. Its biggest selling point is a "buy once, use everywhere" philosophy. A single license covers your desktop (Windows/macOS) and mobile devices (iOS/Android), which is a refreshing approach compared to the platform-specific subscriptions that dominate the market. It’s perfect for the student who studies on a laptop but needs to review on their phone while on the go.

    Anatomyka

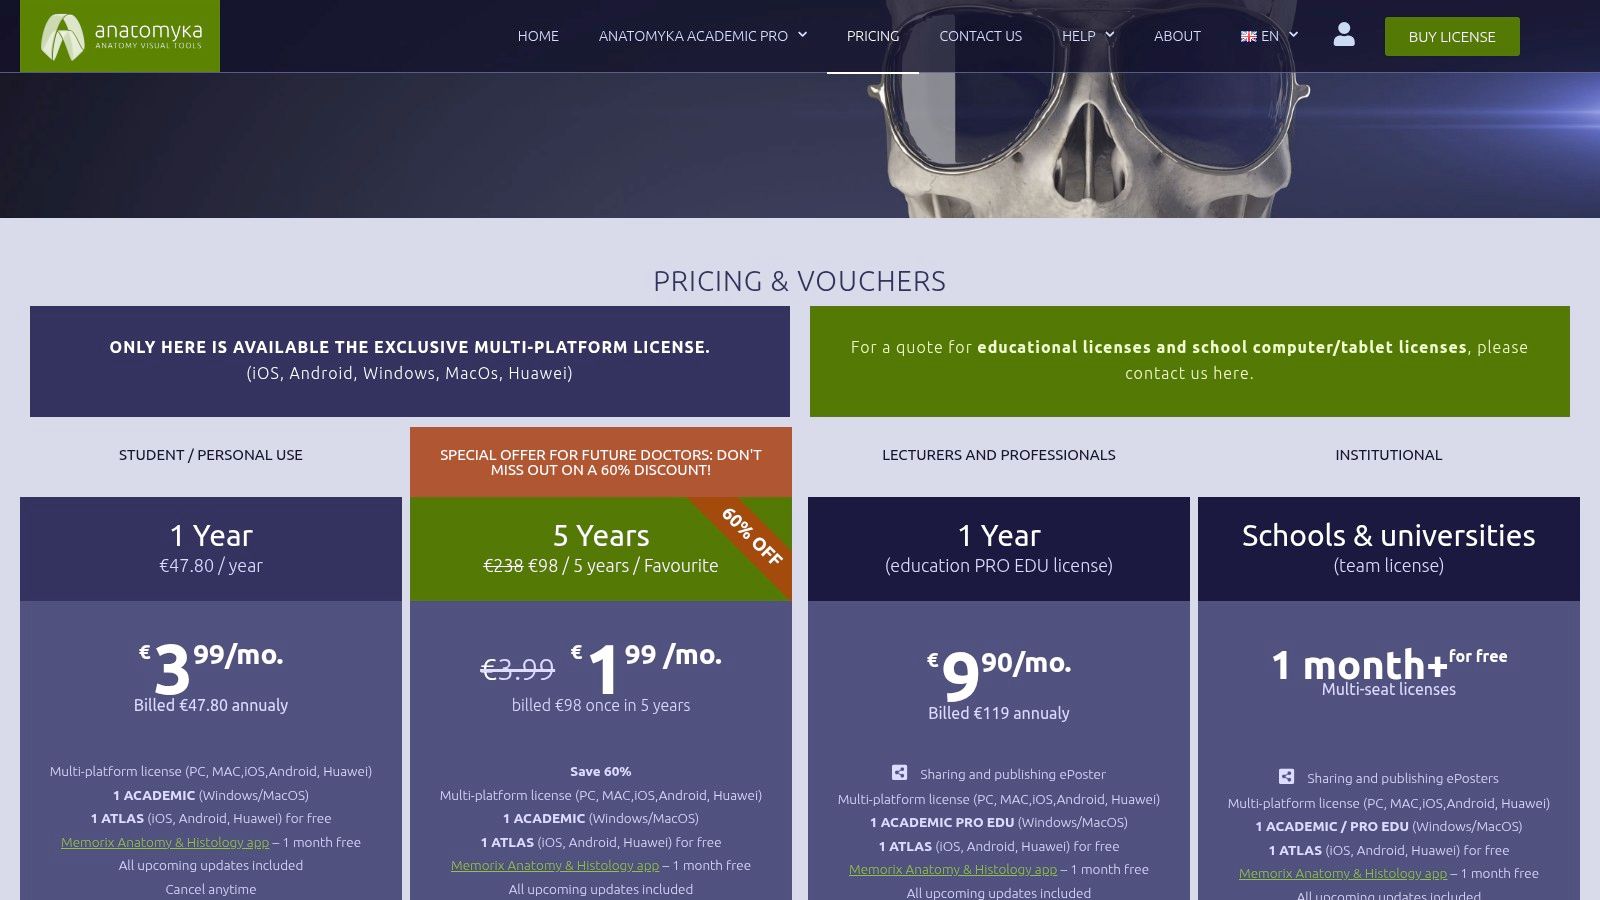
    This platform provides a comprehensive set of models and supplementary resources like anatomical posters, making it a viable tool for both personal study and educational presentations. While it may not have the massive institutional backing of an Elsevier, it delivers core functionality effectively and offers excellent value, especially through its multi-year personal plans.

    Key Info & User Experience

    Feature Details
    Best For Students and professionals who want one license for all their devices.
    Pricing One-time or multi-year licenses for students and professionals. Pricing is listed in EUR.
    Standout Feature Cross-platform license covers desktop and mobile with a single purchase.

    The user experience is straightforward, focusing on easy access to its library of models without too much complexity. The interface is clean, allowing you to get right into exploring anatomical structures. Its smaller brand footprint means it's less of a household name, but for users prioritizing convenience and cost-effectiveness over a sprawling ecosystem, Anatomyka is a strong contender.

    Website: https://www.anatomyka.com/pricing/

    11. Anatomy 3D Atlas (Catfish Animation Studio)

    For those who cringe at the thought of another monthly subscription, Anatomy 3D Atlas offers a refreshing alternative. This straightforward 3D anatomy app from Catfish Animation Studio focuses on a one-and-done purchase model. You get a highly detailed atlas with a perpetual license, making it a great budget-friendly choice for students and enthusiasts who want long-term access without recurring fees.

    Anatomy 3D Atlas (Catfish Animation Studio)

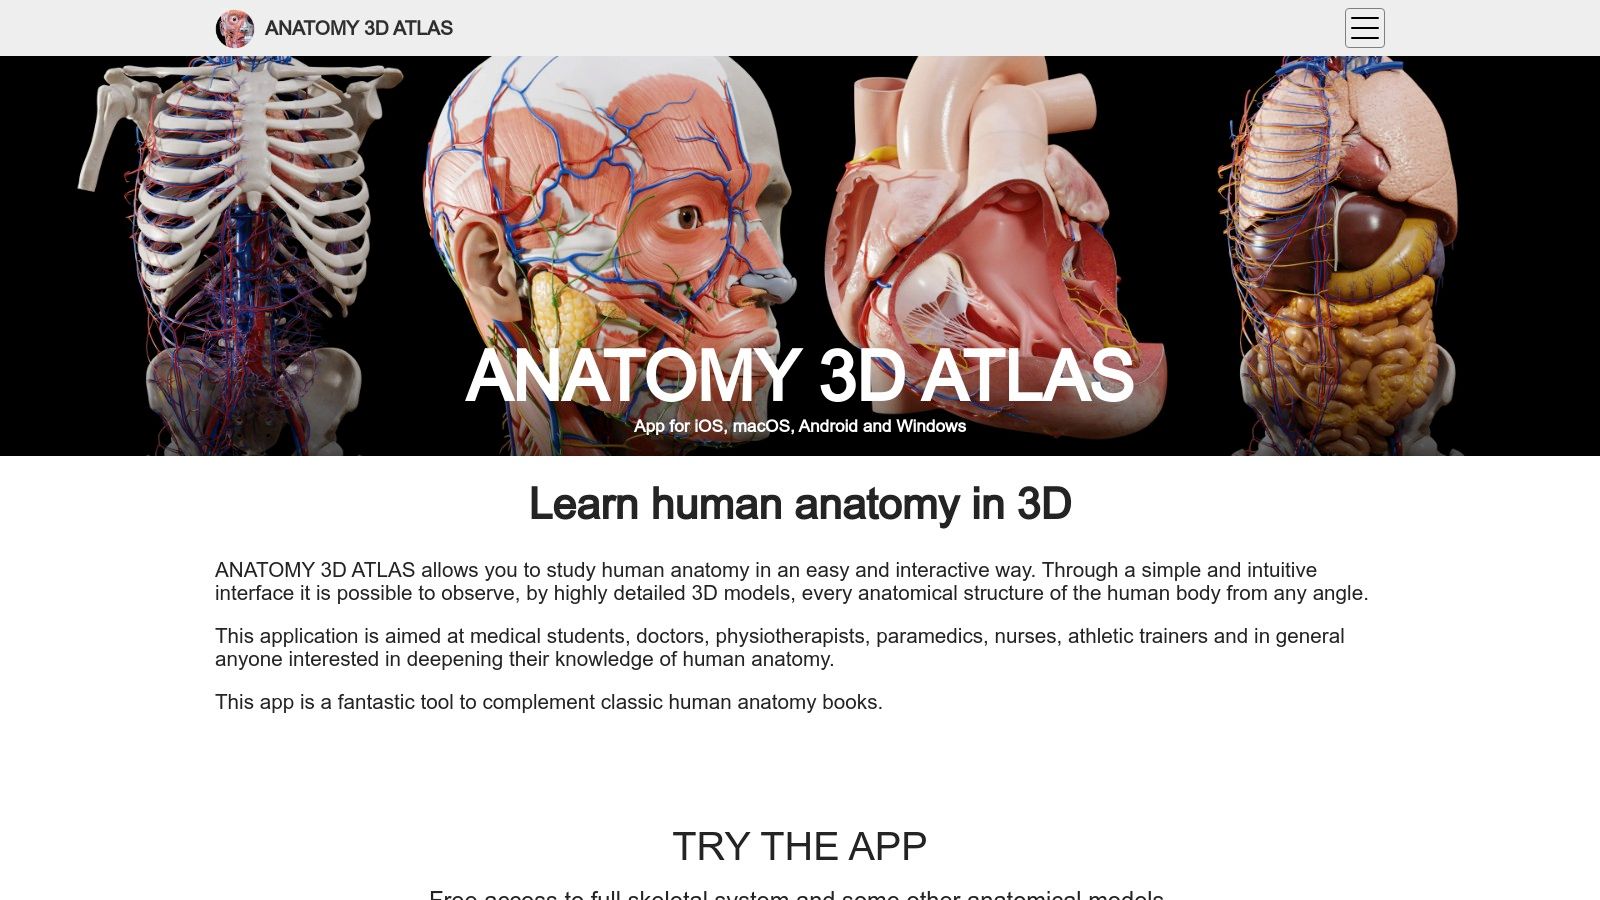
    Its strength lies in simplicity and accessibility. The interface is clean and intuitive, making it easy to isolate, hide, or fade structures to understand their relationships. With support across iOS, macOS, Android, and Windows, it’s a versatile tool you can access on nearly any device. The free version, which includes the complete skeletal system, provides a generous trial to see if its workflow fits your needs before you commit.

    Key Info & User Experience

    Feature Details
    Best For Students and independent learners seeking a subscription-free, multi-platform atlas.
    Pricing Free version with a full skeletal system; one-time in-app purchases unlock full content.
    Standout Feature A perpetual license model that avoids recurring subscription costs.

    The user experience is smooth and focused on core anatomical exploration without the bells and whistles of larger enterprise platforms. While it may lack the extensive video libraries or curriculum integration of its pricier competitors, its high-quality models and easy-to-use controls make it a solid and reliable reference tool. It’s a prime example of a focused, effective 3D anatomy app that prioritizes user ownership.

    Website: https://anatomy3datlas.com/

    12. ZygoteBody (web app)

    If you need a solid 3D anatomy app without the commitment of a download, ZygoteBody is your go-to browser-based solution. It offers a surprisingly robust experience right from your web browser, making it perfect for quick study sessions, patient education, or embedding anatomical views into a presentation without any software installation. It's the "grab and go" option for anatomical exploration.

    ZygoteBody (web app)

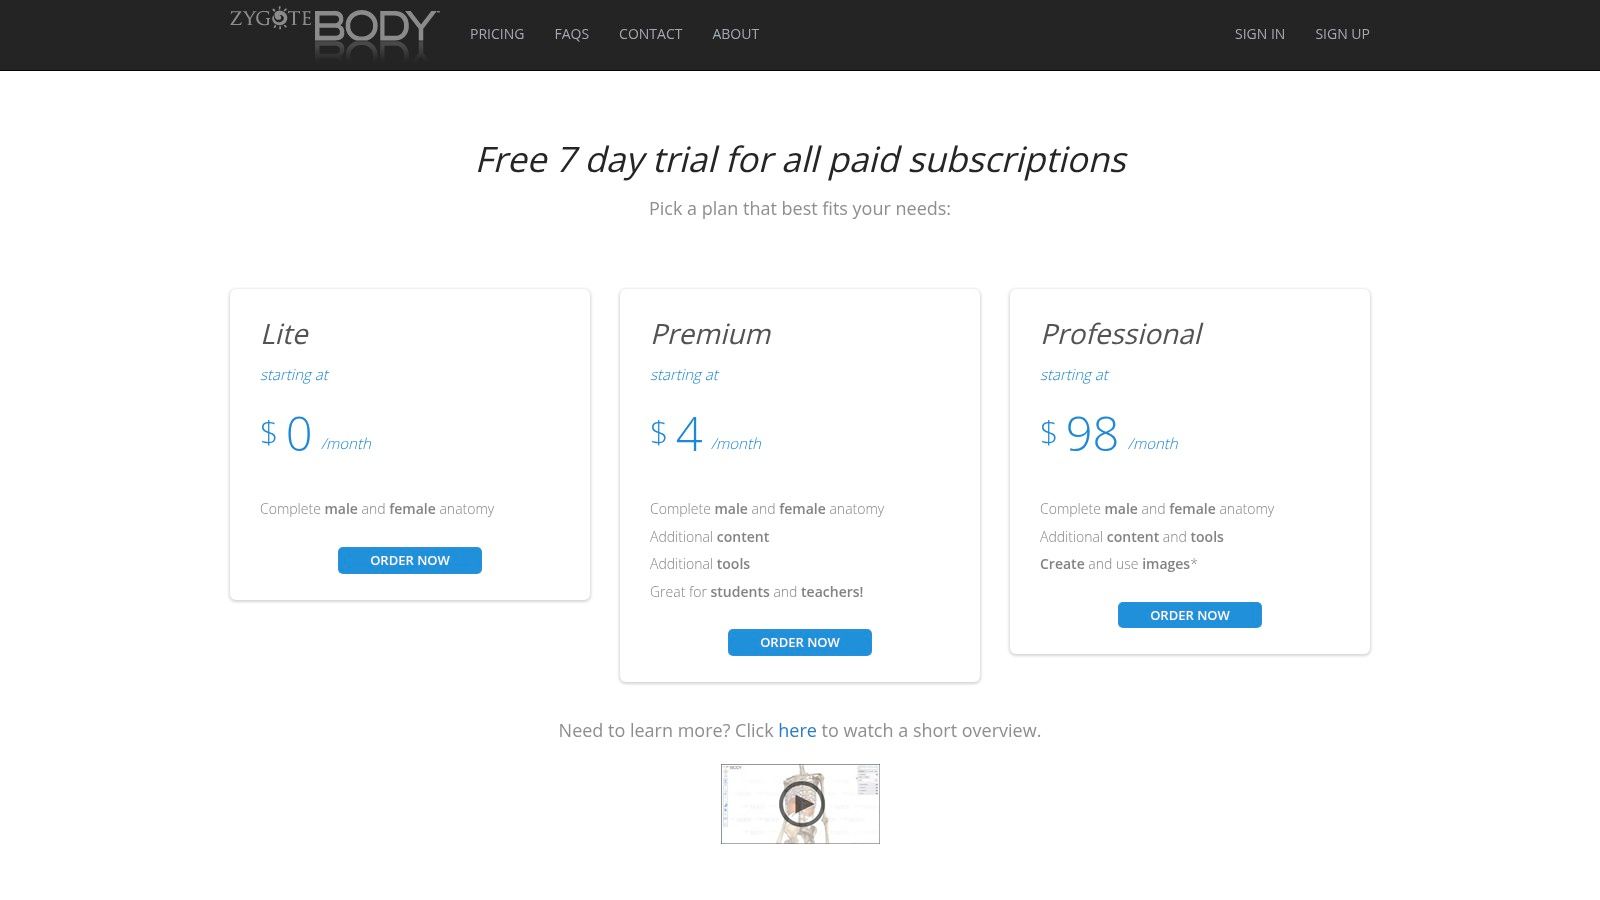
    What makes it stand out is its accessibility and tiered approach. The free Lite version is great for basic layer-by-layer discovery, but the paid tiers unlock powerful features like slicing, exploded views, and the ability to save and annotate scenes. This makes it a scalable tool that can grow with your needs, from casual browsing to serious academic or professional use.

    Key Info & User Experience

    Feature Details
    Best For Students and educators wanting quick, no-install access; professionals needing to create teaching scenes.
    Pricing Free Lite version; affordable Premium and Professional monthly/annual subscriptions with a 7-day trial.
    Standout Feature Fully browser-based functionality, eliminating the need for downloads and allowing for easy access on any modern device.

    The user experience is straightforward and intuitive, prioritizing speed and simplicity over the exhaustive feature sets of its heavyweight competitors. While the content library isn't as vast as some others, and advanced image exports are locked behind higher-priced tiers, its low barrier to entry and hassle-free access make it a valuable resource for instant anatomical visualization.

    Website: https://www.zygotebody.com/pricing

    Top 12 3D Anatomy Apps — Features & Platform Comparison

    Product ✨ Key features ★ Quality 💰 Pricing 👥 Target audience 🏆 Standout/USP
    Complete Anatomy (Elsevier) ✨ High-detail male/female 3D models, courses, AR, clinical videos ★★★★☆ 💰 Subscription (tiered; institutional pricing) 👥 Students, educators, clinicians, institutions 🏆 Elsevier content & deep courseware
    Complete Anatomy (iPhone/iPad) ✨ Full models, 700+ atlas screens, AR, iOS integrations ★★★★☆ 💰 Free download; in‑app subscription (3‑day trial) 👥 Apple users wanting quick trial & mobile use 🏆 Seamless App Store purchase & device restore
    Visible Body – Human Anatomy Atlas ✨ Gross anatomy, AR dissections, muscle/bone actions ★★★★☆ 💰 One-time purchase (core atlas); add‑ons extra 👥 Students & clinicians preferring pay‑once 🏆 Perpetual purchase option; VisionOS support
    Visible Body Suite ✨ Multi-title 3D library (anatomy, physiology, microanatomy) ★★★★☆ 💰 Subscription bundle (all titles) 👥 Multi-course students, educators, institutions 🏆 All-in-one access across Visible Body titles
    BioDigital Human (official) ✨ 1,000+ interactive models, authoring, web embed, mobile apps ★★★★☆ 💰 Free tier → Personal Plus / enterprise plans 👥 Educators, enterprises, clinicians 🏆 Generous free tier + authoring & publishing tools
    BioDigital – iOS App Store ✨ Sync with web account, offline saved models, mobile access ★★★★☆ 💰 Free app; in‑app upgrade to Personal Plus (annual) 👥 Mobile learners needing offline & sync 🏆 Low-cost unlimited views via Personal Plus
    3D Organon (official store) ✨ 17,000+ structures, DICOM/XR support, quizzes, multi-user ★★★★☆ 💰 License tiers (student, pro, XR); higher price 👥 VR classrooms, labs, immersive anatomy users 🏆 Deep XR feature set for VR education
    3D Organon on Steam ✨ Guest 2‑hr access, PC VR & flat-screen, multi-language ★★★★☆ 💰 Free-to-play guest; paid editions/subscriptions on Steam 👥 PC & VR users who want easy trials 🏆 Low-friction Steam trial & easy refunds/updates
    Anatomy.app (Anatomy Next) ✨ Browser-based 3D models, quizzes, progress tracking ★★★☆☆ 💰 Subscription for full library (web-first) 👥 Students prepping for exams; web users 🏆 Fast no-install experience with study tracking
    Anatomyka ✨ Multi-platform license (desktop + mobile), teaching resources ★★★☆☆ 💰 One-license multi-year options (EUR pricing) 👥 Users wanting cross-platform single-license 🏆 One license spans devices; value bundles
    Anatomy 3D Atlas (Catfish) ✨ High-detail models, multiselect, free skeletal tier ★★★☆☆ 💰 Perpetual license; in‑app purchases to unlock content 👥 Budget-conscious buyers wanting pay-once 🏆 Perpetual pay-once across major OSes
    ZygoteBody (web app) ✨ Layer reveal, slicing, scene save, annotations (Pro) ★★★☆☆ 💰 Free Lite; low-cost Premium; Pro higher tiers (7‑day trial) 👥 Teachers, quick visualizers, small teams 🏆 Low entry price + browser convenience

    Supercharge Your Anatomy Visuals with AI

    And there you have it, a whirlwind tour through the digital cadaver lab of the 21st century. We've dissected everything from the academic powerhouse of Complete Anatomy to the developer-friendly API of BioDigital Human and the immersive VR experience of 3D Organon. It's clear that the perfect 3D anatomy app isn't a one-size-fits-all solution; it's a highly personal choice that hinges on your specific mission.

    Whether you're a medical student cramming for finals, an educator crafting an engaging curriculum, or a developer building the next groundbreaking health-tech platform, your journey starts with identifying your core need. Are you after encyclopedic detail, interactive quizzing, or a flexible API to build upon?

    Your Roadmap to Choosing the Right App

    Making the final call can feel like performing delicate surgery, so here’s a quick-start guide to simplify your decision:

    • For the Dedicated Student or Clinician: If you need exhaustive detail, clinical correlations, and a tool that can grow with you from M1 to residency, Complete Anatomy or Visible Body's Human Anatomy Atlas are your gold-standard companions. They are the comprehensive textbooks of the app world.
    • For the Innovative Educator: To bring anatomy to life in the classroom, look towards BioDigital Human for its embeddable models and shareable content, or 3D Organon for its jaw-dropping VR capabilities that can captivate an entire lecture hall.
    • For the Health-Tech Developer: If you're building an application, the choice is clear. BioDigital Human's API offers the most robust and documented path to integrating high-quality 3D models directly into your product. For teams needing foundational models to build from, ZygoteBody provides a fantastic, accessible starting point.

    From Model to Masterpiece: The Visual Bottleneck

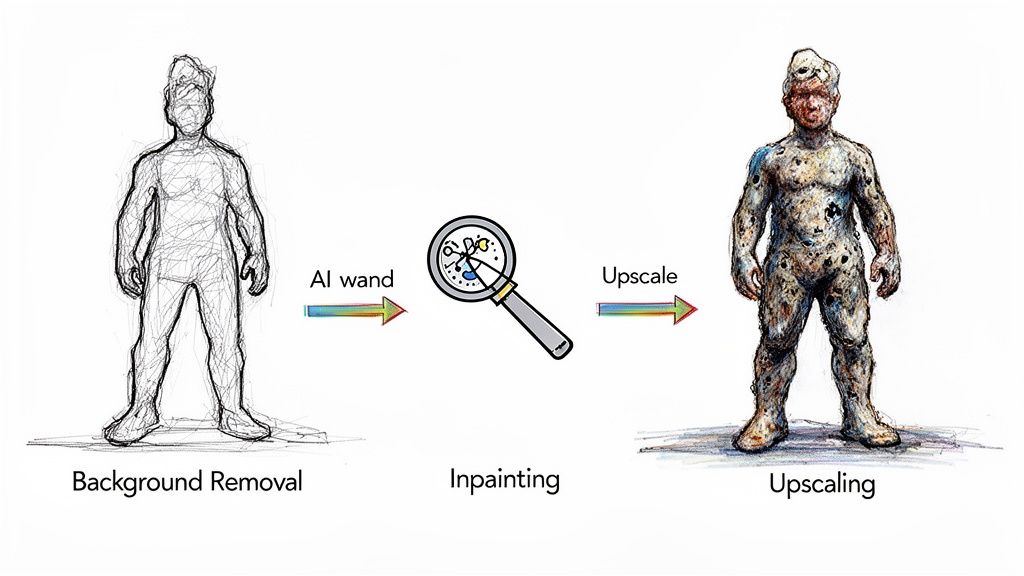
    No matter which 3D anatomy app you choose, you'll eventually face a universal challenge: turning those incredible 3D exports and screenshots into polished, professional assets. Manually cleaning up backgrounds, sharpening details for a presentation, or applying a consistent visual style across hundreds of images is a notorious time-sink. It’s tedious, repetitive work that pulls your focus from what truly matters, which is educating and innovating.

    This is where automation becomes your superpower. Instead of spending hours in Photoshop, imagine an API that does the heavy lifting for you. When considering how to enhance the creation and visualization of anatomical structures, exploring the latest advancements in technology is key, including the best AI tools for 3D modeling that can complement your existing workflow. By automating the post-production process, you free up invaluable time to focus on creating more impactful content.

    The future of anatomical education and app development is not just about having the most detailed models, it's about presenting them with clarity, consistency, and professional polish. Your visuals are the final handshake with your audience, so make them count.


    Ready to stop wasting time on manual image editing and start producing stunning anatomical visuals at scale? PixelPanda provides a powerful API to automate background removal, upscaling, and other essential enhancements for your app's content. Try PixelPanda today and revolutionize your visual workflow.

  • The Ultimate 2025 Guide: 12 Best 3D PDF Viewer Tools Reviewed

    The Ultimate 2025 Guide: 12 Best 3D PDF Viewer Tools Reviewed

    Remember when PDFs were just flat, boring documents? Static text, maybe a grainy image if you were lucky. Those days are over. Today's technical docs, from complex engineering schematics to architectural blueprints, are bursting into the third dimension. But there's a catch: your standard PDF reader, the one you use for invoices and ebooks, might just throw its hands up in defeat when faced with an interactive 3D model. It simply wasn't built for that.

    A specialized 3D PDF viewer isn't just a 'nice-to-have'; it's the essential bridge between a complex CAD model and a universally accessible, interactive document. This guide isn't another tedious feature list. We're diving deep into the 12 best tools that actually get the job done, highlighting the unsung heroes and calling out the frustrating limitations. To truly grasp the capabilities of modern document handling, it's insightful to consider how 3D PDF viewers fit into the broader category of top PDF analyzer tools, which handle complex data extraction and structure analysis.

    We'll help you pick the right viewer for your team's workflow, whether you're a developer embedding a viewer in your app or an engineer sharing a design with a non-technical client. Forget the marketing fluff; get ready for direct links, screenshots, and an honest look at what works.

    1. Adobe Acrobat Reader / Acrobat Pro

    Let's start with the OG, the heavyweight champion of the PDF world: Adobe Acrobat. When it comes to being a reliable 3D PDF viewer, Acrobat is the de facto standard. It’s the reference implementation against which all others are measured, offering native support for both PRC and U3D formats. Think of it as the friendly, slightly corporate bouncer at the door of 3D content; it’s built to handle everything, but it has some rules you need to follow first.

    Adobe Acrobat Reader / Acrobat Pro

    The biggest "gotcha" for new users is that 3D content is disabled by default for security reasons. A user must manually enable it in the preferences, which can be a hurdle for less technical stakeholders. Once enabled, however, the experience is seamless, with a dedicated 3D toolbar for manipulating models. While Adobe Acrobat remains a dominant player in PDF handling, many users explore other options. For those interested, you can find a broader comparison of Adobe Acrobat Reader alternatives.

    Key Features & User Experience

    For enterprise teams, the real power lies in Acrobat Pro's security controls and documentation, allowing IT departments to manage 3D enablement via policy keys. This makes it a trusted choice for large organizations. However, some users on newer Apple Silicon hardware have reported rendering glitches, sometimes requiring a switch to the Rosetta 2 compatibility layer.

    • Pros: The most compatible desktop viewer; strong enterprise security controls.
    • Cons: 3D is disabled by default; potential compatibility issues on Apple Silicon.

    Acrobat Reader is free, while the more powerful Acrobat Pro requires a subscription. You can find out more about the pricing options for Acrobat Pro on Adobe's site.

    Website: https://www.adobe.com/acrobat

    2. Foxit PDF Reader / Foxit PDF Editor

    If Adobe is the heavyweight champion, Foxit is the scrappy, lightweight contender that packs a surprising punch. For years, Foxit has been the go-to alternative for users seeking a faster, less resource-intensive PDF experience. As a 3D PDF viewer, it holds its own with built-in support for both PRC and U3D formats, making it a highly capable and often preferred choice for engineers and designers who want performance without the bloat. It's the nimble tool you grab when you just need to get the job done quickly.

    Foxit PDF Reader / Foxit PDF Editor

    Unlike Adobe, Foxit's 3D features are generally enabled out of the box, removing a significant barrier for sharing interactive models with non-technical clients. The real magic, however, lies in its cross-platform consistency. Foxit's mobile apps are particularly impressive, allowing for smooth multitouch navigation of 3D windows on a phone or tablet, a feature that feels both intuitive and powerful for on-the-go reviews.

    Key Features & User Experience

    The Foxit PDF Editor (specifically the Pro version) goes beyond just viewing by allowing users to directly insert 3D models into a PDF and work with 3D annotations. This makes it a complete workflow tool for creating and consuming technical documentation. While enterprise deployment options are available, some system administrators have noted frustrations with recent installer packaging and licensing changes. Its deprecation of Linux support is also a drawback for some development teams.

    • Pros: Lightweight and fast; strong cross-platform support with excellent mobile 3D navigation.
    • Cons: Deprecated Linux support; installer and licensing changes can be complex for IT.

    Foxit PDF Reader is free, while the advanced Foxit PDF Editor is available through subscription or perpetual license.

    Website: https://www.foxit.com/pdf-editor/addons.html?utm_source=openai

    3. PDF‑XChange Editor (Tracker Software)

    For Windows users seeking a lightweight yet surprisingly powerful alternative, PDF‑XChange Editor from Tracker Software is a serious contender. It’s known for being lean, fast, and packed with features, including a capable 3D PDF viewer. While it only supports the U3D format (lacking PRC support), its performance is zippy, making it a favorite for users who prioritize speed over universal compatibility. It's the speedy hot-hatch in a world of enterprise sedans.

    PDF‑XChange Editor (Tracker Software)

    This editor gives technical users a high degree of control over the 3D viewing experience. Unlike some viewers that offer a one-size-fits-all approach, PDF-XChange lets you dive into detailed rendering preferences, including anti-aliasing settings, axis display, and even the choice of rendering engine. This granularity is a huge plus for engineers who need to inspect models with specific visual settings.

    Key Features & User Experience

    The user experience is geared toward power users who appreciate having every tool at their fingertips. The 3D controls are integrated directly into the interface, allowing for quick manipulation of models without digging through menus. One of its most appealing aspects is its perpetual licensing model, a refreshing change from the subscription-heavy market. It's an excellent choice for individuals or teams on Windows who work primarily with U3D files and want a fast, affordable, and customizable tool.

    • Pros: Fast and resource-friendly editor with granular 3D controls; perpetual licensing options.
    • Cons: Limited to U3D embedded content; Windows-only platform.

    PDF-XChange Editor offers a free version with basic features, while the Pro version with advanced editing and 3D capabilities is available for a one-time purchase.

    Website: https://tracker-software.com/product/pdf-xchange-editor

    4. Bluebeam Revu

    If Adobe is the corporate standard, Bluebeam Revu is the hard-hat-wearing, blueprint-wielding specialist from the construction site. Designed specifically for the Architecture, Engineering, and Construction (AEC) industry, Revu isn't just a 3D PDF viewer; it's a project collaboration powerhouse. It integrates 3D PDF viewing directly into the markup, review, and documentation workflows that AEC professionals rely on, making it a purpose-built tool rather than a generic one.

    Bluebeam Revu

    The platform shines with its direct CAD plug-ins for tools like Revit and Navisworks, allowing teams to publish rich 3D PDFs with a complete model tree. This means stakeholders on-site can section, isolate, and inspect parts of a complex model within a single PDF file, right alongside their 2D plans and markups. It’s all about bringing complex BIM data into an accessible, universal format for everyone on the project team.

    Key Features & User Experience

    Revu's strength lies in its ecosystem. The ability to drag-and-drop U3D or IFC files to create 3D PDFs simplifies the workflow immensely. However, it's a decidedly Windows-centric world, and many of the powerful 3D creation features are reserved for its mid-tier and high-tier subscription plans. For AEC teams already invested in a PDF-based review process, it’s an indispensable asset for integrating 3D models.

    • Pros: Tailor-made for construction workflows; excellent markup and review integration.
    • Cons: Windows-centric desktop app; core 3D creation features require pricier plans.

    Bluebeam offers several subscription tiers, with pricing detailed on their website. The cost reflects its status as a professional-grade industry tool.

    Website: https://www.bluebeam.com/pricing/?utm_source=openai

    5. Tetra4D Reviewer (Tech Soft 3D)

    Moving into the industrial-strength category, Tetra4D Reviewer is a specialized, high-fidelity 3D PDF viewer built for engineers who live and breathe CAD data. This isn't your average document viewer; it's a powerful tool designed to handle complex native CAD files from over 20 formats like CATIA, NX, and Creo. Think of it as a universal translator for 3D engineering data, letting non-CAD users dive deep into assemblies without needing an expensive software license.

    Tetra4D Reviewer (Tech Soft 3D)

    The main "gotcha" here is that you can't just buy the Reviewer by itself. It comes bundled with the Tetra4D Converter or Enrich tools, which are focused on creating and augmenting 3D PDFs. This makes it part of a larger workflow solution for technical data packages rather than a standalone freebie. For teams deeply invested in the Model-Based Definition (MBD) ecosystem, its ability to perfectly display Product Manufacturing Information (PMI) is a massive win.

    Key Features & User Experience

    The user experience is geared toward technical inspection, not casual viewing. Its strength lies in providing precise measurement, model comparison, and the ability to export to neutral formats like STEP. This makes it indispensable for quality control, supplier collaboration, and design review cycles where accuracy is non-negotiable. However, its Windows-only limitation might be a deal-breaker for teams on Mac or Linux.

    • Pros: High-fidelity visualization of major CAD formats; deep support for PMI data.
    • Cons: Not sold separately (bundled with other Tetra4D products); Windows-only.

    Tetra4D's tools are commercial products, and you'll need to contact them for pricing as it's part of a larger enterprise solution.

    Website: https://tetra4d.com/tetra-4d-reviewer/?utm_source=openai

    6. Tetra4D Enrich + Converter

    If Adobe Acrobat is the venue, Tetra4D provides the VIP event planning service. Tetra4D's tools, Enrich and Converter, don't function as a standalone 3D PDF viewer but rather as powerful authoring plugins for Acrobat Pro. They are designed for one specific, crucial task: transforming complex, native CAD files into interactive, data-rich 3D PDFs that anyone with Adobe Reader can open and understand. Think of it as the ultimate translation tool, bridging the gap between highly technical engineering data and the rest of the enterprise.

    Tetra4D Enrich + Converter

    The workflow is straightforward: Converter ingests a wide array of native CAD formats, preserving vital Product Manufacturing Information (PMI), and then Enrich allows you to build interactive documents inside Acrobat Pro. You can create templates, link bill of materials (BOM) data, and essentially build a mini-application within a PDF. This approach empowers non-CAD users to access and interact with complex 3D models for things like work instructions or parts catalogs.

    Key Features & User Experience

    The real magic of Tetra4D is its template-driven approach, which allows companies to standardize how they present 3D data. This ensures consistency and makes the creation process accessible even to non-engineers. It's an enterprise-grade solution that requires a Windows environment and licensing on top of Acrobat Pro, which makes it a specialized tool. Developers looking to automate similar data-rich visual generation might want to explore APIs that can handle complex asset pipelines.

    • Pros: Makes interactive 3D PDFs accessible to non-CAD stakeholders; enterprise-friendly templates and data binding options.
    • Cons: Windows and Acrobat-centric workflow; requires additional licensing beyond Acrobat Pro.

    Tetra4D’s products are commercial and require a purchase or subscription, with pricing available upon request from their sales team.

    Website: https://tetra4d.com/tetra4d-enrich/?utm_source=openai

    7. 3D PDF Reader (Tech Soft 3D) — iOS/iPadOS

    Taking your designs on the road? The 3D PDF Reader by Tech Soft 3D is a purpose-built mobile app designed to bring complex models to your iPhone or iPad. It’s the field technician’s best friend, offering a competent 3D PDF viewer experience for on-the-go access without lugging a laptop around. This app focuses on delivering core 3D PDF functionalities, supporting both PRC and U3D, plus a few direct CAD formats for good measure.

    3D PDF Reader (Tech Soft 3D) — iOS/iPadOS

    It allows users to open files directly from email or cloud storage services like Dropbox, making it practical for reviewing technical data sheets or assembly instructions in the field. The experience is tailored for touch, with standard rotate, pan, and zoom gestures, alongside essential inspection tools like section cuts and part isolation. It's a niche tool, but for teams needing mobile 3D PDF access on Apple devices, it gets the job done.

    Key Features & User Experience

    The app’s strength lies in its PRC fidelity, providing a surprisingly accurate representation of models on mobile hardware. However, it's not without its drawbacks. The app hasn't seen frequent updates, and its App Store ratings reflect some user concerns about stability. Performance on exceptionally large or complex models may also lag compared to a dedicated desktop viewer, which is a common trade-off for mobile convenience.

    • Pros: Strong PRC rendering on mobile; great for field reviews when a desktop isn't an option.
    • Cons: Limited recent updates; performance can struggle with very large models.

    The app is available for free on the iOS App Store.

    Website: https://apps.apple.com/us/app/3d-pdf-reader/id569307672

    8. Aspose 3D — Free Online 3D PDF Viewer

    For those moments when you need a quick, no-install solution, Aspose offers a completely free, browser-based 3D PDF viewer. Think of it as the disposable camera of 3D viewers; it's perfect for a quick peek at a file without the commitment of a software download. You simply drag and drop your 3D PDF into the web page, and it renders the model right in your browser, making it incredibly accessible for quick sanity checks or sharing with non-technical users.

    Aspose 3D — Free Online 3D PDF Viewer

    This approach is platform-agnostic, working equally well on Windows, macOS, Linux, and even mobile browsers. The trade-off, however, is that it requires an internet connection and you must upload your file to their servers. While Aspose states files are deleted after a few hours, this might be a deal-breaker for proprietary or sensitive intellectual property.

    Key Features & User Experience

    The user experience is dead simple, focusing entirely on its core function: viewing. There are no complex toolbars or hidden settings. It’s an ideal tool for quickly confirming that a 3D PDF was generated correctly or for showing a model to a client on a device without any dedicated software installed. It also supports viewing raw 3D formats like U3D directly.

    • Pros: No installation needed; truly cross-platform on any modern browser.
    • Cons: Requires file upload, raising privacy concerns for sensitive models.

    The Aspose 3D viewer is completely free for this online use case. For developers, Aspose also offers a powerful suite of APIs for building similar functionality into your own applications.

    Website: https://products.aspose.app/3d/viewer/pdf?utm_source=openai

    9. Bluebeam Revu Support — 3D PDF How‑to and Compatibility

    While not a standalone 3D PDF viewer itself, Bluebeam's support hub is an indispensable resource for any AEC (Architecture, Engineering, and Construction) team that uses Revu. Think of it as the ultimate instruction manual for building 3D PDF workflows. It provides detailed, step-by-step guides on creating and manipulating 3D models within the Bluebeam ecosystem, ensuring your team isn't just fumbling around in the dark. It’s less about viewing and more about doing.

    Bluebeam Revu Support — 3D PDF How‑to and Compatibility

    This knowledge base is crucial for project managers and IT admins trying to wrangle complex software toolchains. It offers meticulously maintained compatibility matrices, detailing which versions of Revu plugins work with specific releases of Revit, Navisworks, and AutoCAD. This information is gold for preventing workflow-breaking updates and ensuring a smooth pipeline from design to documentation.

    Key Features & User Experience

    The guides are practical and workflow-oriented, covering everything from inserting a 3D model to navigating its intricate model tree and adding markups. This practical focus helps teams maximize their investment in the Bluebeam Revu software. However, remember that all the powerful creation and markup features discussed require the correct subscription plan of Revu, as this site is purely instructional.

    • Pros: Clear documentation reduces team trial-and-error; helps admins ensure toolchain compatibility.
    • Cons: Creation features discussed require a specific Revu plan; docs are instructional only, not the product itself.

    Access to the support content is free, but the Revu software it supports requires a paid subscription.

    Website: https://support.bluebeam.com/articles/revu-create-3d-pdfs/?utm_source=openai

    10. 3D‑Tool (3D‑Tool GmbH)

    While not a standalone 3D PDF viewer in the traditional sense, 3D‑Tool carves out its niche as a powerful CAD viewer and converter that creates interactive 3D PDFs. Think of it as the friendly factory that takes your complex CAD files (like STEP, CATIA, or SolidWorks) and packages them into neat, universally accessible 3D PDF documents. Its primary job is to bridge the gap between heavy engineering files and the stakeholders who just need to view and comment on them.

    3D‑Tool (3D‑Tool GmbH)

    The workflow is straightforward: import your native CAD model, use 3D-Tool’s measurement, sectioning, or exploded view features, and then publish it as a 3D PDF. This makes it an indispensable part of the toolchain for engineers who need to distribute designs without forcing recipients to install specialized software. The platform provides a valuable service by preparing complex data for consumption, which you can explore further in these Pixel Panda AI demonstrations.

    Key Features & User Experience

    3D-Tool is a Windows-only application that focuses heavily on import compatibility, supporting over 20 major CAD formats. Its true value lies in its publishing options, not just creating 3D PDFs but also generating standalone EXE/DDD packages that bundle a free viewer with the model. This is a clever solution for ensuring your audience can open the file with zero friction, even if their PDF reader's 3D capabilities are disabled or problematic.

    • Pros: Excellent CAD format support; straightforward publishing workflow for non-technical recipients.
    • Cons: It's a publisher, not a dedicated viewer; Windows-only platform.

    Several licensing tiers are available, including free trials, making it accessible for teams of different sizes.

    Website: https://www.3d-tool-usa.com/?utm_source=openai

    11. Actify SpinFire

    While most tools on this list are pure viewers, Actify SpinFire is more of a CAD data Swiss Army knife with powerful export capabilities. Think of it as a factory that takes in complex native CAD files (from CATIA, NX, SOLIDWORKS, etc.) and outputs standardized, lightweight 3D PDFs. Its primary role isn't being the final 3D PDF viewer for an end user, but rather the engine that creates the file in the first place, ensuring consistency across an organization.

    Actify SpinFire

    This distinction makes it a critical tool for enterprise workflows. If your goal is to set up an automated pipeline that converts engineering models into 3D PDFs for technical manuals or parts catalogs, SpinFire is a serious contender. It’s built for scale, with batch publishing and modules designed to integrate into larger data management systems.

    Key Features & User Experience

    SpinFire shines in its ability to create PRC or U3D-based 3D PDFs from a huge variety of native CAD inputs. The Quick Publisher modules and integration with SpinFire Manage allow companies to enforce standards, ensuring every exported PDF has the same views, annotations, and metadata. This is less about interactive viewing and more about industrial-strength content creation and management.

    • Pros: Excellent for standardized 3D PDF generation at scale; integrates with centralized libraries and publishing workflows.
    • Cons: Primary value is creation/export, not end-user viewing; licensing and modules are enterprise-oriented.

    SpinFire is a commercial product with pricing and modules tailored to enterprise needs.

    Website: https://spinfire.com

    12. QuadriSpace Publisher3D / Document3D Suite

    Stepping away from pure viewers, QuadriSpace offers a suite of tools focused on creating rich, interactive technical documents from CAD data. Publisher3D and the Document3D Suite are less about being just a 3D PDF viewer and more about being a full-fledged authoring platform. They are designed to help you create template-based, interactive 3D PDFs with detailed model views, callouts, and storyboards for non-CAD audiences like marketing, sales, or manufacturing teams.

    QuadriSpace Publisher3D / Document3D Suite

    The platform’s strength is its multi-format publishing engine. You can create a project once and then output it to raster images, vector illustrations, 3D PDFs, or their proprietary Share3D HTML format for cloud-based distribution. This makes it a powerful content-generation hub for technical communication, ensuring consistency across different media.

    Key Features & User Experience

    QuadriSpace is purpose-built for creating polished technical documentation, not just viewing raw models. It simplifies the process of communicating complex assemblies to stakeholders who don't have access to or knowledge of CAD software. The workflow is streamlined for producing everything from assembly instructions to interactive parts catalogs. However, this is a Windows-centric ecosystem, and pricing is typically available only by quote through resellers.

    • Pros: Excellent for creating polished technical communications; multi-publish to PDF, HTML, and images.
    • Cons: Primarily an authoring tool, not a standalone viewer; Windows-only and pricing isn't transparent.

    You can explore their product suite and request a quote to see if it fits your publishing needs.

    Website: https://www.quadrispace.com/products/publisher3d?utm_source=openai

    Top 12 3D PDF Viewers — Feature Comparison

    Product ✨ Core features ★ Quality / UX 💰 Price / Value 👥 Target audience 🏆 Strength
    Adobe Acrobat Reader / Acrobat Pro ✨ 3D toolbar, PRC/U3D support, 3D PDF authoring (Pro) ★★★★☆ 💰 Free reader / Subscription Pro 👥 Enterprises, publishers, general users 🏆 Broadest compatibility & enterprise controls
    Foxit PDF Reader / Foxit PDF Editor ✨ Built‑in 3D plugin, mobile multitouch, PRC/U3D ★★★★☆ 💰 Free+Pro / Mid‑tier 👥 SMBs, cross‑platform teams, mobile users 🏆 Lightweight alternative with solid mobile support
    PDF‑XChange Editor (Tracker Software) ✨ Granular 3D render prefs, anti‑aliasing, U3D viewer ★★★★ 💰 Perpetual licences / Low‑cost upgrades 👥 Windows power‑users, cost‑sensitive teams 🏆 Fast, resource‑friendly 3D viewing
    Bluebeam Revu ✨ Drag‑drop U3D/IFC, model tree, CAD plugins, sectioning ★★★★☆ 💰 Mid/high‑tier (plans) 👥 AEC teams, construction PMs 🏆 Purpose‑built for AEC markup & workflows
    Tetra4D Reviewer (Tech Soft 3D) ✨ Native CAD reads, PMI, measure/compare, export to STEP ★★★★☆ 💰 Bundled with Converter/Enrich (enterprise) 👥 CAD reviewers, non‑CAD stakeholders 🏆 High‑fidelity CAD visualization without CAD licenses
    Tetra4D Enrich + Converter ✨ Template authoring, BOM/metadata, CAD→3D PDF export ★★★★☆ 💰 Additional licensing (enterprise) 👥 Technical authors, enterprises, publishers 🏆 Rich interactive 3D PDF authoring inside Acrobat
    3D PDF Reader (Tech Soft 3D) — iOS/iPadOS ✨ PRC/U3D + CAD formats, sectioning, cloud load ★★★☆ 💰 Paid app / Low cost 👥 Field engineers, mobile reviewers 🏆 Strong PRC fidelity on iOS for field use
    Aspose 3D — Free Online 3D PDF Viewer ✨ Browser upload/view, supports multiple 3D formats ★★★☆ 💰 Free (web service) 👥 Quick reviewers, cross‑platform users 🏆 No‑install, platform‑agnostic fast checks
    Bluebeam Revu Support — 3D PDF How‑to & Compatibility ✨ Step‑by‑step guides, plugin matrices, training ★★★★ 💰 Free docs (product required) 👥 Admins, AEC implementers 🏆 Clear documentation for planning/compatibility
    3D‑Tool (3D‑Tool GmbH) ✨ Import 20+ CAD formats, publish 3D PDF/EXE packages ★★★★ 💰 Multiple tiers / Trials 👥 Publishers, CAD technicians 🏆 Straightforward 3D PDF publishing for recipients
    Actify SpinFire ✨ CAD→3D PDF export, batch/pipeline publishing, enterprise modules ★★★★ 💰 Enterprise licensing 👥 Large enterprises, catalog/publishing teams 🏆 Scalable standardized 3D PDF generation
    QuadriSpace Publisher3D / Document3D Suite ✨ Template‑based 3D PDFs, storyboards, Share3D cloud ★★★★ 💰 Quote‑based / Reseller pricing 👥 Tech illustrators, documentation teams 🏆 Communicating CAD to non‑CAD audiences efficiently

    Choosing Your Champion: Which 3D PDF Viewer Wins?

    Well, you've made it through the gauntlet of 3D PDF viewers. If your head is spinning with PRC, U3D, and WebGL, don't worry, that’s a good sign. It means you’re moving beyond the flat, lifeless documents of the past and into a world where your data can truly come alive. After dissecting everything from the venerable Adobe Acrobat to specialized powerhouses like Bluebeam Revu and the versatile Tetra4D suite, one truth stands out: there is no single "best" 3D PDF viewer. The real champion is the one that flawlessly integrates into your specific universe.

    The journey to find the right tool is a classic tale of viewing versus creating. If your team's primary need is simply to consume and review 3D data packaged within a PDF, the familiar territory of Adobe Acrobat Reader or the slightly more nimble Foxit PDF Reader will serve you well. They are the established gatekeepers, offering reliability and widespread familiarity, even if they sometimes feel like using a sledgehammer to crack a nut.

    However, for those of us in the trenches of engineering, architecture, and construction, the conversation starts and ends with Bluebeam Revu. It’s less a viewer and more a command center, transforming 3D PDFs into collaborative, data-rich environments for markups and project management. If your workflow involves CAD data conversion and high-fidelity model preservation, then tools like Tetra4D Enrich or 3D-Tool are not just options; they are necessities. They bridge the critical gap between complex engineering files and universally accessible documentation.

    Your Final Checklist for Selecting a 3D PDF Viewer

    So, how do you pick your winner? Don't get paralyzed by the options. Instead, ask yourself these pointed questions to cut through the noise:

    • Who is the end-user? Are they a client on a tablet needing a quick visual (hello, web-based viewers like Aspose), a shop-floor technician needing interactive work instructions (QuadriSpace might be your hero), or an engineer conducting a detailed design review (point them to Bluebeam or a dedicated desktop app)? The user dictates the interface.
    • What’s the core job-to-be-done? Is it simple viewing, collaborative markup, interactive technical documentation, or generating the 3D PDF itself? Each task has a purpose-built champion on our list. Don't choose a creation suite if all you need is a reliable viewer.
    • Where does the workflow live? If your team operates entirely within a specific ecosystem (like AEC), a specialized tool like Bluebeam is a no-brainer. If you need to embed models on a website or in a web app, your focus should shift to developer-friendly solutions and the future of browser-based 3D PDF rendering.

    The era of static, two-dimensional documentation is officially in the rearview mirror. The tools we’ve explored are more than just viewers; they are portals to a more interactive, intuitive, and data-driven way of communicating complex ideas. Your mission, should you choose to accept it, is to select the portal that best fits your world.


    While you're revolutionizing your documentation with 3D PDFs, ensure the 2D images in your projects and product catalogs are just as dynamic. PixelPanda offers an AI-powered API that automates tedious image editing, from background removal to intelligent resizing, freeing up your team to focus on bigger challenges. Integrate powerful visual processing into your workflow and let your images work as hard as your 3D models do.

  • Unlocking 4K Resolution YouTube Videos

    Unlocking 4K Resolution YouTube Videos

    Welcome to the eye-popping, pixel-packed world of 4K on YouTube. It’s where video quality goes from "pretty good" to "whoa, is that a real window?"

    Think of it this way: 1080p is like a decent LEGO set. You can build something cool and recognizable. But 4K? That’s like getting four times the bricks. Suddenly, you’re not just building a car; you're building a hyper-realistic replica with every tiny detail, from the stitching on the seats to the reflection in the side mirror.

    Why 4K on YouTube Is the New Gold Standard

    Graphic comparing 1080p and 4K display resolutions with grid details and a YouTube logo.

    So, what does that massive jump in detail really mean for you? A 4K video is made up of a staggering 3840 x 2160 pixels, which adds up to over 8 million little dots of light. Your standard 1080p "Full HD" video? It's working with just over 2 million pixels. This isn't just a minor upgrade; it's a monumental leap in visual information.

    That extra clarity completely changes the game. Whether you're watching a sweeping travel vlog where you can count the leaves on a distant tree or a chaotic gaming stream where you can actually read the tiny text on an in-game sign, 4K just feels more real. For anyone watching on a big-screen TV, the difference is night and day.

    For creators, shooting and uploading in 4K on YouTube is a power move. It’s about future-proofing your hard work and giving your audience the absolute best version of your vision. Here’s a pro tip: even viewers on 1080p screens get a better experience, because YouTube's compression treats 4K source files better, resulting in a crisper downscaled image.

    The Tangible Benefits of Ultra HD

    The perks go way beyond just a sharper picture. Here’s what makes 4K such a big deal:

    • Mind-Blowing Detail: Fine textures, background elements, and subtle expressions that would be a blurry mess in lower resolutions are suddenly crystal clear.
    • Deeper, Richer Colors: 4K often goes hand-in-hand with a wider color gamut and High Dynamic Range (HDR), which means you get colors that pop, deeper blacks, and brighter whites. It's more true-to-life.
    • Freedom in the Edit: Filming in 4K gives editors a massive canvas to play with. You can crop in, reframe a shot, or digitally stabilize shaky footage for a 1080p export without turning your video into a pixelated soup.

    The big idea is simple: more pixels create a more convincing illusion of reality. When you watch a 4K video, your brain doesn't have to work as hard to fill in the missing details, which lets you sink into the experience and be truly captivated.

    Resolution Quick View 1080p vs 4K

    To put this all into perspective, let's break down the two most common resolutions you'll find on YouTube today. This little table really shows you how much of a jump 4K truly is.

    Feature 1080p (Full HD) 4K (Ultra HD)
    Pixel Count 1920 x 1080 (2.1 million) 3840 x 2160 (8.3 million)
    Detail Level Good for phones and smaller screens Excellent for all screens, especially big TVs
    Typical Use Vlogs, tutorials, standard streaming Cinematic work, gaming, product reviews

    Ultimately, getting a handle on 4K is your first step toward mastering it. And don't worry if your entire workflow isn't 4K-ready just yet; amazing tools are popping up to close that gap. For instance, AI-powered software can breathe new life into existing footage. You can learn more about upscaling video with AI from our team at PixelPanda to see just how accessible top-tier quality has become. Now, let's dive deeper and get you ready to create some stunning content.

    What's the Secret Sauce in YouTube's 4K Recipe?

    Ever wondered how YouTube squeezes a gigantic 4K video through the internet's sometimes-creaky plumbing and onto your screen without it looking like a blocky mess from 1998? It's not magic, but it’s a pretty slick bit of digital trickery happening behind the curtain. The whole process is designed to make sure those gorgeous visuals you filmed actually make it to the viewer's eyeballs.

    This journey from your camera to their laptop is a multi-step process, with a few key players doing the heavy lifting to make it all work seamlessly.

    Diagram illustrating a video encoding workflow from camera to master file, then VP9 and AV1 codecs, and finally streaming and a laptop.

    As you can see, once your masterpiece file hits YouTube's servers, a critical compression step happens before anyone can stream it. Let's break down who’s in charge of that.

    Meet the Codecs: The Digital Origami Masters

    The unsung heroes of this whole operation are video codecs. Think of a codec as a world-class packing expert who specializes in digital origami. When you upload a monster 4K video file, YouTube’s codecs—mostly VP9 and its even smarter younger sibling, AV1—get to work folding and compressing that data with incredible precision. They toss out all the redundant information the human eye won't miss, shrinking the file down so it can fly across the internet.

    This is exactly why you need to feed YouTube a high-quality file to begin with. Give its codec a rich, detailed video, and it can work its magic to create a beautifully compressed stream. But if you upload a low-quality, muddy-looking file? Well, garbage in, garbage out. The codec has nothing to work with, and you'll end up with those ugly blocky artifacts we all hate.

    Understanding Bitrate: The 'Data Paint' for Your Video

    So, if the codec is the packing method, what's bitrate? Think of it as the amount of stuff you're giving the packer. Imagine you're painting a massive, detailed mural. Bitrate is the volume of "data paint" you get for each second of your video.

    More paint (a higher bitrate) means you can add finer details, capture silky-smooth motion, and showcase vibrant, rich colors. A low bitrate is like trying to paint that same mural with a half-empty watercolor set. You have to stretch the paint so thin that everything looks washed out, blotchy, and just plain sad.

    For 4K resolution YouTube videos, getting the bitrate right is non-negotiable. Here's a quick cheat sheet for what YouTube likes to see:

    • 4K at 24/25/30 FPS: Shoot for a bitrate between 35-45 Mbps (megabits per second).
    • 4K at 48/50/60 FPS: For that buttery-smooth high frame rate look, you need more data paint. Target 53-68 Mbps.

    Uploading in these ranges gives YouTube's compression process enough information to chew on, ensuring your final video still looks stunning.

    When you see a 4K video that looks absolutely pristine, it’s a tag-team effort. A powerful codec like VP9 was handed a high-bitrate source file, allowing it to intelligently preserve all the important visual data while ditching the rest. That’s how a crisp image makes it to the viewer.

    Bringing Colors to Life with HDR

    Alright, one last ingredient: the sparkle. That's High Dynamic Range (HDR). If resolution gives you more pixels and bitrate gives those pixels more detail, HDR hands them an entirely new box of crayons to play with.

    Standard video is like working with a basic 8-color crayon set. It gets the job done. But HDR is like getting the giant 120-crayon box—the one with all the neons, metallics, and fifty shades of blue. This tech allows for blindingly bright whites and deep, inky blacks to exist in the same frame, creating contrast that makes the image practically pop off the screen.

    The result is a level of color and realism that feels incredibly immersive. When you see a true 4K HDR video on a screen that can handle it, the difference isn't just noticeable; it's breathtaking.

    Getting Your 4K Masterpiece Ready for YouTube

    Alright, this is it. The final, nail-biting step. After all the hours you've poured into shooting and editing, you’re about to hand your masterpiece over to the great and powerful YouTube algorithm. To make sure your video survives the journey with all its stunning clarity intact, you need a smart game plan. This is about more than just clicking "Export."

    Think of your video file as a fragile, priceless vase you're shipping across the country. If you just toss it in a flimsy box with some newspaper, you can bet it's going to show up in a thousand pieces. But if you carefully wrap it in bubble wrap and secure it in a sturdy, well-padded box, it arrives looking perfect. Your export settings are the bubble wrap for your video.

    Unlocking YouTube’s VIP Codec: The VP9 Secret

    Your number one goal is to convince YouTube to process your video with its best-in-class VP9 codec. Why? Because VP9 is a wizard at compressing video without turning it into a blurry mess, which is exactly what you want for that crisp 4K stream. Upload a lower-quality file, and you'll likely get stuck with the older, clunkier AVC1 codec, which often leaves your video looking soft and artifact-ridden.

    So, how do you get the VIP treatment? The secret is to feed the beast. Upload a master file with a ridiculously high bitrate—way higher than what YouTube actually streams at. This gives the VP9 encoder a mountain of data to work with, allowing it to preserve every last bit of texture and detail that would otherwise get squashed.

    Sending YouTube a high-bitrate file is like giving a master painter a giant, high-resolution canvas. They have all the room and detail they need to create a masterpiece. A low-bitrate file is like handing them a napkin and a crayon. The final result is going to be limited by what you gave them to start with.

    Nailing Your Export Settings

    Whether you're a Premiere Pro wizard, a DaVinci Resolve guru, or a Final Cut Pro fanatic, the core principles are the same. Your mission is to create a master file that's as close to perfect as possible without being so massive it takes a week to upload.

    While more creators are going 4K—uploads have jumped by 35%—the audience is a bit behind. Only about 15% of viewers consistently watch in 4K, often because it's a huge drain on their internet and device resources. It’s an interesting balancing act for any creator.

    Here are the key settings that'll make your 4K video shine on YouTube:

    • Container: Stick with MP4. It's the universal language of web video, and YouTube speaks it fluently. No compatibility headaches here.
    • Codec: Export using H.264. While H.265 (HEVC) is technically newer, H.264 is still the most reliable and bulletproof choice for YouTube's processing pipeline.
    • Bitrate: This is where the magic happens. For 4K video at 24-30fps, aim for 50-65 Mbps. Shooting at 60fps? Bump that up to 65-85 Mbps. You're intentionally "over-delivering" on data to force YouTube's hand and get that sweet, sweet VP9 encode.
    • Color Space: For most content, Rec. 709 is your go-to. If you’ve gone through the trouble of shooting and grading in HDR, you can export using Rec. 2020, but make sure your entire workflow is HDR-compatible from start to finish.

    Recommended 4K Upload Settings for YouTube

    To make it even easier, here's a cheat sheet. Dial these settings into a preset in your editor, and you'll be set for every upload.

    For developers and teams looking to automate this kind of high-quality encoding at scale, these settings are a fantastic starting point. You can build incredibly powerful media workflows using these parameters as a baseline; the PixelPanda API for developers provides deeper insights into building scalable video processing pipelines.

    Setting Recommendation Why It Matters
    Container MP4 Ensures universal compatibility with YouTube's processing pipeline.
    Codec H.264 (High Profile) The most reliable and widely supported codec for uploads.
    Resolution 3840×2160 The standard pixel dimension for 4K UHD video.
    Bitrate (24-30fps) 50-65 Mbps (VBR, 2-pass) Provides ample data to trigger the VP9 codec for superior quality.
    Bitrate (60fps) 65-85 Mbps (VBR, 2-pass) Higher frame rates require more data to maintain clarity in motion.
    Color Space Rec. 709 (SDR) The standard for most web video, ensuring accurate color reproduction.
    Audio Codec AAC-LC High-quality audio codec preferred by YouTube.
    Audio Bitrate 384 kbps Stereo Delivers rich, clear audio to complement your stunning visuals.

    By following this playbook, you're no longer just hoping for the best—you're taking control. You're ensuring that every single pixel of your hard-earned 4k resolution youtube video shines through, giving your audience the breathtaking experience they came for.

    So, Why Isn't My 4K Video Playing in 4K?

    You did it. You poured your heart and soul into shooting, editing, and exporting a masterpiece in stunning 4K. You’ve uploaded it to YouTube, hit publish, and… wait, what? The little gear icon is stubbornly stuck at 1080p.

    It’s a classic creator nightmare, but take a deep breath. This is an incredibly common problem, and the culprits are usually pretty easy to round up. More often than not, the issue isn't your original file but the complicated journey it takes from YouTube's servers to a viewer's screen.

    Let's play detective and figure out why your beautiful pixels are being held hostage.

    This little flowchart shows the typical path your video takes. That last step, "Processing," is where most of the mystery begins.

    Flowchart illustrating the three-step 4K YouTube upload process: Edit, Export, and Process with icons.

    Here's the key: "uploaded" doesn't mean "ready." That processing stage is where YouTube works its magic, creating different versions of your video for all sorts of devices and internet speeds. And that, my friend, takes time.

    The Number One Culprit: The Processing Delay

    By a long shot, the most common reason your 4K video isn't showing up in all its glory is that YouTube just isn't finished with it yet. When a video is first uploaded, YouTube hustles to get low-resolution versions (like 360p and 480p) out the door so it can go live quickly. The higher resolutions, especially the data-heavy 4K version, are way back in the queue.

    Think of it like a restaurant kitchen. The 360p version is a simple appetizer that's ready in minutes. The 4K version is the slow-roasted, multi-course feast that takes hours to prepare perfectly. For a longer 4K video, this can easily take a few hours or even a full day.

    Pro tip: Always upload your videos as "Unlisted" or "Private" first. Give YouTube a solid 24 hours to finish processing all the resolutions before you unleash it on the world. This way, the 4K option is there for everyone from the moment you go public.

    Is Your Internet Connection Holding You Back?

    The next big hurdle is bandwidth. Trying to stream 4K resolution YouTube content on a slow connection is like trying to drink a thick milkshake through a coffee stirrer—it's just not going to work. For smooth, buffer-free 4K, you need a stable internet connection of at least 25 Mbps.

    Even if your plan is fast enough, other saboteurs might be at play:

    • Wi-Fi Woes: A weak or congested Wi-Fi signal can throttle your speeds. Get closer to your router or, better yet, plug in with an Ethernet cable for a rock-solid connection.
    • Household Traffic Jams: If the whole family is streaming, gaming, and Zooming at once, your 4K stream might get stuck in traffic. There’s only so much bandwidth to go around.
    • The Digital Divide: Let's face it, not everyone has access to lightning-fast internet. It's a real issue. Data shows that only about 45% of urban users have connections consistently fast enough for 4K, and that number drops to just 20% in rural areas. It’s a stark reminder of the access gap among YouTube's 2.70 billion monthly users. You can explore more about this on the Data Globe Hub.

    Checking Your Hardware and Software Limits

    Sometimes, the bottleneck isn't YouTube or your internet—it's the very device you're watching on. Not all gear is built to handle the heavy lifting that 4K requires.

    First, the obvious one: your screen. You can't watch 4K if your display doesn't have the pixels. Your monitor, TV, or phone screen needs a native resolution of at least 3840 x 2160 to show true 4K.

    Next up is raw power. Older computers, phones, or smart TVs might just not have the processing muscle to decode and play 4K video without stuttering. Your browser could also be the problem. You'll need an updated version of a modern browser like Chrome, Firefox, or Edge that supports the efficient VP9 codec, which is what YouTube uses to serve up 4K.

    And just to keep things interesting, strange bugs can pop up. Some creators have recently reported that brand-new 4K uploads play perfectly on a PC but are capped at 1080p on smart TV apps. This points to temporary glitches on YouTube's end, so sometimes a little patience is all that's needed.

    Using AI to Upscale and Enhance Your Videos

    What if you could deliver stunning 4K quality without ever shooting in 4K? It sounds like a gimmick, I know, but it’s fast becoming a go-to strategy for savvy creators, all thanks to the wild world of AI video enhancement. This isn't just about blowing up your video files; it's about making them smarter.

    Picture this: you have a fantastic video you shot in 1080p. The old way of upscaling was like stretching a small photograph—sure, it gets bigger, but it also becomes a blurry, pixelated mess. You're just spreading the same data too thin, and the results are almost always a letdown.

    AI upscaling completely torches that old-school method.

    Diagram illustrating AI upscaling from a 1080p screen to a sharper 4K resolution display.

    Instead of just stretching pixels, AI models dive into your 1080p footage frame-by-frame. Having been trained on millions of high-res images and videos, the AI has essentially learned what things should look like. It intelligently predicts and rebuilds the missing details, filling in the blanks to turn a standard HD video into something that looks shockingly close to a native 4K masterpiece.

    How AI Breathes New Life into Your Content

    This whole approach is a massive win for creators who might not have the budget for 4K cameras, the hard drive space for those enormous files, or the time to go out and reshoot everything. It levels the playing field, closing the gap between what you can afford and what your audience expects to see.

    The applications here are incredibly practical and can make a real difference in how your channel is perceived.

    Here are a few ways AI enhancement can become your secret weapon:

    • Revitalizing Old Footage: Got some classic videos from a few years back, shot in 720p or 1080p? AI can breathe new life into them, making that content look fresh and sharp on today's high-resolution screens.
    • Improving Smartphone Video: Modern phones shoot incredible video, but let's be honest, they still can't touch a dedicated cinema camera. AI can clean up digital noise, sharpen up the details, and upscale that phone footage to look way more professional.
    • Enhancing Product Demos: If you run an e-commerce brand, detail is everything. An AI-enhanced product video can transform a standard demo into a stunning 4K showcase, letting customers see every last texture and feature with absolute clarity.

    The real magic of AI upscaling isn't just about adding more pixels; it's about adding intelligence. By understanding context, lines, and textures, the AI generates new, believable details that trick your eyes into thinking the video was shot in a higher resolution all along.

    This isn't some far-off future tech; it's here right now. If you want to see this process for yourself, check out an interactive image upscaling demo to get a real feel for how AI reconstructs details from a low-res source. The same exact principles are at play with video, and the results can be jaw-dropping.

    When to Use AI Upscaling for YouTube

    Now, while this tech is powerful, it’s not a magic wand you can wave at every video. It's a tool. And like any good tool, knowing when to use it is the key to getting that top-tier 4k resolution youtube quality.

    Think about using AI enhancement in these situations:

    1. Your source footage is high-quality 1080p. The AI needs good material to work with. A crisp, well-lit 1080p file is going to upscale beautifully. A blurry, dark, shaky video? Not so much. Garbage in, garbage out.
    2. You want to trigger YouTube’s VP9 codec. We’ve talked about this already, but it’s a huge one. Uploading a 4K file—even an upscaled one—gives YouTube a nudge to use its better VP9 codec. The result is a cleaner video for everyone, even those watching at 1080p.
    3. You're mixing footage. If you’re editing a project with a mix of 4K and 1080p clips, upscaling the 1080p stuff helps everything look seamless and professional in the final cut. No more jarring quality shifts.
    4. You need to crop or reframe a shot. By upscaling a 1080p clip to 4K, you give yourself a ton more room to punch in on a shot for a 1080p export without it turning into a pixelated mess.

    By using AI strategically, creators can finally deliver that premium 4K experience audiences are hungry for, without being held back by their gear or budget. It’s an exciting new frontier that’s making incredible video quality more accessible than ever.

    Got Questions About 4K on YouTube? We've Got Answers.

    Alright, we've waded through the deep end of codecs, bitrates, and AI magic. But let's be honest, you probably still have a few questions rattling around. When it comes to something as detailed as 4K resolution YouTube videos, that’s perfectly normal.

    This is where we clear the air. No jargon, no fluff—just straight answers to the most common questions we hear from creators and viewers alike. Think of it as the final piece of the puzzle, your go-to FAQ for mastering the ultra-HD world.

    Is It Really Worth Uploading in 4K?

    This is the big one, isn't it? The question that keeps creators staring at their export settings at 2 AM. With those beefy file sizes and agonizingly long processing times, is 4K actually worth the hassle?

    The answer is a massive, unequivocal YES. And it comes down to two huge advantages.

    First, you’re playing the long game. You're future-proofing your art. Every day, more people are bringing 4K TVs and monitors into their homes. Uploading in 4K ensures your content will look just as crisp and impressive years from now as it does today.

    Second—and this is the secret weapon—uploading in 4K makes your video look better for everyone, even those watching on a 1080p screen. Why? Because a 4K upload forces YouTube to use its superior VP9 codec. When YouTube downscales that high-quality file for a 1080p viewer, the result is dramatically sharper and more detailed than if you’d just uploaded a 1080p file in the first place.

    Simply put, a 4K upload gives a premium viewing experience to your entire audience, no matter what screen they're on. It's the single most effective way to guarantee your video looks its absolute best.

    How Much Data Does Streaming 4K Gobble Up?

    If you’ve ever been hit with a surprise data overage bill, this question is for you. Streaming in 4K is a data-hungry beast, and it’s smart to know what you’re signing up for before you binge-watch in glorious ultra-HD.

    As a general rule of thumb, here's what you can expect to burn through:

    • 1080p (Full HD): Around 3 GB of data per hour.
    • 4K (Ultra HD): A hefty 7-10 GB of data per hour.

    That number can wiggle a bit depending on the video's frame rate and on-screen action, but it’s a solid estimate. That’s a serious leap, which is why a stable, unmetered internet connection is your best friend for enjoying 4K resolution YouTube without that dreaded data-anxiety.

    "Help! Why Does My 4K Video Look Blurry at First?"

    You did it. You uploaded your masterpiece, clicked the link, and… it looks like it was filmed with a potato. Don't panic! This is completely normal and all part of YouTube’s processing workflow.

    YouTube is all about speed. It first spits out the low-resolution versions (like 360p and 480p) to get your video online as quickly as possible. The massive 4K version is at the very back of the processing queue, and it can take anywhere from a few hours to over a day for longer videos to finish cooking.

    Here's a pro tip to sidestep that awkward, blurry debut:

    1. Upload as "Private" or "Unlisted." Never, ever publish it immediately.
    2. Give it 24 hours. Let YouTube’s servers do their thing without an audience watching.
    3. Check your work. Once you confirm the 2160p (4K) option is live and kicking, then you can switch the video to "Public."

    This simple process guarantees that the moment your video hits your subscribers' feeds, the stunning 4K version is ready to shine.

    Can I Watch 4K YouTube on Just Any Device?

    The short answer? Nope. Getting true 4K playback requires a perfect chain of command where every piece of hardware and software is up to the task.

    For starters, your screen—whether it's a TV, monitor, or phone—needs a native resolution of at least 3840 x 2160 pixels. You can't see 8 million pixels if your screen only has 2 million to show. It’s that simple.

    Next, your device’s processor needs the muscle to decode that massive 4K video stream without breaking a sweat. Older computers, budget phones, and even some smart TVs might choke, resulting in that awful stuttering or constant buffering.

    Finally, your app or browser must support YouTube's modern VP9 or AV1 codecs. Thankfully, most current web browsers and official YouTube apps are good to go. But if you're hitting a wall, especially on a smart TV, a codec compatibility issue might be the sneaky culprit.


    Ready to stop worrying about manual edits and start producing stunning visuals at scale? PixelPanda offers a powerful API that automates everything from background removal to AI-powered 4K upscaling. See how our developer-friendly tools can transform your visual content workflows by visiting the official PixelPanda website today.

  • Unleash 3d live wallpaper: Create Immersive Depth and Parallax Effects

    Unleash 3d live wallpaper: Create Immersive Depth and Parallax Effects

    Ever tilted your phone and watched the background subtly shift, creating an almost magical sense of depth? That's a 3D live wallpaper at work, and you're about to learn how to make one yourself, starting with nothing more than a simple, flat image.

    From Flat Photos to Interactive Art

    Let's be honest, static backgrounds are a bit dated. A really well-made 3D live wallpaper turns your device from a functional tool into a small, interactive piece of art. This isn't just about a looping video; it's a dynamic scene that responds to your phone's movement, creating a cool parallax effect that gives your screen a genuine feeling of depth.

    This guide is your roadmap. We’ll kick things off with the basics, like how to pick the perfect source image. Then, we'll get into the real magic: using AI tools like the PixelPanda API to instantly generate a detailed depth map, which is basically the secret sauce for the whole 3D effect. After that, I'll show you how to bring the layers to life with animation and get your creation ready for any platform—whether it's for a website, an Android phone, or an iPhone.

    Why This is a Skill Worth Having

    The world is hungry for rich, custom visuals, and that demand isn't slowing down. Believe it or not, the 3D wallpaper market was already valued at around USD 1.5 billion in 2023, and it's expected to rocket to nearly USD 2.8 billion by 2033. This explosion is happening because AI-driven design tools have made creating these immersive backgrounds ridiculously accessible.

    Here's the entire workflow in a nutshell:

    Infographic showing the 3D live wallpaper creation process: 2D photo to depth map to 3D live wallpaper.

    As you can see, it all boils down to a few key steps. The AI-generated depth map is the critical bridge connecting your static photo to the final, interactive wallpaper.

    Core Stages of 3D Live Wallpaper Creation

    Here's a high-level look at the key stages for turning a flat image into a 3D live wallpaper, including the goal and tools for each step.

    Stage Objective Key Tools & Technologies
    Asset Preparation Isolate key subjects from the background to create distinct layers. Adobe Photoshop, GIMP, AI background removal tools.
    Depth Map Generation Create a grayscale image that maps the distance of objects from the viewer. PixelPanda API, specialized depth map generation models.
    Animation & Deployment Use the depth map to create the parallax effect and package for distribution. JavaScript libraries (like parallax.js), Android/iOS SDKs.

    Whether you're a developer adding some visual punch to an app or a designer wanting to create stunning visuals, this process is a game-changer.

    Let's break down those core stages a bit more.

    • Prep Your Assets: It all starts with the right image—one with a clear distinction between the foreground and background. You can even take it a step further by using an AI-powered tool to remove the background entirely, which really makes your main subject pop.

    • Generate the Depth Map: This is where the AI does the heavy lifting. We’ll feed it our 2D photo, and it will spit out a grayscale map. In this map, white represents things that are "close" to the camera, and black represents things that are "far away."

    • Animate and Deploy: Finally, we’ll use that depth map to create the parallax effect, making the layers move in response to the device’s gyroscope. Then, it's just a matter of packaging it up for your platform of choice.

    By the time you're done with this guide, you’ll have everything you need—from practical tips to actual code—to transform any photo into an awesome 3D live wallpaper.

    Getting Your Depth Map Cooked Up with AI

    The magic trick behind any mind-blowing 3D live wallpaper isn't some dark art—it’s a killer depth map. This grayscale image is the blueprint for your whole parallax effect. It's a dead-simple set of instructions for your software: pure white screams "I'm right in your face!" while pure black whispers "I'm way back there." Everything else is just a shade of gray in between.

    Side-by-side comparison of an original image with an AI cloud icon and its grayscale depth map.

    Trying to paint one of these by hand? Good luck. It's a tedious, soul-crushing process of guessing distances and meticulously shading pixels. This is precisely where AI swoops in to save the day, turning hours of agony into a few seconds of pure automation.

    Let the AI Do the Heavy Lifting

    Instead of playing a frustrating guessing game, you can just toss your image at an AI service and have it spit back a pixel-perfect depth map. This whole process is called monocular depth estimation, which is a fancy way of saying the AI has been trained to look at a flat, 2D picture and figure out the 3D space within it.

    The process itself is refreshingly simple. You fire your source image off to an API endpoint, and the AI sends back the finished depth map. It looks at all the little clues—textures, how big things are, perspective lines—to build a surprisingly accurate 3D model of the scene.

    Pro Tip: Want the best results? Feed the AI images with a really clear foreground, middle, and background. A portrait where the background is nice and blurry? Perfect. A landscape with mountains fading into the distance? Gold. A flat photo of a brick wall? Not so much.

    For all you developers out there wanting to build this into your own app, it's just a simple API call. With a tool like PixelPanda, for instance, you can automate the entire thing. The PixelPanda API documentation has all the code snippets and walkthroughs you'll need to get this running in your own project without breaking a sweat.

    Give Your New Depth Map a Quick Once-Over

    When you get your depth map, take a second to really look at it. Does it feel right? The main person or object in your photo should be the brightest part of the map, and the distant sky or horizon should be the darkest.

    Sometimes, the AI can get a little tripped up by weird stuff in the image. Keep an eye out for these common culprits:

    • Shiny Things: Reflections on windows or water can throw the AI for a loop, causing it to misjudge the distance.
    • Crazy Patterns: Super busy, repeating patterns can sometimes be read as being closer or further away than they really are.
    • See-Through Stuff: Things like chain-link fences, lace, or wispy hair can be tough, though the newer AI models are getting much better at handling these tricky edges.

    If you spot a little glitch, don't panic. You can usually pop the image into an editor like Photoshop and do a quick touch-up with a soft, slightly lighter or darker brush. But honestly, if you pick a solid source image to begin with, you probably won't have to do anything at all. Choose your photo well, and you'll give the AI everything it needs to create the perfect foundation for your 3D live wallpaper.

    Let's Make It Move: Adding the Parallax Magic

    Alright, you've got your AI-generated depth map, and it's looking sharp. That grayscale image is the secret sauce, the blueprint for the entire 3D illusion we're about to cook up. Now for the really cool part: breathing life into your static image and making it dance with a parallax effect.

    Sketch of a smartphone showing layered app interfaces, demonstrating 3D depth using gyroscope movement.

    The concept is surprisingly simple. We're going to treat that depth map as a set of instructions. When the user tilts their phone or moves their mouse, the pixels in your original image will shift based on their "distance" from the viewer. The bright white parts of the map? That’s your foreground, and it’s going to move a lot. The dark black areas? That’s the background, and it will barely budge. This difference in movement is what tricks the brain into seeing depth.

    How the Motion Works

    Ever look out the window of a moving train? The fence posts right next to the tracks zip by in a blur, but the mountains way off in the distance seem to crawl along at a snail's pace. That’s parallax in a nutshell. Our code is going to mimic this exact effect by tying the phone's gyroscope or a computer's mouse movement to this pixel-shifting logic.

    For a web-based wallpaper, for example, we can use a little JavaScript to track the mouse cursor. As it moves away from the center of the screen, we'll calculate an offset. We then multiply this offset by the pixel's depth value (where black is 0.0 and white is 1.0).

    The core formula is pretty straightforward: finalPixelOffset = sensorInput * depthValue * sensitivity. That sensitivity value is your fun dial. Crank it up for a dramatic, in-your-face 3D effect, or dial it back for a more subtle, elegant shift.

    This calculation has to happen for every single pixel, dozens of times per second. This is where you’ll be glad you're not doing the math yourself. A graphics library like Three.js that uses WebGL is your best friend here. It hands off all that heavy lifting to the GPU, keeping the animation silky smooth and preventing your device from trying to achieve liftoff.

    Shaders: Where the Real Wizardry Happens

    The true magic unfolds inside what’s called a fragment shader. Think of it as a tiny, super-efficient program that runs on your GPU and gets to decide the final color of every pixel on the screen. It needs two key ingredients: your original image and your shiny new depth map.

    Here’s a play-by-play of what the shader does for every single frame of animation:

    1. Check for Input: It grabs the latest data from the phone's tilt sensors or the mouse's position.
    2. Calculate the Shift: Based on that input, it figures out how much the scene needs to move.
    3. Consult the Depth Map: For the pixel it's currently drawing, it looks up the grayscale value from your depth map.
    4. Displace the Image: It uses that depth value to shift where it looks on the original image for the color.
    5. Paint the Pixel: Finally, it grabs the color from that new, shifted coordinate and draws it to the screen.

    Today’s smartphones, with their buttery-smooth 90–120 Hz OLED screens and pixel densities over 400–500 PPI, are built for this kind of eye candy. When you pair that hardware with an AI-powered workflow for generating depth maps, you can slash your manual editing time by a staggering 70–90%. This kind of speed makes it possible to produce a ton of high-quality assets, a huge leg up in what's becoming a very busy market, as shown in these insights into the digitally printed wallpaper market.

    Nailing this rendering loop is what separates an amateurish-looking wallpaper from a truly professional 3D live wallpaper. Get the sensitivity right, make sure your assets are optimized, and you'll create a jaw-dropping effect that feels like a natural part of the device itself.

    Getting Your Wallpaper to Run Smoothly Without Killing Batteries

    You’ve done the creative part—you've got a gorgeous 3d live wallpaper that looks amazing. But here’s a dose of reality: if it makes a phone feel like it's running through molasses or drains the battery in an hour, nobody's going to use it. A beautiful wallpaper that gets uninstalled is just a failed experiment. Performance isn't a "nice-to-have"; it's everything.

    So, let's roll up our sleeves and make sure your creation is as lean as it is stunning. We're going to dive into some essential optimizations that transform a laggy resource hog into something people will actually love having on their screen.

    Your New Best Friend: Smart Compression

    The quickest and most impactful optimization is compressing your images intelligently. Bloated, uncompressed images are the absolute worst offenders for poor performance, especially on mobile devices where every kilobyte counts. The goal is to slash those file sizes without making your art look like it was saved on a potato.

    This is where modern image formats come to the rescue. It's time to leave old-school JPEGs and PNGs behind.

    • WebP: This is your go-to. WebP offers fantastic lossy and lossless compression that blows older formats out of the water, often shrinking files by 25-35% compared to a JPEG of similar quality.
    • AVIF: The new kid on the block, AVIF, pushes things even further. You can sometimes see file sizes 50% smaller than a comparable JPEG with virtually no perceptible loss in quality.

    Before you write a single line of code, run your source image and depth map through a good compression tool. This one step dramatically cuts down the data your GPU needs to chew on, making your wallpaper feel snappier right away. If you find your textures lose a bit of their sharpness after compression, you can use AI tools to bring back the detail. We have a guide on leveraging image upscaling technology that shows you exactly how to keep things crisp.

    Clever GPU Tricks for Silky-Smooth Animation

    File size is only half the battle. How you organize your assets makes a huge difference. One of the oldest and most effective tricks in the book is using a texture atlas (you might also hear it called a sprite sheet). Instead of having a bunch of separate little images for your animation layers, you stitch them all together into one big image.

    Why? Because the GPU works much more efficiently when it only has to load one large texture instead of juggling a dozen small ones. This slashes the number of "draw calls"—basically, the number of times you ask the GPU to draw something. Fewer draw calls mean less work for the GPU and a smoother experience for the user.

    Think of it like a trip to the grocery store. It’s way faster to go once with a full shopping list than to drive back and forth for every single item. A texture atlas is your GPU's shopping list.

    If you're building this for the web, requestAnimationFrame is non-negotiable. This browser API is your secret weapon for efficient rendering. It syncs your animation code perfectly with the screen's refresh rate, which is far smarter than using something clunky like setInterval. The browser is smart enough to pause the animation when the tab is in the background, saving a ton of CPU and battery. This gives you that buttery-smooth 3d live wallpaper when it's visible and puts it to sleep when it's not—the best of both worlds.

    Advanced Tricks for Cinematic Wallpapers

    Once you've got the basic parallax effect down, you're at the doorstep of some seriously cool creative territory. A simple depth shift is neat, but a truly cinematic 3D live wallpaper tells a story. It's time to move past that first layer of movement and start breathing some dynamic life into your scenes.

    Think of your depth map as just one ingredient in the recipe. The real magic happens when you start blending it with other masks and effects to create animations that feel alive.

    Isolating Elements for Unique Animations

    Let's say your wallpaper is a dramatic mountain landscape with clouds rolling overhead. The parallax effect gives the mountains a nice sense of depth, but those clouds are just… sitting there. We can fix that. By creating a separate mask that singles out just the clouds, you can treat them as their own animatable layer.

    With that cloud mask in hand, you can apply a slow, looping horizontal drift. This animation moves completely independently of the main parallax effect. The result? The mountains shift as you tilt your phone, while the clouds drift serenely across the sky. Now we're talking.

    This technique works for almost anything you can imagine:

    • Shimmering Water: Mask out a lake or ocean and apply a subtle, noisy shimmer effect. It's a perfect way to simulate light reflecting off the water's surface.
    • Flickering Lights: Got a city scene? Isolate the streetlights or neon signs and make them gently flicker or pulse.
    • Rustling Leaves: For a forest scene, a mask on the tree canopy can drive a gentle swaying animation, making it feel like a breeze is passing through.

    The key is to think in layers. Your main parallax effect provides the foundation of depth, while these smaller, masked animations add character and realism, transforming a static scene into a living moment.

    Adding Dynamic Particles and Lighting

    Ready to push your wallpaper into truly cinematic territory? Start introducing elements that actually interact with the scene's depth. Particle effects are your best friend here. Think gentle snow falling, embers rising from a campfire, or dust motes floating in a sunbeam.

    By feeding your depth map to the particle system, you can make these effects feel like they're really part of the world. Snowflakes, for example, can appear to land on foreground objects (the brighter areas of the map) while falling behind elements in the background. Suddenly, the particles aren't just a cheap overlay; they're integrated into the environment.

    You can even take it a step further and simulate dynamic lighting. Imagine a virtual light source that shifts as the user tilts their device. This can cast subtle highlights and shadows that move across the scene, cranking up the 3D illusion and giving everything a polished, professional feel.

    When you start combining these advanced tricks—isolated animations, depth-aware particles, and dynamic lighting—you elevate a simple 3D live wallpaper into a pocket-sized piece of interactive art. It's the kind of thing that will genuinely captivate anyone who sees it.

    Got Questions About 3D Live Wallpapers?

    So, you're ready to dive into making your own 3D live wallpapers, but a few things might be nagging at you. From picking the right picture to stressing about battery life, let's tackle the questions I hear all the time.

    Nailing these fundamentals is the difference between a wallpaper that just looks cool and one that's a joy to actually use every day.

    What Kind of Image Works Best for This?

    Honestly, the best images have an obvious sense of depth. You're looking for a clear subject in the foreground that really pops from a detailed background. Picture a portrait with a sprawling landscape behind the person, or a nature shot with a big tree right in front and mountains way off in the distance.

    High-contrast photos with sharp, clean edges are your secret weapon. They make the AI's job of generating a depth map so much easier, and that map is the heart of your entire 3D effect. If you start with a blurry, flat, or muddy image, you're just going to get a soupy, unconvincing mess.

    Is This Going to Nuke My Phone's Battery?

    Ah, the million-dollar question. The honest answer? It all boils down to how well you build it. A properly optimized live wallpaper is surprisingly gentle on the battery.

    The single most important thing is making sure your wallpaper completely freezes its animation and rendering when it's not visible.

    A live wallpaper has to be a good citizen on the user's device. If it's chugging away at full power while hidden behind other apps, it will absolutely murder the battery. Smart lifecycle management isn't just a nice-to-have; it's a must.

    Beyond that, keeping your asset sizes down with smart compression and using efficient GPU shaders makes a massive difference. Stick to the optimization tips we've covered, and you can create something beautiful that won't have users scrambling for their chargers.

    Can I Just Use a Video Instead of a Picture?

    You can, but it cranks the complexity and power consumption up to eleven. For a full-screen parallax effect on a phone, it's a terrible idea. The constant processing required will drain the battery in no time.

    A much smarter play is to use a video for just one part of the wallpaper. Think of it as a texture for a specific layer. You could swap out a static sky for a perfectly looping video of clouds, for instance. This hybrid approach gives you that dynamic, eye-catching movement without the brutal performance hit. It's the best of both worlds.


    Ready to stop wrestling with manual edits and start generating perfect depth maps in seconds? PixelPanda offers a developer-friendly API that automates the entire process, letting you build stunning 3D experiences at scale. Get started for free at pixelpanda.ai.

  • Build a Standout 3D Camera App From Scratch

    Build a Standout 3D Camera App From Scratch

    Let's be real—the days of needing a minivan full of expensive gear to capture the world in 3D are over. The real magic now happens in the software, right on the phone in your pocket. This guide is my developer-to-developer brain dump on how to build a seriously cool 3D camera app from scratch. We're going to skip the fluff and get right into the nitty-gritty of what actually works in the wild.

    Your Blueprint for the Next Great 3D App

    So, you're thinking about jumping into the 3D app space? Smart move. You're not just building a niche tool; you're tapping into a market that's absolutely exploding. We're talking a projected leap from USD 8.45 billion in 2025 to a staggering USD 35.25 billion by 2034. That’s not just growth; it’s a gold rush. The demand for rich, immersive experiences is through the roof.

    This isn't going to be some dry, academic exercise. I've been in the trenches, and I'm here to share the practical, actionable stuff that actually turns a good idea into a great app. We’ll cover how to get a regular smartphone camera to "see" in 3D using photogrammetry—the clever process of stitching multiple 2D pictures together to build a 3D model.

    Before we dive deep, let's get a bird's-eye view of the project. Building a 3D camera app isn't a single sprint; it's a marathon with distinct stages. Each phase presents its own unique puzzles to solve and requires a different set of tools.

    Here’s a high-level look at the core development phases, what each stage demands, and the technologies you'll be working with.

    Key Development Stages for Your 3D Camera App

    Development Phase Primary Goal Key Technologies Involved
    Capture & Depth Estimation Extract 3D information from 2D images. Stereoscopic Vision, Structure from Motion (SfM), LiDAR (if available)
    Data Fusion & Processing Combine multiple scans into a single, cohesive 3D model. Point Cloud Registration, Volumetric Fusion, Mesh Generation
    Cleanup & Enhancement Fix imperfections and make the final 3D model look amazing. AI-powered APIs, Mesh simplification, Texture upscaling, Inpainting

    This table maps out our journey. From figuring out how to capture depth to making the final product shine, we've got a lot of exciting ground to cover.

    The real secret sauce isn't just capturing a 3D model. It's making the whole process feel seamless for the user and delivering a result that looks absolutely stunning. Your app's success will come down to how well you solve the messy problems of noisy data, missing pieces, and slow performance.

    The Tools of the Trade

    To pull this off, you'll need the right toolkit. We’ll get our hands dirty with libraries like manifold-3d for generating the geometric mesh and Three.js for rendering beautiful, interactive 3D scenes right in a mobile or web app.

    But what about all the post-processing work? Raw 3D scans are always a bit rough around the edges. This is where a powerful image processing API becomes your best friend. Instead of building complex enhancement features from the ground up, you can automate things like depth-aware sharpening, background removal, and smart inpainting.

    If you want to fast-track that part of the process, checking out an API built for this, like the PixelPanda API, can give you a massive leg up.

    Alright, enough talk. Let's start building.

    Mastering 3D Capture and Depth Estimation

    Alright, let's get into the guts of a 3D camera app. The real magic isn't just snapping a photo; it's about making a flat, 2D lens see the world in three dimensions. This is where we stop being photographers and start becoming computational geometers, turning pixels into objects with real depth and form.

    The classic approach here is stereoscopic vision, which is just a fancy way of saying we're copying how human eyes work. You take two pictures from slightly different angles, and your app crunches the numbers on the differences—the "disparity"—to figure out how far away everything is. It's old-school but incredibly reliable.

    But what about the billions of phones with just one main camera? That's where Structure from Motion (SfM) struts onto the scene. Instead of two simultaneous shots, SfM uses a whole video or a series of photos as the user pans their phone. The software is smart enough to spot the same points across all those frames, and from there, it reverse-engineers both the camera's movement and the 3D shape of the object. Think of it as leaving a trail of digital breadcrumbs to build a 3D model.

    Hardware vs. Software: Picking Your Path

    Your first big decision is dictated by the hardware you're targeting. Does the user have a shiny new phone with dedicated depth sensors, or are we working with a standard camera and a whole lot of clever code?

    This decision tree lays out how the tech in a user's pocket shapes your development strategy right from the get-go.

    A decision tree illustrating 3D app development choices based on device technology, from standard camera to advanced tracking.

    As you can see, if you're lucky enough to have LiDAR or ToF data, you get a clean, direct depth map. For everyone else, you're heading down the photogrammetry route, which means more heavy lifting on the software side.

    The Raw Power of Specialized Sensors

    Newer high-end phones are often packed with Time-of-Flight (ToF) or LiDAR sensors, and frankly, they're game-changers. Instead of just guessing depth from a picture, these sensors actively measure it. They shoot out tiny, invisible beams of infrared light and time how long it takes for the light to hit something and bounce back.

    The result? A direct, accurate, and near-instantaneous depth map of whatever you're pointing at. This isn't just some gimmick; it's a market that's blowing up. The Time-of-Flight (ToF) sector is projected to grow at a staggering 19.7% CAGR, pushing 3D experiences into the mainstream. You can dig into the research behind these 3D camera market trends to see just how big this opportunity is.

    For us developers, a phone with a ToF sensor is a dream. It hands you a reliable depth map on a silver platter, which means way less cleanup and fewer headaches down the line. This is absolutely critical if you're building anything that needs to work in real-time, like an AR filter or a measurement tool.

    AI to the Rescue on Single-Camera Phones

    So, what about the vast majority of phones that don't have these fancy sensors? This is where AI makes a heroic entrance with something called monocular depth estimation. At its core, this is a deep neural network that has been trained on millions of images to do one thing: predict depth from a single 2D photo.

    The AI essentially learns all the subtle visual cues that we humans use to perceive depth—things like perspective, how shadows fall, and the relative size of objects. It’s not quite as tack-sharp as a LiDAR scan, but it's good enough to bring 3D capture to billions of devices that would otherwise be left out.

    • The upside: You get massive device compatibility. No special hardware or user actions needed.
    • The downside: It’s less precise than hardware-based methods and can sometimes get confused by weird objects or tricky lighting.

    So, which capture method is right for you? It all boils down to your app's purpose. Are you building a hyper-accurate scanner for professionals, or a fun AR effect for the masses? Let’s lay them out side-by-side.

    Comparing 3D Capture Techniques

    Choosing your primary capture method is one of the most important architectural decisions you'll make. Each has distinct advantages and trade-offs that will impact everything from user experience to processing load. Here's a quick breakdown to help you decide.

    Technique How It Works Pros Cons
    Structure from Motion (SfM) Reconstructs 3D geometry from a sequence of overlapping 2D images taken from different viewpoints. Can produce highly detailed, photorealistic, and textured models from standard cameras. Requires the user to move the camera deliberately and carefully. It's also very computationally heavy.
    Time-of-Flight (ToF) / LiDAR Actively measures depth by firing infrared light and timing its return trip to the sensor. Incredibly fast, provides an accurate depth map in real-time. Perfect for AR and instant scans. It's a hardware-dependent feature, limited to higher-end devices.
    Monocular Estimation A trained AI model analyzes a single 2D image and infers a depth map based on learned visual cues. Works on almost any device with a camera. Simple for the user—just point and shoot. The least accurate method. Depth maps can be noisy, less detailed, and prone to artifacts.

    Ultimately, the smartest 3D camera app doesn't just pick one method; it builds a flexible, hybrid system. Start by checking for a ToF sensor. If it's there, use it! If not, fall back to a monocular AI model for a quick preview, and then guide the user through a more detailed SfM capture if they need higher quality. This kind of adaptable logic is key to delivering a fantastic experience to everyone, regardless of what phone they have in their pocket.

    Alright, you've managed to wrangle a stream of images and depth data from the phone. Nicely done. Now comes the million-dollar question that will shape your app's entire architecture: where does all the heavy lifting happen?

    Welcome to the main event: the classic showdown between crunching numbers right on the device versus sending it all up to the cloud.

    This isn't just a technical debate; it's a fundamental user experience decision. Get it wrong, and you're stuck with a sluggish app that eats batteries for breakfast or a cool tool that's completely useless without a five-bar Wi-Fi signal.

    The Case for Keeping It Local: On-Device Processing

    Processing everything directly on the user's phone has some huge advantages, especially for a 3D camera app that needs to feel snappy and immediate.

    The most obvious win is speed. No network lag. Period. When a user is trying out a real-time AR filter, it needs to stick to their face instantly, not three seconds later after a round trip to a server farm in another state.

    But it’s not just about latency. Going on-device gives you:

    • Offline Superpowers: Your app just works. On a plane, in the subway, or hiking in the middle of nowhere. This is a massive boost for usability and makes your app feel incredibly reliable.
    • A Privacy Fortress: User data—which could be images of their home, their face, or personal stuff—never leaves their device. In an era where everyone's (rightfully) paranoid about privacy, this is a powerful selling point.
    • Zero Server Bills: You're not paying for server uptime, data transfer, or beefy GPU instances every time someone scans a coffee mug. The processing cost is neatly offloaded to the user's hardware.

    Of course, this path isn't all sunshine and rainbows. You’re completely at the mercy of the phone's hardware. Running complex photogrammetry algorithms can turn a phone into a pocket-sized space heater and drain the battery faster than you can say "thermal throttling." You're also limited in the sheer complexity of the 3D models you can generate, thanks to tight memory and CPU ceilings.

    Unleashing the Beast: Cloud Processing

    When you need sheer, unadulterated power, you look to the cloud. Server-side processing means you can throw entire fleets of high-performance GPUs at a problem, running algorithms that would make a smartphone curl up and cry.

    This is the path you take when quality is king.

    If your app’s mission is to produce high-fidelity, professional-grade 3D models for e-commerce or architectural visualization, the cloud is your best friend. It lets your 3D camera app tackle incredibly demanding tasks that are simply impossible on a phone:

    • High-Resolution Mesh Reconstruction: We're talking detailed, multi-million polygon models generated from hundreds of photos.
    • Advanced Texture Mapping: Think crisp, beautiful 4K or 8K textures that look genuinely photorealistic.
    • AI-Powered Magic: Running sophisticated AI models for denoising, filling holes, and object segmentation that are far too large or slow for a mobile chip.

    The catch? It all comes at a price—literally. You’re now on the hook for server maintenance, scaling infrastructure, and paying for every single compute cycle. More importantly, the user experience is now chained to an internet connection. Uploading dozens of high-res images on a shaky cell signal is a recipe for user frustration.

    My advice? Don't fall into the trap of thinking it's a strict "either/or" choice. The most sophisticated and successful apps rarely pick just one. They get clever and blend the two approaches.

    The Hybrid Approach: A Winning Strategy

    Honestly, the most elegant solution is almost always a hybrid model. This strategy uses the phone for what it's good at (quick, responsive tasks) and the cloud for what it's good at (brute-force number crunching). It’s a delicate dance, but when you get the choreography right, the user experience is unbeatable.

    Here’s what a smart hybrid workflow can look like:

    1. Instant Gratification (On-Device): As the user captures images, the app performs a quick, low-poly reconstruction right on the device. This gives them an immediate preview to check if they’ve covered all the angles. No more guessing.
    2. Smart Culling (On-Device): Before uploading anything, the app can be a bouncer at the club door. It can compress images, automatically toss out blurry frames, and roughly align the camera positions. This slashes the amount of data you have to send over the network.
    3. The Heavy Lifting (Cloud): The pre-processed, curated data is sent to your servers. This is where your cloud GPUs earn their keep, handling the full-scale, high-quality 3D model generation.
    4. Final Delivery (Both): The final, optimized 3D model is sent back to the device. You might send a lightweight version for quick mobile viewing while providing a link to the glorious, high-resolution version for desktop use.

    This hybrid architecture gives users the snappy feel of on-device processing while delivering the jaw-dropping quality of a cloud pipeline. It’s the kind of thoughtful balance that separates a fun tech demo from a truly powerful and usable 3D camera app.

    Turning Raw Scans into Polished Art with AI

    Let's be honest. Raw 3D captures are a hot mess. They're like a first draft—full of potential but riddled with noisy point clouds, weird floaty bits, and gaping holes where your camera just couldn't peek. This is the moment your 3d camera app either becomes a cool tech demo or a tool people genuinely can't live without. It all comes down to the cleanup, and thankfully, AI is ready to be your digital janitor and art director rolled into one.

    Forget the soul-crushing drudgery of manual mesh editing. We're talking about plugging in smart, automated pipelines that take a rough-and-tumble scan and spit out a polished, professional-grade asset. This isn't just about patching up errors; it's about adding a layer of magic that makes your users go, "Whoa, how'd it do that?"

    The Magic of Depth-Aware Enhancements

    The first big brain move is to stop thinking in 2D. Your app has a superpower that most image editors don't: the depth map. Using this data unlocks depth-aware enhancements, where the AI actually understands the 3D structure of the scene and applies effects with a mind-blowing level of realism.

    Think about a sharpening filter. A basic 2D filter just cranks up the contrast on every edge, making everything look harsh and fake. A depth-aware AI, on the other hand, knows to sharpen the person in the foreground more than the mountains in the back, perfectly mimicking how a real camera lens focuses. It’s a subtle shift that adds a layer of professional gloss users can feel, even if they can't quite put their finger on why.

    This pipeline shows just how powerful this can be, taking a simple sketch and using AI to create a stunning final image.

    Diagram illustrating an AI image editing workflow: sketch to detailed figure via background removal, inpainting, and upscaling.

    From isolating the subject to intelligently filling in the blanks, each step builds on the last to create something far beyond what the initial capture could offer.

    This same logic applies to all sorts of other cool effects:

    • Realistic Lighting: Don't just blast the whole scene with brightness. Add virtual light sources that cast believable shadows based on the actual 3D geometry.
    • Artistic Styles: That "oil painting" filter you want to add? It looks a million times better when the AI makes the brush strokes follow the 3D contours of the object.

    Here's the bottom line: your app isn't just taking pictures, it's capturing context. Using that 3D context during the enhancement phase is what separates a gimmick from a seriously powerful creative tool. It makes the final output feel real.

    Let AI Handle the Dirty Work

    Now for the nitty-gritty. Let's talk about the cleanup jobs that can rescue a user's scan from the brink of frustration. Integrating an AI-powered image processing API like PixelPanda can automate these tedious tasks, freeing you up to focus on the fun parts of your app.

    AI-Powered Background Removal
    One of the first things users will want to do is cut their scanned object out from its messy real-world background. Doing this by hand is a special kind of torture. An AI, however, can look at the image and its depth map and perform a pixel-perfect cutout in seconds. It can distinguish between the foreground subject and the background with surgical precision, even with fuzzy or complex edges. Want to see for yourself? You can test a live background removal demo and see just how clean the results are.

    Intelligent Inpainting and Hole Filling
    No scan is ever perfect. Reflections from shiny surfaces or just plain awkward angles will always leave holes in your mesh and textures. This is where AI inpainting swoops in to save the day. Instead of leaving an ugly black void, a smart inpainting algorithm analyzes the surrounding texture and fills the gap with new pixels that make perfect sense. It's like Photoshop’s Content-Aware Fill, but fully automated and baked right into your app.

    Text and Watermark Removal
    What if a user scans something with a logo on it, like a soda can or a book cover? An AI trained on object recognition can spot and remove that text, seamlessly painting over it with the underlying texture. This is a massive win for users who want to create clean, generic assets they can use in other projects.

    Crank Up the Quality with AI Upscaling

    Finally, let's talk resolution. The textures you generate from a phone's camera are often… fine. But "fine" doesn't drop jaws. They can look a bit blurry or pixelated, especially up close. This is where AI upscaling delivers the final knockout punch.

    An AI upscaler doesn't just make the pixels bigger; it intelligently hallucinates and adds new detail, effectively bumping the image resolution by up to 4x or even more. It can transform a soft, 1024×1024 texture into a razor-sharp 4K texture, making the final 3D model look absolutely stunning. This single step can be the difference between an asset that looks "scanned" and one that looks photorealistic.

    Building these AI cleanup and enhancement features directly into your 3d camera app is how you create an experience that’s not just polished, but downright addictive.

    Making Your App Actually Usable: Performance and User Experience

    A hand-drawn sketch illustrating a smartphone with labels for GPU, real-time, feedback, low latency, memory, battery, and guided UI.

    Alright, let's be real. A 3d camera app with a million features is completely worthless if it runs like a slideshow, crashes every five minutes, or turns the user's phone into a space heater. Performance isn't just another item on a feature list; it's the bedrock of the entire experience.

    This is where you separate the professional-grade apps from the clunky tech demos that get deleted immediately. Your mission is to build something that feels snappy and responsive, even when it's wrestling with massive 3D datasets. The user doesn't know or care about your fancy algorithms—they just want an app that feels fast and doesn’t nuke their battery life.

    Taming the Memory Monster

    Working with 3D data is a memory-hogging nightmare. A single high-res scan can easily spit out a point cloud with millions of vertices, each packed with position, color, and normal data. If you’re not careful, your app will devour all the available RAM and get unceremoniously killed by the OS.

    Smart memory management isn't optional; it's survival. You have to think like a minimalist, only ever loading what is absolutely essential into memory at any given time.

    Here are a few battle-tested strategies that actually work:

    • Stream, Don't Gulp: Instead of trying to load the entire point cloud at once, process it in smaller, manageable chunks. Think of it as sipping data, not chugging it.
    • Use the Right Tools for the Job: Ditch generic lists and arrays. Opt for data structures built for spatial data, like octrees. They make it much faster to query and cull data that isn't even visible to the user.
    • Compress Everything: Before you send data to the GPU or save it to disk, squeeze it down. Compression cuts down your memory footprint and drastically reduces load times.

    Let the GPU Do the Heavy Lifting

    Your phone’s CPU is a generalist, but the GPU is a specialist—a beast built for massively parallel number crunching. For silky-smooth, real-time rendering, you have to offload as much work as possible to the GPU. I’m not just talking about drawing the final model; use it for complex calculations during the reconstruction process itself.

    Your goal is a tight feedback loop. When the user moves their phone, the 3D preview should update instantly. This real-time feedback is crucial for guiding them to a successful capture. Lag kills the experience and leads to bad scans.

    This obsession with user experience is precisely why this space is exploding. Smartphone 3D camera technology is on a massive growth trajectory. Valued at USD 13.8 billion in 2025, the market is projected to rocket to an insane USD 230.1 billion by 2035, growing at a 32.5% CAGR. You can explore the full forecast on smartphone 3D camera trends to see just how big this wave is.

    Designing an Interface That Doesn't Suck

    A great UI is your app's co-pilot. It needs to actively guide the user through what can be a really intimidating process. Don't just slap a "record" button on the screen and call it a day.

    Your interface should provide clear, actionable feedback in real-time. For example, if the user is waving their phone around too fast, show a visual warning. If they’ve missed a spot, overlay a heatmap on the model to show them which areas need more attention. A well-guided experience turns potential frustration into a fun, almost game-like process, which dramatically improves the quality of the final scan.

    Finally, think about the finish line. Once the user has created a beautiful 3D model, make it ridiculously easy for them to share it. Exporting to standard, web-friendly formats like GLB or USDZ is non-negotiable. These formats bundle the model, textures, and animations into a single, compact file that works everywhere.

    And to make sure those textures really pop, you can even check out an AI image upscaling demo to see how you can automatically boost their resolution and detail before you package everything up.

    Got Questions? We've Got Answers

    Alright, let's get real. Even with the best blueprint in hand, building a 3D camera app from the ground up will test your patience. You're going to hit snags. Every single developer does.

    So, let's dive into the questions that pop up most often. Figuring this stuff out now will save you a world of hurt later on.

    Do I Really Need a Phone with LiDAR or ToF?

    Short answer: Nope.

    It’s easy to think you need the latest and greatest hardware, but phones with dedicated depth sensors like LiDAR or Time-of-Flight (ToF) are still a sliver of the market. While they're great for getting squeaky-clean depth data, requiring one is like putting up a "VIPs Only" sign at your app's front door. You'll massively shrink your potential audience.

    The truth is, many of the slickest apps out there are pure software plays. They work their magic using the standard RGB camera that’s on literally every smartphone.

    You've got a couple of solid software-based paths to choose from:

    • Photogrammetry: This is the classic approach. Techniques like Structure from Motion (SfM) chomp through a series of photos to painstakingly reconstruct a 3D scene. It's a real workhorse, computationally speaking, but the level of detail you can get is often mind-blowing.
    • AI Estimation: This is the new kid on the block. A trained neural network takes one look at a single 2D image and just… predicts the depth. It’s not as surgically precise as photogrammetry, but it's blazing fast and way easier for a user to handle.

    You're essentially trading a tiny bit of precision for a massive gain in device compatibility. For most apps, that's a trade worth making every single time.

    Where Are the Performance Gremlins Hiding?

    When your app starts to chug and feel like it's wading through molasses, the problem is almost always one of three usual suspects. These are the performance killers that can bring your user experience to a screeching halt.

    First up, data transfer. We're talking about moving mountains of high-res image data from the camera sensor to the processor. It's a firehose of information that can easily clog the pipes. Then comes the actual processing. The number-crunching involved in 3D reconstruction is brutal and can easily redline a phone's CPU, causing it to overheat and slow down.

    And finally, you have rendering. Trying to display a complex, high-polygon 3D model on the screen in real-time puts a huge strain on the GPU.

    The only way to win this fight is to optimize from start to finish. Think efficient data formats, offloading the heavy lifting to background threads (or even a server), and using level-of-detail (LOD) systems so you’re only rendering what you absolutely have to.

    How Do I Deal with Messy, Imperfect Captures?

    Let’s be brutally honest: there's no such thing as a "perfect" 3D scan out in the real world. It just doesn't happen.

    Users will move too fast. The lighting will be awful. They'll try to scan a chrome toaster, which is basically a sensor's worst nightmare. Your app has to be built to expect chaos and handle it with grace.

    Your first line of defense is a smart UI. Give people clear, real-time feedback while they're scanning. Help them avoid the most common mistakes before they make them. But even with a great guide, you're going to get flawed data.

    This is where AI becomes your secret weapon. A solid post-processing pipeline is what separates a frustrating gimmick from a tool people actually want to use.

    • AI Inpainting: Intelligently fill in the missing holes in your 3D model's mesh or textures by looking at the surrounding data. It's like magic Photoshop for 3D.
    • Denoising Algorithms: Clean up the fuzzy "static" and other sensor noise that’s unavoidable, especially in dim light.
    • Texture Enhancement: Use AI to sharpen and upscale the textures captured from the phone's camera, turning a blurry mess into a crisp, professional-looking result.

    Baking these automated cleanup and repair features right into your app isn't just a nice-to-have; it's essential for delivering a polished product people will trust.


    Ready to skip the soul-crushing part of building all those AI enhancement features from scratch? PixelPanda wraps up everything from background removal to 4x upscaling and smart inpainting into a dead-simple API. You can integrate it in minutes and start delivering studio-quality results. Explore the docs and start your free trial at PixelPanda.

  • Fixing the Dreaded 404 Error Google Sends Your Way

    Fixing the Dreaded 404 Error Google Sends Your Way

    When Google's crawler, Googlebot, stumbles upon a 404 error on your site, it’s not just a "page not found" message. It’s a dead end. For a human visitor, it’s an annoyance. But for Google, it’s a wasted trip that burns through your valuable crawl budget on a URL that leads absolutely nowhere.

    What a 404 Error Is Really Telling Google

    A hand-drawn illustration of a cracked block displaying '404' next to a surprised spider and blue splatters.

    Think of that quirky broken robot page as a big, flashing warning sign. When a user—or more critically, Googlebot—hits a 404, it’s a clear signal that the content they were looking for has simply vanished. This isn't some minor technical blip; it has real, tangible consequences for your site's health and SEO performance.

    A sudden spike in 404s can signal to users that your site is neglected, often causing them to bounce right back to the search results. For Google, the problem is even bigger. Its spiders waste precious crawl budget trying to fetch pages that don't exist, which can seriously delay the discovery and indexing of your actual, important content. It's like sending a delivery driver to an address that was bulldozed last year—a complete waste of time and resources.

    So, Where Do These Pesky 404s Come From?

    These errors pop up for all sorts of reasons, but they usually trace back to a few common culprits. Getting a handle on these is the first real step toward stopping them.

    • Simple Typos: One wrong letter in an internal link or a marketing campaign URL can send a flood of traffic to a dead end. We've all done it.
    • Deleted Pages: Content gets axed during a site cleanup or a content audit, but nobody puts a redirect in its place. Oops.
    • Botched Site Migrations: Moving to a new domain or CMS is notorious for leaving a trail of broken links if the redirect mapping isn't perfect.
    • URL Structure Changes: Decided to update your permalinks (like going from site.com/p=123 to site.com/blog/new-post)? If you forget to redirect the old URLs, you've just created a 404 minefield.

    A 404 error is Google's signal that it followed a path to nowhere. Each one represents a missed opportunity to deliver value and a small dent in your site's perceived reliability.

    The Sneaky "Soft 404" vs. a Real 404

    Just when you thought you had it figured out, there’s a sneakier, more confusing variant: the soft 404. This is what happens when a URL for a non-existent page returns a "success" (200 OK) status code to the browser instead of the proper 404. The page itself might say "Sorry, not found!", but the server is telling Google, "Everything is A-OK here!"

    This mixed message is a nightmare for crawlers. They see a technically valid page that has zero real content, leading to indexing problems and more wasted crawl budget.

    Here’s a fun fact to put it all in perspective: these errors are so widespread that Google’s own 404 page is an absolute traffic monster. It ranks as the 33rd most visited webpage on the planet, which just goes to show the staggering scale of broken links across the web. You can discover more insights about Google's web dominance, even with its error pages.

    Being proactive about fixing your own 404s isn't just good housekeeping; it's a fundamental part of modern SEO. For more on how we handle data, you can learn about our commitment to privacy.

    Your Toolkit for Hunting Down Broken Links

    You can't fix what you can't find. To become a proper 404 detective, you need to know where to look. And your first stop should always be the one place where Google literally hands you a list of every broken link its crawlers have stumbled upon.

    Your most powerful weapon in this fight is, without a doubt, Google Search Console. It’s free, it’s coming straight from the source, and it’s the unfiltered truth about how Google sees your website. Think of it as your command center for spotting any 404 error Google has logged.

    Your Starting Point: Google Search Console

    Pop open Search Console and head over to the 'Pages' report. Tucked away under the "Not indexed" tab, you'll find a reason neatly labeled "Not found (404)." This isn't just a random number; clicking on it reveals an interactive list of every single URL Google tried to crawl but came up empty.

    Here’s a glimpse of what that indexing report looks like in the wild.

    This report shows you the exact URLs returning a 404 status. It’s an immediate, actionable list of problems that need your attention, pronto.

    From there, you can export this list straight into a spreadsheet. That simple click transforms abstract data into a concrete hit list, giving you the foundation for your entire cleanup operation. Honestly, it's the most direct way to see your site through Google’s eyes.

    Going Deeper with Web Crawlers

    While Search Console tells you what Google finds, a dedicated web crawler shows you what’s broken inside your own walls. Tools like Screaming Frog or Ahrefs' Site Audit act like your own personal Googlebot, meticulously crawling every page, link, and image on your domain.

    These crawlers are absolute gold for digging up issues that Search Console might not flag, such as:

    • Broken internal links: A link from one of your blog posts to another page on your site that now leads to a dead end.
    • Faulty redirect chains: A tangled mess of redirects that ultimately drops the user on a 404 page.
    • Broken image sources: Missing product photos or blog post images that just kill the user experience.

    Running a site crawl gives you a complete health report of your site's internal linking structure. It lets you pinpoint the exact source of a broken link and fix it on the spot, rather than just patching up the destination. This proactive approach is just solid technical SEO. For more advanced implementations, check out our guide on how to build with our developer-friendly tools.

    For the Truly Dedicated: Server Log Analysis

    Ready to go full Sherlock Holmes? Your server logs hold the raw, unfiltered truth. Every single request made to your server is recorded here—every hit on a non-existent URL, complete with the user agent (was it a real person or a bot?) and the referrer (where did they come from?).

    Server log analysis is like dusting for fingerprints at a crime scene. It shows you everything—not just what Googlebot found, but what every user and bot has experienced. It’s the ultimate source of truth for 404 detection.

    Diving into server logs is definitely more technical, but the insights you can pull are unmatched. You might discover some rogue bot is hammering old, deleted URLs, eating up your server resources. Or maybe you'll find that a popular external site is sending a ton of traffic to one of your broken pages—a perfect candidate for a 301 redirect.

    By combining these three tools—Search Console, crawlers, and server logs—you get a complete, 360-degree view of every broken pathway on your website.

    Choosing the Right Fix for Every Type of 404

    Alright, you’ve got your hit list of broken URLs. Now comes the fun part—playing digital surgeon. But here’s the thing: this isn’t a one-size-fits-all kind of operation. Slapping the wrong fix on a 404 can cause more SEO headaches than just leaving it alone.

    Your mission is to send crystal-clear signals to everyone involved, from the frustrated user clicking a dead link to the Googlebot trying to make sense of your site structure. A typo in an internal link requires a totally different approach than a product page you intentionally nuked last season.

    Let's walk through the decision-making process for handling any 404 error Google flags in your reports.

    The Go-To Solution: The 301 Redirect

    Think of a 301 redirect as the digital equivalent of a permanent change-of-address form you file at the post office. It's your most trusted and frequently used tool for a reason.

    You pull out the 301 when a page’s content is still alive and well, just living under a new roof (a new URL). It seamlessly whisks users away to the new location and, most importantly, passes the vast majority of the old page's SEO juice—its authority, its rankings—along with it.

    You'll want to use a 301 redirect when:

    • You’ve updated a URL slug (e.g., /blog/post-1 becomes /blog/awesome-post-1).
    • You've combined several weaker articles into one powerhouse piece of content.
    • You notice another website is sending you great traffic, but they misspelled the URL in their link.

    A classic example: your best-selling "Blue Suede Shoes" page at /products/blue-shoes is now at the more descriptive /products/blue-suede-footwear. A 301 from the old URL to the new one ensures you don't lose an ounce of that hard-earned link equity.

    When to Tell Google It’s Gone for Good

    Sometimes, a page is just… gone. And it’s not coming back. Maybe it was for a flash sale from three years ago or a blog post on a topic that’s now completely irrelevant to your business. In these cases, letting Googlebot hit that 404 page over and over is a waste of everyone's time.

    Enter the 410 Gone status code.

    A 410 is like putting a "Business Closed Permanently" sign on the door. It’s far more definitive than a 404, telling Google, "Hey, we deleted this on purpose. Don't bother checking back for it, ever." This often gets Google to de-index the URL faster and stop wasting its precious crawl budget on a dead end.

    Just be sure before you use it, as this is a permanent solution. It's the perfect tool for content you've intentionally vaporized with no plans for a replacement.

    Here’s a quick visual of how you might start your investigation, beginning with the tools that give you the broadest view and narrowing down from there.

    A flowchart detailing the process of finding and resolving 404 errors for website maintenance.

    This process helps you triage effectively, tackling the most visible errors first before digging into the nitty-gritty details hidden in your server logs.

    The Easiest Fix of All: Just Restore the Page

    We’ve all been there. Someone on the team accidentally unpublished a critical landing page, or a key resource got trashed during a content audit. Human error is part of the game, and sometimes the simplest solution is staring you right in the face.

    Before you start messing with redirect plugins or .htaccess files, just ask yourself one simple question: "Was this page actually supposed to be deleted?"

    If the answer is a sheepish "no," then your job is easy. Just restore the page from your CMS trash or a recent backup. Boom. The 404 vanishes, the URL works again, and you can get back to your coffee. It’s the cleanest possible fix for those inevitable "oops" moments.


    To make this even simpler, here's a quick cheat sheet to help you make the right call in the heat of the moment.

    404 Error Remediation Cheat Sheet

    Scenario Best Solution Why It Works
    Accidental Deletion Restore the page The page was never meant to be gone. This is the simplest, cleanest fix.
    URL Has Changed 301 Redirect The content moved. This passes users and SEO value to the new location.
    Content Was Merged 301 Redirect Redirect old, less comprehensive pages to the new, consolidated "super" page.
    Page Is Gone Forever 410 Gone Tells search engines to stop crawling this URL, saving crawl budget.
    Typo in an Internal Link Update the link Fix the source of the problem directly. No redirect is needed.
    Minor Typos in External Links 301 Redirect You can't fix their site, but you can capture that link equity by redirecting their typo.

    Ultimately, choosing the right solution comes down to understanding the intent behind the missing page. Was it an accident, a strategic move, or an oversight? Once you know the "why," the "how" becomes much clearer.

    How AI Search Changes the Game for Broken Links

    Well, the age of AI search is officially here, and it’s got a surprisingly tight connection to every single 404 error Google stumbles upon on your site. When a tool like Google’s AI Overviews or ChatGPT cites your website, it's doing more than just sending a link; it's stamping your content with a seal of approval.

    This new dynamic raises the stakes—a lot. A broken link that shows up in an AI-generated answer isn't just a frustrating dead end for a user anymore. It's a direct blow to your credibility, telling these powerful new models that you can't be trusted.

    Think about it. If an AI points a user to your site for a specific answer and they smack into a "Page Not Found" wall, you've got a double-whammy of a problem. First, you've annoyed a potential customer. Second, the AI model itself might just learn that your domain isn't a reliable source, which could tank your visibility in future AI-powered results.

    The Credibility Gap of AI Citations

    This isn't just some far-off theory, either. We're already seeing data that shows a real difference in how well different platforms are handling link rot.

    A recent analysis dug into over 145,000 URLs cited by ChatGPT and found that a startling 1.22% of them led to 404 Not Found errors. That means you’re twice as likely to hit a dead end from a ChatGPT citation than from Google's ecosystem. For comparison, Google's AI Overviews came in with a much cleaner error rate of just 0.56%. It’s a clear sign of how seriously Google is taking link reliability in this new world. If you want to dive deeper, you can check out the full research on AI and broken links at seranking.com.

    When an AI cites your broken page, it's not just sending a user to a dead end. It's broadcasting your site's unreliability at scale, potentially damaging your brand's reputation with both humans and algorithms.

    All this means that keeping your site squeaky clean of 404s has graduated from "good SEO housekeeping" to "essential future-proofing." It's about making sure your website is ready for a world where algorithms, not just people, are the ones judging your authority.

    Why Every Single Link Matters More Now

    In this new reality, every URL on your site is a potential citation—a tiny piece of data that AI models gobble up to build their knowledge. A single broken link can create a ripple effect, slowly chipping away at the trust these systems have in your entire domain.

    Let’s break down the impact:

    • For Users: Hitting a dead end from an AI recommendation is instantly frustrating and makes your brand look sloppy.
    • For AI Models: It’s a loud-and-clear signal that your content is outdated or poorly managed, making you a less attractive source for future answers.
    • For Your SEO: It's a completely wasted opportunity for referral traffic and a negative mark on your site's overall health report card.

    Fixing a 404 error Google flags is no longer just about clawing back some link equity. It’s about cementing your position as a trusted voice for the next generation of search. For those building integrations, you can explore our own commitment to reliability by checking out the specifications in our OpenAPI documentation.

    How to Stop Playing Whack-A-Mole with 404s

    A hand-drawn pre-launch checklist with one item checked, being reviewed by a magnifying glass.

    Fixing 404s after Google flags them is a reactive, never-ending game. The real win? Building a fortress against broken links so they never show up in the first place.

    Instead of waiting for that dreaded email from Search Console, you need to get ahead of the problem. This means being meticulous before anything goes live and having a solid game plan for retiring old content. It's time to shift from cleanup crew to a savvy site architect.

    Get Your Pre-Launch Checklist in Order

    Pushing a new page, feature, or a whole site redesign live without a pre-launch checklist is just asking for trouble. This isn't some nice-to-have document; it's your first and best line of defense against creating a fresh batch of 404s.

    Your checklist needs to be simple but brutally effective. The absolute number one item on that list? Test every single link. Seriously. Before you even think about hitting "publish," run a full crawl on your staging environment. This is how you catch broken paths before they ever become a public embarrassment.

    This one habit prevents the most common source of self-inflicted 404s: simple human error during development or content migration. A single unchecked box can save you hours of pain later.

    A proactive crawl of a staging site is the single most effective way to prevent 404 errors. It turns a potential public mess into a private, easily fixable issue.

    Never Just Delete Old Content

    Every piece of content has a lifecycle. When a blog post is no longer relevant or a product line gets discontinued, hitting the delete button is an SEO cardinal sin. That single action instantly creates a 404 for any internal links, user bookmarks, or—most critically—valuable backlinks pointing to that URL.

    Retiring content requires a graceful handoff. Always, always implement a 301 redirect to the next most logical page. If you're sunsetting a page for "vintage blue sneakers," redirect users and search engines to the main "sneakers" category. This simple step preserves your hard-earned link equity and saves the user from a dead end.

    Schedule Regular Site Health Checks

    Don't let Google be the one to tell you something's broken. Get into the habit of running a full crawl on your live site on a regular basis. Firing up a tool like Screaming Frog or Ahrefs' Site Audit once a month is a fantastic way to catch problems before they fester.

    Think of it as a routine dental checkup for your website. This kind of maintenance helps you spot and fix nagging issues, such as:

    • Broken internal links that popped up after a recent content update.
    • Redirect chains that have gotten too long or looped back on themselves.
    • External links pointing to pages or sites that have since vanished.

    By catching these things early, you stay miles ahead of the crawlers and maintain a rock-solid site structure that users and search engines can trust.

    Craft a Killer Custom 404 Page

    Look, even with the best systems in place, some users are going to hit a 404. They might mistype a URL or follow a bad link from a third-party site you have no control over. This is your chance to turn a moment of frustration into a surprisingly positive brand experience.

    A great custom 404 page does more than just state the obvious. It should:

    • Show Some Personality: Use your brand's voice. A little self-aware humor can go a long, long way.
    • Offer a Search Bar: Empower users to find what they were actually looking for.
    • Provide an Escape Hatch: Give them helpful links to your homepage, popular articles, or main product categories.

    This simple touch transforms a digital dead end into a helpful new starting point, keeping visitors on your site and preventing them from bouncing away for good.

    Your Burning Questions About 404 Errors, Answered

    Let's cut through the noise and tackle some of the most common myths and questions that always seem to pop up around the dreaded 404 error. Getting a handle on these will help you manage your site's health with a lot more confidence and sidestep some classic technical SEO face-plants.

    Do 404 Errors Actually Hurt My Rankings?

    This is the big one, isn't it? The short answer is no, not directly. Google’s own John Mueller has said many times that having some 404s is just a normal part of the internet doing its thing. A few broken links won't make Google slap your entire site with a penalty.

    But—and this is a big but—the indirect effects are where the real danger lies. If a page that has a bunch of awesome backlinks suddenly starts 404'ing, all that hard-earned link equity just vanishes into thin air. Poof. And if your users keep hitting dead ends, they’ll bounce, sending signals to Google that your site offers a frustrating experience.

    What’s the Difference Between a 404 and a Soft 404?

    Think of it this way: a standard 404 (Not Found) is an honest, straightforward message. The server clearly tells both the browser and Googlebot, "Nope, nothing here." Everyone is on the same page, and there's no confusion.

    A soft 404, on the other hand, is a master of mixed signals. The server sends a 200 OK success code, basically saying, "Yep, this page is totally here and working!" but the content itself is a sad, empty shell saying something like, "Sorry, this product is out of stock." Google gets this confusing message—a technically valid page with zero actual value—and flags it because it doesn't know what to do with it.

    A soft 404 is like a ghost page. The server swears it's there, but for all practical purposes, it’s empty. This just wastes your crawl budget and muddies the waters for search engines.

    How Many 404s Are Too Many?

    Honestly, there's no magic number. A sprawling e-commerce site with millions of product pages will naturally rack up more 404s from discontinued items than a tiny five-page business site. It's not about the raw number; it’s all about the context and the impact.

    So, instead of trying to get to "inbox zero" in your Google Search Console report, you need to get smart about prioritizing. Focus your energy on fixing 404s that:

    • Get a meaningful amount of traffic.
    • Have valuable, high-authority backlinks pointing to them.
    • Are a crucial part of a user's journey, like a step in your checkout process.

    Should I Just Redirect All My 404s to the Homepage?

    Oh, please don't. While it might seem like a quick fix, this is a lazy solution that creates a genuinely terrible user experience. Just imagine you clicked a link for "blue running shoes" and were unceremoniously dumped on the homepage. It's confusing, unhelpful, and makes people leave.

    Google is wise to this trick, too, and often treats this kind of blanket redirect as a soft 404. The golden rule is to always redirect a broken URL to the next most relevant page. If a good alternative doesn't exist, you're far better off letting it serve a proper 404 or, even better, a 410 Gone status code to say it's gone for good.


    Ready to stop wrestling with visual content and start scaling? With PixelPanda, you can automate everything from background removal to smart upscaling with a simple API call. Get started for free and see what you can build.

  • What Is a 3rd Party App? A Simple Explainer for Everyone

    What Is a 3rd Party App? A Simple Explainer for Everyone

    Ever downloaded an app? Of course you have. But have you ever stopped to think about where it came from?

    A third-party app is simply any piece of software made by someone other than the company that created your device or its operating system (OS). The Mail and Safari apps that came pre-installed on your iPhone? Those are first-party apps, made by Apple. The Instagram, TikTok, or Spotify apps you downloaded from the App Store? All third-party.

    They're the lifeblood of our digital world.

    Understanding the App Ecosystem

    Think of your phone's operating system—iOS or Android—as a brand-new car straight off the factory line. It comes with all the essentials built by the manufacturer: the engine, the steering wheel, a basic radio. These are your first-party apps. They're fundamental and designed to work perfectly with the car itself.

    But who settles for basic? The real fun begins when you start adding your own gear. That killer sound system you install, the high-tech GPS you mount on the dash, the slick roof rack for your weekend adventures—those are your third-party apps. They're built by specialists to give your car powerful new abilities the original maker never even thought of.

    The Three Parties in Your App Ecosystem

    To really get what's going on, it helps to know who's who. This whole system boils down to three main players, each with a distinct role.

    Here’s a simple breakdown of the relationship between the platform, the developers, and you.

    Party Who They Are Real-World Example
    The First Party The company that owns the device or platform. Apple (for the iPhone) or Google (for Android). They build the playground and set the rules.
    The Third Party Any other developer who builds an app for that platform. Meta (for Facebook), Spotify, or even a solo indie game developer. They build the cool toys for the playground.
    The User That's you! The person who chooses which apps to install. You deciding to download a new photo editor to make your pictures pop.

    This relationship creates a massive, thriving marketplace. Between the Google Play Store and Apple's App Store, there are millions of apps to choose from, with people spending over $150 billion on them in recent years.

    These apps aren't just novelties; they're woven into the fabric of our daily lives. A whopping 49% of people open an app 11 or more times a day. If you're curious, you can dive deeper into app market trends to see just how big this world has become.

    How Your Favorite Apps Talk to Each Other

    Third-party apps are rarely lone wolves. Their real magic kicks in when they start talking to other services, sharing information and working together. But how does this happen without turning into a chaotic security mess? It all boils down to a few clever methods that act as the digital handshakes between the tools you use every day.

    These connections are all built on something called an Application Programming Interface, or API. An API is basically a set of rules and protocols that lets different software programs communicate with each other. A great way to think about it is like a restaurant menu. The menu tells you what dishes you can order and how to ask for them, but it doesn't let you just wander into the kitchen and start cooking yourself.

    This is a simplified look at how first-party and third-party apps interact on your device.

    A flowchart illustrating the device app ecosystem, moving from device UI to first-party and third-party apps.

    As you can see, even though both types of apps live on your device, the third-party ones rely on these secure connections to bring new features to the table.

    The Keys to the Kingdom

    So, how do apps tap into these APIs without leaving the front door wide open for bad actors? They use specific authentication methods to prove they have permission to access your data.

    • API Keys: Think of an API key as a secret password that two trusted businesses share. It's a long, unique string of characters that an app presents to prove its identity when it makes a request. A developer building an integration, for example, would need an API key to connect their service to a tool like PixelPanda. You can see how that works in their developer documentation.

    • OAuth (Open Authorization): This one is more about you, the user. Imagine giving a valet a special key for your car. That key can open the door and start the engine, but it can't unlock the glove box or the trunk. That's OAuth in a nutshell. When you see a button that says "Log in with Google," you're using OAuth. You're giving that 3rd party app very specific, limited permissions (like "view your email address") without ever sharing your actual Google password.

    Getting Instant Updates with Webhooks

    While API keys and OAuth are all about asking for information, webhooks are about getting it pushed to you automatically.

    A webhook is essentially an automated message sent from one app to another when something specific happens. It’s a "push" notification instead of a "pull" request.

    Let's say you run an online store. Instead of your app constantly bugging your payment processor every five seconds—"Did the payment go through yet? How about now?"—a webhook flips the script. The moment the payment is confirmed, the payment processor sends a single, instant message (the webhook) to your store's app. Done.

    This kind of real-time communication is the secret sauce that makes modern software feel so slick and connected. It’s the behind-the-scenes magic that ensures your digital tools work in harmony, creating the powerful, integrated experiences we can’t live without.

    Navigating Permissions and Protecting Your Data

    A hand-drawn smartphone displays a 'PERMISSION' screen with toggles for app access and a security shield.

    Connecting a new 3rd party app is a bit like giving a contractor a key to your house. You wouldn't just hand over the master key that opens every single door, would you? Of course not. You'd give them access only to the rooms they need to work in.

    That permission screen that pops up when you install an app is your digital contract—it’s where you set those boundaries. It’s absolutely crucial to read the fine print before you tap “Allow.” These permission requests, often called scopes, define exactly which parts of your digital "house" the app gets to enter. "Read calendar" means it sees every appointment. "Access contacts" means it gets your entire address book. The golden rule is to grant the absolute minimum access required for the app to do its job.

    Understanding the Real Risks

    Unfortunately, not every app developer plays by the rules. Granting too many permissions, or over-permissioning, is like leaving your front door wide open for data misuse and theft. A recent study revealed that a staggering 73% of organizations have been hit with a serious disruption caused by a third-party cyber incident. These aren’t just minor hiccups; they can spiral into full-blown data breaches.

    The mobile app market is exploding. It has tripled in size since 2017, with global revenues expected to hit a mind-boggling $585 billion. This gold rush makes it a massive playground for shady characters looking to exploit user data. You can dig deeper into the app industry's incredible financial scale on Udoni's blog.

    Always ask yourself why an app needs certain access. A simple photo filter has no business reading your text messages. That bit of critical thinking is your best defense.

    Your Pre-Approval Checklist

    Before you grant access to anything, run through this quick mental checklist. It’s a simple habit that will help you vet any new app and make smarter, safer calls about your data.

    1. Review the Developer: Who made this thing? A quick Google search can tell you about their reputation, other apps they’ve built, and any security scandals in their past.
    2. Read Recent Reviews: Don’t just glance at the star rating. Dig into what actual users are saying, especially recent comments. Keep an eye out for red flags like privacy complaints, bugs, or sketchy behavior.
    3. Scrutinize the Scopes: Read every single permission request. If an app wants access to something that feels totally unrelated to its purpose, that's a major warning sign. Just say no or find another app.
    4. Check the Privacy Policy: Legitimate apps have clear, easy-to-find privacy policies that explain what they do with your data. Reputable companies like PixelPanda are upfront about their practices; you can see what a good one looks like by checking out their privacy policy.

    By treating every permission request with a healthy dose of skepticism, you can get all the benefits of third-party apps without putting your personal data on the line.

    Seeing 3rd Party Apps in the Real World

    Alright, enough with the theory. Let's see where the rubber meets the road. Third-party apps aren't just some abstract tech concept; they're the secret sauce powering the tools you rely on every single day, both at work and at home. Think of them as the essential connective tissue that makes modern software so darn useful.

    Ever bought something online? If you used a platform like Shopify or BigCommerce, you were swimming in a sea of third-party apps without even knowing it. That little pop-up offering you a discount, the email reminding you about your abandoned cart, and even the behind-the-scenes inventory management are often separate apps plugged right into the main store.

    These integrations aren't just a nice-to-have feature. For any competitive online business, they're a flat-out necessity.

    How 3rd Party Apps Solve Problems Across Industries

    A great 3rd party app makes its mark by solving a very specific problem that the original platform just wasn't built to handle. Whether it's taming social media chaos or processing creative assets by the thousands, these tools are specialists that get the job done right.

    The magic of third-party apps is their ability to slot into existing workflows and supercharge them. Here’s a quick look at how different sectors put these specialized tools to work.

    Industry Problem to Solve 3rd Party App Solution
    E-commerce Reducing abandoned carts & managing customer reviews An app that automatically sends follow-up emails to shoppers who left items behind and another that collects and displays verified product reviews.
    Marketing Managing multiple social media accounts without going insane A platform like Hootsuite or Buffer that connects to all your accounts, letting you schedule posts from one unified dashboard.
    Creative/Design Moving massive video or design files between storage and editing software An integration that connects your video editor directly to Dropbox or Google Drive, so you can pull footage without downloading and re-uploading.
    Software Development Keeping the entire team in sync on code changes and bug fixes A connection between GitHub and Slack that posts automatic notifications to a team channel whenever new code is pushed or an issue is updated.

    This modular approach lets companies stitch together a custom "stack" of the best tools for the job, creating a system that’s perfectly tailored to their needs.

    The Real-World Impact

    This interconnected world is what allows a tiny e-commerce startup to go toe-to-toe with a retail giant, or a solo creator to manage a global brand. Each 3rd party app acts as a force multiplier, automating mind-numbing tasks and unlocking powerful new capabilities that would otherwise be completely out of reach.

    These apps win because they do one thing exceptionally well. They don't try to be everything to everyone; they focus on being the best at a single task, and then they play nicely with the bigger systems you already use.

    In short, they handle the messy, complicated logistics so you can get back to focusing on what you actually do best.

    How to Keep Your App Connections on a Leash

    A hand-drawn 'Permission Audit' checklist displayed on a digital tablet, with a stylus resting nearby.

    Connecting a shiny new 3rd party app is easy. The real work begins after you click "Allow." Think of it like a party at your house. You've handed out keys to the DJ, the caterer, and that guy who does magic tricks. But once the music stops and everyone goes home, are you going to let them keep the keys?

    Of course not. That's exactly why you need to do a permission audit. It's just a fancy term for a scheduled check-up where you review every single app connected to your important accounts (think Google, Slack, Shopify, etc.) and kick out anything you no longer use, need, or trust. It’s basic digital housekeeping, and it's your best defense against unwanted surprises.

    Time for a Digital Spring Cleaning

    Ready to tidy up? The best way to make this a habit is to put it on your calendar. Seriously, set a recurring reminder for every three to six months. It’s a tiny time commitment with a massive security payoff.

    1. Map Out Your Digital Hubs: Grab a notepad (digital or physical) and list your most important accounts. Start with your primary email, your main social media profiles, and any cloud storage you use. These are the Grand Central Stations of your digital life.
    2. Hunt Down the "Connected Apps" List: Every major service has a security dashboard with a list of all the third-party apps you've granted access to. It might be called "Third-Party Apps," "Security Checkup," or "Apps with access to your account." A quick search will usually get you there.
    3. Go Full Marie Kondo: Go through that list, app by app. Ask yourself: "Does this app still spark joy?" Or, more practically, "Have I used this in the last six months?" If you don't recognize it or the answer is a hard no, click "Remove Access" or "Revoke" without a second thought. Be ruthless.

    A regular permission audit is the single most powerful thing you can do to shrink your digital attack surface. Every forgotten app connection is a potential backdoor. Slam it shut.

    Staying Safe Isn't a One-and-Done Deal

    Beyond these periodic cleanups, a few smart habits will keep you much safer day-to-day. A good password manager is a total game-changer, letting you create ridiculously strong, unique passwords for everything without having to remember them. That way, if one service gets breached, the criminals don't get a master key to your entire life.

    It's also worth noting how the app world has changed. Developers aren't just selling apps for a one-time fee anymore. Subscription models are huge—in fact, they account for 48% of all revenue-generating apps on the App Store. This is good news in a way; developers have a strong incentive to keep their apps secure and maintain your trust. Still, the responsibility for managing your connections is always on you. You can read more about the changing mobile app economy on Tekrevol.

    And what happens when an integration suddenly breaks? Before you panic, try the classic "turn it off and on again" trick. Revoke the app's access completely, then go through the connection process from scratch. This often resets a faulty token and fixes the problem. Good developers also provide clear documentation to make this easier—for example, tools like PixelPanda have a public AI plugin manifest file so you can see exactly what the integration needs before you even start.

    Got Questions About 3rd Party Apps? We've Got Answers.

    Even after you get the hang of it, a few common questions always seem to surface. Let's dig into some of the usual suspects to clear up any confusion and make you the resident expert on third-party apps.

    Are 3rd Party Apps and Plugins the Same Thing?

    Close, but not quite! It's best to think of a "third-party app" as a huge, all-encompassing category. It’s basically any software made by a developer that isn't the original maker of your device or the platform you're on.

    A plugin (or extension) is a specific type of third-party app. It’s a smaller piece of software designed to live inside another program to give it new superpowers. Think of a Google Chrome extension that blocks ads or a Photoshop plugin that adds funky new filters.

    So, every plugin is a third-party app, but not every third-party app is a plugin. The Spotify desktop client, for instance, is its own program—it stands alone, it doesn't plug into anything else.

    How Can I Tell If a 3rd Party App Is Safe?

    This is the big one. While official marketplaces like the Apple App Store and Google Play Store have security checks, the real gatekeeper is you. There's no magic bullet for safety, but developing good habits can get you 99% of the way there.

    The scariest part of third-party risk isn't just one user getting hacked; it's the scale. A single weak link in a popular app can give attackers a backdoor into thousands of companies at once.

    To keep your data locked down, make these steps a reflex:

    • Stick to Official Stores: Never, ever download apps from a sketchy website or a link in a random email. It’s just not worth the risk.
    • Check Recent Reviews: Don’t just look at the star rating. Dig into the latest comments. Are people suddenly complaining about weird behavior, battery drain, or privacy pop-ups? That’s a signal.
    • Scrutinize Every Permission: This is your most powerful tool. If a flashlight app wants access to your contacts, photos, and microphone, slam the brakes. Ask yourself: why on earth would it need that? If you can't come up with a good reason, deny it.

    What Is the Difference Between a 1st and 3rd Party App?

    It all comes down to a simple question: who made it?

    A first-party app is built by the same company that made the device or operating system. Think about your iPhone—apps like Safari, Mail, and Messages are all made by Apple. They are native to the ecosystem.

    A third-party app, on the other hand, is made by anyone else. When you download Netflix or Uber onto that same iPhone, you're installing software created by Netflix Inc. and Uber Technologies, Inc.—not Apple. They're guests playing by the rules of Apple's house. This is what makes our app stores so vibrant and full of endless possibilities.


    Ready to put this into practice? See what a powerful and developer-friendly PixelPanda API can do. Automate your image workflows, from background removal to AI-powered upscaling, and cut your manual editing time to zero. Start building for free today at https://pixelpanda.ai.

  • The 12 Best 3D Modeling App Choices of 2025: A Full Comparison

    The 12 Best 3D Modeling App Choices of 2025: A Full Comparison

    Picking the right 3D modeling app can feel like trying to build a spaceship with a stone hammer. You know what you want to create, but the sheer number of tools, each with its own cult-like following and cryptic interface, is overwhelming. One person swears by Blender's open-source magic, while another won't touch anything but Autodesk's polished professional suite. It's a universe of polygons, NURBS, and procedural workflows, and finding your starting point can be a paralyzing task.

    This guide cuts through that noise. Forget wading through dense forums and biased marketing pages. We've created a definitive resource with honest reviews and a direct comparison of the absolute best software out there. We’ll explore the top-tier 3d modeling app alternatives, from free, beginner-friendly options like Tinkercad to industry titans like Maya and Houdini.

    Our goal is simple: to give you a clear, practical roadmap. We'll show you which app excels for specific tasks, like creating photorealistic product renders for your ecommerce store, sculpting organic characters for a game, or designing precise mechanical parts. We break down the key features, learning curves, and hidden costs for each platform. Think of this as your personal consultation, complete with direct links and screenshots, designed to help you confidently select the perfect tool for your project and creative ambition. Let's find your perfect dimension.

    1. Blender

    Blender isn't just a 3D modeling app; it's the free, open-source juggernaut that challenges premium software without asking for a dime. It's the Swiss Army knife of 3D creation, bundling everything from modeling and sculpting to animation, photorealistic rendering with Cycles, and even real-time rendering with EEVEE. This massive scope makes it a go-to for indie game developers, architectural visualizers, and marketing teams creating stunning product shots from scratch.

    Blender

    What truly sets Blender apart is its rabidly passionate community and breakneck development speed. New features and optimizations drop constantly, fueled by a global network of artists and developers. While user reviews often point to a steep learning curve, the payoff is immense. You gain access to a tool that can do almost anything, supported by an unparalleled ecosystem of free tutorials and affordable add-ons.

    Our Take & Key Features

    For any serious comparison of 3D software, Blender stands out for its sheer value. It’s not just one of the free alternatives; it's a professional-grade powerhouse.

    • Modeling Workflows: Supports everything from traditional polygon and subdivision surface modeling to advanced procedural creation with Geometry Nodes.
    • Rendering Engines: Includes the industry-respected Cycles path-tracing engine for realism and EEVEE for blistering-fast real-time renders.
    • Cost: Completely free and open-source under the GPL license, allowing for unrestricted commercial use.
    • Ecosystem: A massive library of add-ons and a vibrant community provide endless support and拡張性.

    Once your renders are complete, integrating them into a professional pipeline is the next step. For tasks like automated background removal or upscaling your final images, you can explore developer-friendly APIs to streamline your post-processing workflow.

    Website: https://www.blender.org

    2. Autodesk (Maya, 3ds Max) – Official Autodesk Store

    If Blender is the people's champion, Autodesk's suite, featuring titans like Maya and 3ds Max, represents the undisputed heavyweight champion of professional studios. This isn't just a single 3d modeling app; it's an ecosystem of highly specialized tools that have built the VFX, film, and AAA gaming industries for decades. From intricate character rigging in Maya to detailed architectural visualization in 3ds Max, Autodesk's platforms are where blockbuster budgets meet pixel-perfect execution.

    Autodesk (Maya, 3ds Max) - Official Autodesk Store

    What makes the official Autodesk store the destination is its direct pipeline to these industry-standard tools, complete with enterprise-level support, team licensing, and educational access. While user reviews often cite the steep learning curve and premium subscription cost as major hurdles, the career payoff is undeniable. Proficiency in Maya or 3ds Max is a golden ticket for jobs at major studios, making the investment a strategic career move for aspiring professionals.

    Our Take & Key Features

    In any serious comparison of professional-grade software, Autodesk stands as the benchmark against which many alternatives are measured. Its deep, feature-rich environments are tailored for large-scale, collaborative projects.

    • Industry Specialization: Maya is the gold standard for character animation and rigging, while 3ds Max excels in architectural and product visualization.
    • Powerful Rendering: Deep integration with the Arnold renderer produces photorealistic, cinematic-quality images right out of the box.
    • Cost: Premium subscription-based model. High cost is a primary consideration, though free trials and educational licenses are available. Exploring the details of pricing for different software can help teams budget effectively.
    • Ecosystem: Backed by extensive official documentation, certified training programs, and a massive marketplace for plugins and assets.

    Website: https://www.autodesk.com/products?utm_source=openai

    3. SketchUp (Trimble)

    SketchUp has carved out a massive niche by being the most intuitive gateway into the world of 3D modeling, especially for architectural and interior design. Its push-pull modeling method is famously easy to learn, allowing users to go from a 2D floor plan to a 3D structure in minutes. This focus on speed and simplicity makes it a favorite for conceptual design, urban planning, and woodworking, where quick iterations are more valuable than complex polygonal control.

    SketchUp (Trimble)

    What truly defines the SketchUp experience is its ecosystem. The 3D Warehouse is a colossal library of free, user-generated models, from furniture to entire cityscapes, saving countless hours of work. While some user reviews note that advanced parametric modeling requires plugins from the Extension Warehouse, this modular approach keeps the core app clean and approachable. Its flexible pricing, from a free web version to powerful desktop tiers, offers scalable alternatives for every budget.

    Our Take & Key Features

    In any comparison of user-friendly design tools, SketchUp excels at rapid visualization. It's less about creating photorealistic characters and more about quickly building and communicating spatial ideas.

    • Ease of Use: The intuitive "Push/Pull" technology makes it arguably the easiest professional 3d modeling app to learn for architectural and hard-surface models.
    • 3D Warehouse: Gain instant access to a vast, free library of millions of 3D models, from specific branded furniture to vegetation and vehicles.
    • Flexible Tiers: Offers a range of plans including Go (web/iPad), Pro (desktop), and Studio (advanced visualization), catering to hobbyists and professionals alike.
    • Cost: Provides a free, browser-based version for personal use, with paid monthly and annual plans for commercial features and desktop access.

    After exporting your architectural renders, ensuring they are high-resolution for client presentations is crucial. You can see how AI upscaling sharpens your final images to preserve every important detail.

    Website: https://sketchup.trimble.com/en/plans-and-pricing

    4. Maxon (Cinema 4D and ZBrush)

    Maxon represents a powerhouse duo in the 3D world, uniting the motion graphics titan Cinema 4D with the undisputed king of digital sculpting, ZBrush. This isn't just one 3D modeling app; it's an ecosystem designed for high-end production. Cinema 4D is revered in the motion design industry for its intuitive MoGraph toolset and rock-solid stability, while ZBrush is the industry-standard tool for creating hyper-detailed characters, creatures, and intricate hard-surface models that other applications simply can't handle.

    Maxon (Cinema 4D and ZBrush)

    What makes Maxon compelling is the Maxon One bundle, which packages these specialized tools together, offering significant value over individual subscriptions. User reviews consistently praise Cinema 4D’s gentle learning curve compared to its competitors, making it a favorite for artists transitioning from 2D. ZBrush, however, is a different beast, known for its unique workflow that rewards dedication with unparalleled sculpting power. The move to a subscription-only model has been controversial, but for professionals needing the best tools, it's often a necessary investment.

    Our Take & Key Features

    In any software comparison, Maxon's offerings stand out for their specialized excellence rather than a one-size-fits-all approach. For artists focused on motion graphics or high-poly sculpting, few alternatives can match this combination.

    • Specialized Workflows: Cinema 4D is a master of procedural motion graphics, while ZBrush offers a sculpting experience that feels more like digital clay than pushing polygons.
    • Industry Integration: Both apps are deeply embedded in professional pipelines for film, television, and game development, ensuring seamless collaboration.
    • Cost: Subscription-based, available individually or as part of the comprehensive Maxon One bundle. No new perpetual licenses are offered.
    • Ecosystem: The Maxon App simplifies license management and updates across all products, creating a unified user experience.

    Once your intricate models are sculpted and animated, presenting them perfectly is the final hurdle. For automating the post-production of your renders, from upscaling to perfect cutouts, you can explore developer-friendly APIs to enhance your creative output.

    Website: https://www.maxon.net

    5. SideFX (Houdini)

    Houdini isn't just a 3D modeling app; it's a procedural powerhouse built for artists who think like engineers. Instead of directly manipulating polygons, Houdini encourages you to build systems and recipes (nodes) that generate geometry, effects, and simulations. This node-based workflow is the gold standard in the visual effects industry for creating mind-bending destruction, fluid simulations, and complex environments that would be impossible to model by hand.

    SideFX (Houdini)

    What makes Houdini truly special is its digital asset system, allowing you to wrap up complex node networks into custom tools that can be used in other software like Unreal Engine or Maya. While user reviews often highlight its notoriously steep learning curve, its power is undeniable. The "Houdini Indie" license makes this VFX-grade tool accessible to freelancers and small studios, offering one of the best alternatives to more traditional modeling workflows.

    Our Take & Key Features

    For any serious comparison of high-end 3D software, Houdini excels in procedural generation and complex simulations. It's less a direct modeler and more a 3D creation toolkit for building complex systems.

    • Procedural Workflow: Its node-based system is non-destructive, meaning you can go back and change any step in your creation process at any time, which is incredibly powerful.
    • VFX & Simulation: Industry-leading tools for creating realistic fire, smoke, fluids, and particle effects are built directly into its core.
    • Houdini Indie: A nearly full-featured, affordable license for independent creators and studios earning under a certain revenue threshold, making professional tools accessible.
    • Houdini Engine: Allows you to import Houdini's procedural assets directly into other applications like game engines, streamlining complex pipelines.

    Website: https://www.sidefx.com/products/compare/?utm_source=openai

    6. Rhino 3D (McNeel)

    Rhino 3D is the architect's and industrial designer's best friend, a precision-driven 3d modeling app built for creating complex curves and surfaces with mathematical accuracy. Where polygonal modelers approximate curves, Rhino uses NURBS (Non-Uniform Rational B-Splines) to define them perfectly, making it the go-to for product design, jewelry, and manufacturing. This focus on CAD-like precision, combined with a surprisingly flexible free-form modeling environment, makes it a unique hybrid tool.

    Rhino 3D (McNeel)

    What really pushes Rhino into a league of its own is the inclusion of Grasshopper, a visual programming language that unlocks the world of parametric and generative design without writing a single line of code. User reviews frequently praise the one-time perpetual license, a refreshing departure from the subscription-heavy landscape of professional software. While it may lean on plugins for photorealistic rendering, its core strength lies in turning complex designs into manufacturable realities.

    Our Take & Key Features

    In any comparison of professional design software, Rhino's value proposition is its perpetual license and specialization in high-precision surface modeling. It’s an indispensable tool for anyone creating physical products.

    • Modeling Technology: Built on a foundation of hyper-accurate NURBS modeling, now supplemented with powerful SubD tools for more organic, free-form creation.
    • Generative Design: Includes the revolutionary Grasshopper visual scripting tool, enabling complex procedural and parametric workflows.
    • Cost: Offers a perpetual license, meaning you buy it once and own it forever, making it one of the best long-term investments among professional alternatives.
    • Extensibility: Features a robust ecosystem of third-party plugins for specialized tasks like rendering (V-Ray), CAM, and analysis.

    Website: https://www.rhino3d.com/buy/?utm_source=openai

    7. Onshape (PTC)

    Onshape shifts the entire paradigm of a traditional 3d modeling app by taking professional-grade parametric CAD entirely to the cloud. It’s less of a standalone program and more of a collaborative design platform, built from the ground up for distributed engineering teams and modern educational settings. By operating completely within a web browser, it eliminates installs, hardware compatibility issues, and the endless headache of file management, making it one of the most accessible CAD alternatives available.

    Onshape (PTC)

    What makes Onshape a standout is its integrated Product Data Management (PDM). Forget "final_v2_final_final.sldprt"; Onshape uses a Git-like versioning system, allowing teams to branch, merge, and compare design histories effortlessly. User reviews frequently praise this seamless, real-time collaboration, where multiple users can work on the same part assembly simultaneously. While its free plan makes all your documents public, it’s an unbeatable entry point for hobbyists and students.

    Our Take & Key Features

    For any comparison of cloud-based CAD, Onshape’s robust collaboration and data management tools put it in a class of its own. It’s a powerful choice for teams that prioritize agility and accessibility over offline capabilities.

    • Cloud-Native CAD: Full-featured parametric modeling that runs on any modern web browser, including Chromebooks and mobile devices.
    • Real-Time Collaboration: Multiple users can edit designs simultaneously, with live updates and an integrated commenting system.
    • Built-in Version Control: A complete edit history with branching and merging capabilities eliminates file-based PDM chaos.
    • Cost: Offers a generous free plan for open-source projects and hobbyists, with paid tiers for private documents and advanced enterprise features.

    Website: https://www.onshape.com/en/pricing?utm_source=openai

    8. Shapr3D

    Shapr3D is the 3D modeling app that breaks free from the desk, bringing professional-grade CAD to your iPad, Mac, and Windows devices with a touch-and-pen-first approach. It's built for speed, allowing engineers and designers to go from a quick sketch to a precise solid model in minutes, making it perfect for rapid prototyping and concept iteration. Its intuitive interface, designed around the Apple Pencil, feels more like drawing than traditional point-and-click modeling, offering a uniquely fluid creative experience.

    Shapr3D

    What makes Shapr3D a compelling choice is its focus on a seamless, cross-platform workflow without sacrificing precision. User reviews consistently praise its fast, direct modeling capabilities that feel natural and responsive. While it offers a capable free version, the subscription model gates advanced features and professional CAD formats. This places it in a price bracket comparable to some desktop juggernauts, making it a serious investment for professionals who value mobility and speed above all else.

    Our Take & Key Features

    In any comparison of mobile-first CAD tools, Shapr3D is a clear front-runner for its professional execution and design-centric workflow. It's one of the best alternatives for those who find traditional CAD software cumbersome for initial ideation.

    • Intuitive UX: A pen-first interface designed for Apple Pencil, making sketching and modeling feel incredibly natural and fast.
    • Direct Modeling Workflow: Effortlessly push, pull, and modify geometry to iterate on designs without the constraints of a complex history tree.
    • Cross-Platform Sync: Start a project on an iPad during a meeting and seamlessly continue it on your Windows or Mac desktop back at the office.
    • Cost: Offers a free tier for personal use with limitations, with paid subscriptions (Standard and Business) unlocking professional features and formats like STEP and IGES.

    Website: https://www.shapr3d.com/pricing?utm_source=openai

    9. Adobe Substance 3D Modeler

    Adobe Substance 3D Modeler dives headfirst into the tactile world of digital sculpting, treating 3D modeling less like engineering and more like working with digital clay. Its core strength is a gestural, intuitive workflow that shines in both traditional desktop and immersive VR environments. This approach makes it a fantastic tool for concept artists, character designers, and anyone who wants to create organic shapes without getting bogged down by vertices and polygons.

    Adobe Substance 3D Modeler

    What makes Modeler a compelling choice is its seamless integration into the broader Adobe ecosystem. You can sculpt a model and then, with a few clicks, send it directly to Substance 3D Painter for texturing. User reviews often praise this streamlined pipeline, noting how it accelerates creative projects. While it can be purchased as a standalone edition, its true power is unlocked when used as part of the full Substance 3D Collection, which provides a complete texturing and rendering suite.

    Our Take & Key Features

    In any comparison of sculpting-focused apps, Modeler stands out for its accessibility and powerful VR workflow. It’s an excellent choice for artists looking for intuitive creation tools over technical modeling.

    • Sculpting Workflow: Focuses on an intuitive, gestural "digital clay" approach that works seamlessly on desktop or in VR for a truly immersive experience.
    • Ecosystem Integration: Works flawlessly with other Substance 3D apps like Painter and Designer, creating a powerful pipeline for asset creation from start to finish.
    • Cost: Available via the Adobe Substance 3D Collection subscription or as a standalone perpetual license (2025 edition) on platforms like Steam.
    • Platform: The desktop version is currently Windows-only, which is a key consideration when evaluating alternatives on macOS.

    Website: https://www.adobe.com/products/substance3d/apps/modeler.html?utm_source=openai

    10. 3DCoat (Pilgway)

    3DCoat is less of an all-in-one 3D modeling app and more of a specialized digital clay workshop. It excels in voxel and surface sculpting, offering an intuitive, tactile experience for creating organic models. But where it truly carves its niche is in its post-sculpting workflow, bundling some of the industry's most powerful retopology, UV unwrapping, and PBR texture painting tools into a single, cohesive environment.

    3DCoat (Pilgway)

    What makes 3DCoat a compelling choice is its laser focus on the artistic asset pipeline. It’s designed to slot perfectly alongside other DCCs, acting as the bridge between a high-poly sculpt and a game-ready, textured model. User reviews often praise its auto-retopology feature as a massive time-saver, turning complex sculpts into clean, usable geometry with remarkable efficiency. While its interface has a learning curve compared to mainstream alternatives, its specialized toolset is hard to beat for character artists and hard-surface modelers.

    Our Take & Key Features

    In any software comparison for texturing and sculpting, 3DCoat stands out for its purpose-built tools and flexible pricing. It’s a powerful specialist that complements a generalist 3D application.

    • Sculpting & Retopology: Combines free-form voxel sculpting with powerful surface sculpting tools, plus an acclaimed Auto-Retopo function for clean mesh generation.
    • UV & Painting: Features a dedicated and highly efficient UV editing toolset alongside a comprehensive PBR smart material painting workflow.
    • Cost: Offers flexible licensing, including perpetual licenses, subscriptions, and unique rent-to-own options, making it accessible at different budget levels.
    • Integration: Designed to work seamlessly with other 3D software by focusing on sculpting, retopology, UVing, and texturing pipelines.

    Website: https://3dcoat.com/buy/?utm_source=openai

    11. Tinkercad (Autodesk)

    Tinkercad is the quintessential entry point into the world of 3D, a completely free and browser-based 3d modeling app that strips away complexity to reveal pure, creative fun. It's Autodesk’s friendly gateway drug to more complex software, designed specifically for beginners, educators, and anyone needing to whip up a 3D printable model in minutes, not hours. By using simple geometric shapes that you combine, subtract, and warp, it turns the intimidating process of 3D design into a set of digital building blocks.

    Tinkercad (Autodesk)

    What makes Tinkercad shine is its unwavering focus on accessibility. It runs on virtually any computer with a web browser, including Chromebooks, making it a classroom favorite for STEM education. User reviews consistently praise its gentle learning curve, which allows total novices to go from a blank canvas to a tangible 3D object ready for printing in a single session. While it's not a tool for professional production, its role as a conceptual sketchpad and educational platform is unmatched.

    Our Take & Key Features

    In any comparison of beginner-friendly software, Tinkercad is king. It’s less of a direct competitor to professional suites and more of a foundational tool that makes 3D accessible to everyone.

    • Modeling Approach: Employs a simple constructive solid geometry (CSG) workflow, where you add and subtract basic shapes to create complex forms.
    • Accessibility: Entirely browser-based, requiring no installation and running smoothly on low-spec hardware, making it one of the best alternatives for users without powerful PCs.
    • Cost: Completely free with just an Autodesk account, including all features and classroom management tools.
    • Education Focused: Packed with tutorials, project guides, and features designed to help educators teach the principles of 3D design and printing.

    Website: https://www.tinkercad.com/

    12. Nomad Sculpt

    Nomad Sculpt is the reason your tablet is about to become your favorite sculpting tool. This powerhouse 3d modeling app for iOS and Android brings the fluid, intuitive feel of digital clay to a mobile-first environment. It’s designed from the ground up for a stylus-and-touch workflow, allowing artists to sketch out characters, props, and organic shapes anywhere, without being tethered to a desktop. Its accessibility has made it a favorite for both beginners dipping their toes into sculpting and professionals creating concept art on the go.

    Nomad Sculpt

    What makes Nomad Sculpt stand out in user reviews is its surprising depth packed into such a lean package. It’s not just a simple doodling app; it offers a sophisticated toolset with layers, PBR painting, and robust sculpting brushes that feel responsive and powerful. While it can’t replace a full desktop setup for final production, its ability to quickly get ideas down and even perform advanced operations like voxel remeshing on a tablet is a game-changer for creative workflows.

    Our Take & Key Features

    In any comparison of mobile sculpting alternatives, Nomad Sculpt often comes out on top for its sheer capability and one-time-purchase model. It provides a near-desktop-level experience for a fraction of the cost.

    • Sculpting Engine: Features a high-performance engine supporting multi-resolution sculpting and dynamic topology, perfect for organic forms.
    • Painting & Rendering: Includes a full PBR painting system with layers and a simple but effective built-in renderer for quick previews.
    • Cost: A very affordable one-time purchase on mobile app stores, with an optional in-app purchase for a powerful Quad Remesher.
    • Portability: The mobile-first design makes it the ultimate tool for sculpting on the move, with excellent Apple Pencil and stylus support.

    Website: https://nomadsculpt.com

    Top 12 3D Modeling Apps — Quick Comparison

    Software ✨ Core features ★ UX / Quality 💰 Price / Value 👥 Target audience 🏆 USP
    Blender Modeling, sculpt, animation, Cycles/EEVEE, Geometry Nodes ★★★★ — powerful, steeper learning 💰 Free (GPL) — exceptional value 👥 Hobbyists → Professionals 🏆 Open‑source ecosystem & addons
    Autodesk (Maya, 3ds Max) Industry modeling, rigging, Arnold renderer, team/cloud tools ★★★★ — studio standard, complex 💰 High subscription cost 👥 Film/TV/Games studios, professionals 🏆 Studio pipeline integration & certified support
    SketchUp (Trimble) Web/iPad/Desktop tiers, 3D Warehouse, extensions ★★★★ — easy, fast concepting 💰 Tiered plans; flexible monthly 👥 Architects, interiors, product design 🏆 Rapid conceptual modeling + large model library
    Maxon (Cinema 4D & ZBrush) MoGraph, high‑detail sculpting, Maxon One bundle ★★★★ — stable, artist‑friendly 💰 Subscription; bundle options 👥 Motion graphics artists & sculptors 🏆 MoGraph workflow & industry‑leading sculpting
    SideFX (Houdini) Procedural node VFX, simulations, Houdini Engine ★★★ — extremely powerful, steep learning 💰 Flexible licensing incl. Indie 👥 VFX studios, procedural artists 🏆 Unmatched procedural/scalable scene generation
    Rhino 3D (McNeel) Precision NURBS, Grasshopper, strong plugin ecosystem ★★★★ — CAD‑grade accuracy 💰 Perpetual license available 👥 Industrial/product designers, jewelry 🏆 Precision NURBS + Grasshopper visual coding
    Onshape (PTC) Cloud parametric CAD, versioning, real‑time collaboration ★★★★ — smooth cloud UX, collaborative 💰 Free(public) / Paid private tiers 👥 Distributed teams & education 🏆 Cloud PDM + live collaboration
    Shapr3D Pen/touch first direct modeling, fast sketch→solid ★★★★ — very fast, intuitive on tablet 💰 Subscription; free edu plan 👥 Concept designers, iPad/pen users 🏆 Apple Pencil‑first, fast concepting
    Adobe Substance 3D Modeler Gestural digital‑clay sculpting, VR support, Substance integra. ★★★★ — sculpting‑focused, approachable 💰 Subscription or standalone (Steam) 👥 Sculptors, texture artists 🏆 VR sculpting & Substance ecosystem links
    3DCoat (Pilgway) Voxel/surface sculpt, auto‑retopo, UV & PBR painting ★★★★ — strong retopo/texturing workflows 💰 Flexible licensing (perpetual/rent) 👥 Texture artists, retopo specialists 🏆 End‑to‑end sculpt→retopo→paint pipeline
    Tinkercad (Autodesk) Browser CSG modeling, classroom features, easy export ★★★ — extremely easy, limited for pro use 💰 Free 👥 Beginners, education, 3D‑printing novices 🏆 Easiest web‑based entry tool for education
    Nomad Sculpt Mobile multi‑res sculpting, PBR painting, export (OBJ/glTF) ★★★★ — excellent tablet experience 💰 Low one‑time cost 👥 Mobile/tablet sculptors, quick concepting 🏆 Premium mobile sculpting with Apple Pencil support

    From Pixels to Perfection: Supercharging Your 3D Workflow

    Well, there you have it, our whirlwind tour of the 3D modeling app universe is complete! We’ve navigated the vast cosmos from the free, all-powerful black hole that is Blender to the specialized, high-gravity worlds of ZBrush and Houdini. We've seen how tools like Shapr3D and Nomad Sculpt are bringing professional-grade creation to your fingertips on mobile devices, proving that you don't need a supercomputer to build something spectacular. The digital landscape is richer and more accessible than ever, filled with incredible software ready to bring your wildest ideas to life.

    This journey wasn't just about listing features; it was about providing a detailed comparison to help you understand the core philosophies behind each application. Our in-depth reviews aimed to cut through the marketing noise and give you a real sense of what it’s like to work with these tools, highlighting both their superpowers and their kryptonite. By examining various alternatives, we've shown that there's no single "best" 3d modeling app, only the one that best fits your specific mission.

    How to Choose Your Champion

    So, how do you pick your creative co-pilot from this star-studded lineup? The decision paralysis is real, but you can conquer it by focusing on your primary objective.

    • For Aspiring Creators & Hobbyists: Don't get intimidated by price tags. Start with Blender or Tinkercad. These free platforms offer an incredible runway to learn the fundamentals without any financial commitment. You can always specialize later.
    • For Product Designers & Engineers: Precision is your game. Your best bet lies with CAD-focused software like Onshape, Rhino 3D, or Shapr3D. Their parametric and NURBS-based modeling capabilities are built for manufacturing and real-world accuracy.
    • For Marketing & E-commerce Teams: You need speed, realism, and an easy-to-manage workflow. SketchUp and Adobe Substance 3D Modeler offer a great balance of power and user-friendliness, perfect for creating stunning product visualizations without a steep learning curve.
    • For Game Devs, Animators & VFX Wizards: You live on the cutting edge. The industry-standard powerhouses like Autodesk Maya, 3ds Max, Cinema 4D, and the procedural magic of Houdini are your domains. These tools are built to handle the most complex pipelines and demanding creative challenges.

    The Final Polish: From Render to Reality

    Remember, creating a stunning 3D model is only the first half of the equation. The most photorealistic render can fall flat if it's presented poorly. Manually cutting out backgrounds, fighting with jagged edges, or struggling with low-resolution textures can suck hours out of your day and diminish the impact of your hard work. This is where your workflow needs a final, crucial upgrade.

    Your chosen 3d modeling app is the factory where you build the masterpiece, but a smart post-processing pipeline is the professional photo studio that makes it shine. Instead of getting bogged down in tedious, repetitive editing tasks in Photoshop, you can automate the entire process. Imagine exporting hundreds of product renders and having them instantly become catalog-ready with perfect, transparent backgrounds, upscaled textures, and consistent lighting. This isn't science fiction; it’s the power of integrating a dedicated image processing API into your workflow, freeing you to focus on what you do best: creating. By bridging the gap between raw render and polished final asset, you not only save immense amounts of time but also elevate the perceived value of your work.


    Ready to automate the final, tedious step of your creative process? Stop wasting hours on manual background removal and image cleanup. PixelPanda connects seamlessly with your workflow to deliver perfect, production-ready images from your renders in seconds. Try PixelPanda for free and see how AI-powered editing can perfect your pixels.

  • A Guide to ai tools for image editing in 2025

    A Guide to ai tools for image editing in 2025

    Tired of spending hours on manual photo edits that feel like a digital root canal? The game has officially changed. Powerful AI tools for image editing are no longer a futuristic fantasy but an essential part of the modern creative toolkit, freeing up time for developers, marketers, and e-commerce teams who need to generate stunning visuals at scale. The problem isn't a lack of options; it's a flood of them. How do you know which AI-powered platform is a powerhouse and which is just a glorified filter?

    This guide cuts through the marketing noise. We're diving deep into the top 12 tools for 2025, providing honest reviews, a head-to-head feature comparison, and a clear look at the best alternatives for every possible use case. Whether you're a developer needing a robust API for background removal, a marketer churning out social media assets, or an e-commerce manager perfecting thousands of product shots, this is your definitive resource. We'll explore everything from one-click background removal and intelligent upscaling to generative fill and API availability, showing you exactly what works and what doesn't. For a deeper dive into the fundamental concepts and definitions of this evolving field, consider exploring this resource on What is AI Photography: A Comprehensive Guide.

    Forget generic feature lists. We’re providing actionable insights, screenshots, direct links, and clear recommendations to help you find the perfect tool to automate your creative workflow. Let’s find the right AI magic for your specific needs.

    1. PixelPanda

    PixelPanda positions itself not just as another entry in the crowded field of ai tools for image editing, but as an integrated, developer-first platform designed for automation at scale. It consolidates a powerful suite of editing capabilities into a single, cohesive workflow accessible via a clean UI and a robust API. This makes it an exceptionally strong choice for teams needing to programmatically enhance, clean, and generate visuals without manual intervention.

    Unlike single-purpose tools, PixelPanda’s strength lies in its comprehensive feature set. It combines precise background and object removal with intelligent 4x upscaling, smart inpainting, and text-to-image generation. The platform particularly excels with difficult subjects like hair and fur, using depth-aware models to produce clean, natural-looking cutouts that many alternatives struggle with.

    Standout Features & Use Cases

    • Studio-Quality Automation: The toolset is built for high-volume tasks. Ecommerce teams can automate the creation of thousands of consistent, white-background product shots, while real estate agents can instantly remove unwanted objects from property photos.
    • Developer-Friendly API & SDKs: This is where PixelPanda shines for technical teams. The simple REST API and available SDKs allow for seamless integration into existing web apps, backend systems, or content management workflows. You can build entire image processing pipelines without ever touching the UI.
    • AI Avatar & Model Generation: A game-changer for marketing, this feature lets you train a custom AI model on a person or product (with just 10-20 photos). From there, you can generate an infinite stream of on-brand, photorealistic model shots or product lifestyle images without organizing a single photoshoot.

    Pricing & Onboarding

    PixelPanda offers a straightforward, volume-based pricing structure with a generous free trial (10 credits, no credit card required) that allows for genuine quality validation.

    Plan Price/Month Images AI Avatars Support
    Free Trial $0 10 credits 0 Community
    Starter $49 500 1 Email
    Pro $99 1,500 4 Priority
    Business $249 4,500 10 Dedicated

    Practical Tip: The credits don't roll over, so it’s wise to pick a plan that aligns closely with your projected monthly volume. Use the free trial to process your most challenging images first, which will give you a clear idea of the platform's capabilities before committing. Their interactive demos, including a powerful one for image upscaling, are also great for quick reviews and performance comparison.

    Website: https://pixelpanda.ai

    2. Adobe Photoshop + Firefly

    Let's address the 800-pound gorilla in the room: Adobe Photoshop. It’s the platform most other AI tools for image editing are measured against, and for good reason. With the integration of its Firefly AI model, Photoshop has transformed from a manual powerhouse into a generative content juggernaut. Its AI features aren't just add-ons; they are deeply woven into the fabric of its legendary layer-based workflow.

    Adobe Photoshop + Firefly

    The headline feature is Generative Fill, allowing you to select an area and conjure anything from a new object to a completely different background with a simple text prompt. It's shockingly good. For Photoshop users, understanding how AI is transforming backgrounds in Photoshop for fashion brands can significantly enhance your workflow. The Generative Expand tool is another game-changer, letting you extend an image's canvas while the AI intelligently fills in the new space, matching the original's style.

    Key Features & Use Cases

    • Best For: Professional designers, enterprise creative teams, and anyone already invested in the Adobe Creative Cloud ecosystem.
    • Standout Features:
      • Generative Fill/Expand: Integrated directly into selection tools for seamless in-painting and out-painting.
      • Firefly Web App: A separate playground for text-to-image generation and other AI experiments.
      • Enterprise-Grade Policies: Adobe trains Firefly on its own stock library, providing a clearer path for commercial use.
    • Pricing: Access requires a Creative Cloud subscription, starting around $22.99/month for the Photoshop plan, which includes a set number of generative credits.

    Practical Assessment & Alternatives

    In a direct comparison, Photoshop's AI integration is unmatched for professionals who need granular control. However, the subscription cost can be a barrier. Recent reviews have also pointed to some user confusion over plan terms. For teams needing simpler, API-driven solutions or seeking Photoshop alternatives, platforms like PixelPanda offer more straightforward automation without the steep learning curve.

    3. Canva (Magic Edit/Magic Expand/Magic Studio)

    If Photoshop is the pro-grade heavyweight, Canva is the undisputed champion of accessibility and speed. Once a simple template tool, it has evolved into a full-fledged design suite powered by its "Magic Studio" AI. These aren't just tacked-on features; they are built into Canva's core, browser-first workflow, making powerful AI tools for image editing available to marketers, creators, and small businesses without a steep learning curve.

    Canva (Magic Edit/Magic Expand/Magic Studio)

    Canva’s AI magic shines with features like Magic Edit, which lets you brush over an object and type a prompt to replace it, and Magic Expand, its take on generative out-painting. The entire platform is engineered for rapid content creation, from social media posts to marketing presentations, with an enormous library of templates acting as a launchpad. It’s built for teams that need to produce branded content quickly and consistently.

    Key Features & Use Cases

    • Best For: Marketing teams, social media managers, and small businesses needing to create high-volume, branded visual content without professional design skills.
    • Standout Features:
      • Magic Studio: An all-in-one suite including Magic Edit (inpainting), Magic Expand (outpainting), and a background remover.
      • Template-Driven Workflow: AI tools are integrated directly into a vast library of templates, speeding up content creation.
      • Brand Kit: Centralizes brand assets like logos and color palettes for team-wide consistency.
    • Pricing: A robust free tier is available. Canva Pro starts at around $14.99/month, with custom pricing for Canva for Teams.

    Practical Assessment & Alternatives

    In a direct comparison, Canva demolishes the learning curve associated with professional tools like Photoshop. Its user experience is second to none for quick edits. However, user reviews have noted that recent pricing changes for teams were steep. For users who don't need Canva’s extensive template library or brand controls, simpler, more focused alternatives like Fotor or even PixelPanda's automated API approach might be more cost-effective for specific editing tasks.

    4. Topaz Labs (Topaz Photo AI, Gigapixel)

    When it comes to pure image restoration and enhancement, Topaz Labs is in a class of its own. Rather than focusing on generative fills or creative edits, their suite of desktop-first AI tools for image editing is obsessed with technical perfection. Their apps, like Photo AI and Gigapixel AI, are specialized instruments for sharpening, denoising, deblurring, and upscaling photos with an almost unsettling level of precision. They rescue blurry, noisy, or low-resolution images that you would otherwise discard.

    Topaz Labs (Topaz Photo AI, Gigapixel)

    This laser focus on enhancement means Topaz excels where other all-in-one editors fall short. While Photoshop can upscale, Gigapixel AI often produces cleaner, more detailed results, making it a favorite among professional photographers and digital artists needing to print large-format images from smaller source files. Its algorithms are specifically trained to reconstruct authentic detail rather than just smoothing pixels.

    Key Features & Use Cases

    • Best For: Photographers, digital restoration artists, and anyone needing to improve the technical quality of existing images.
    • Standout Features:
      • Gigapixel AI: Best-in-class image upscaling for increasing resolution without artifacts.
      • Photo AI: An all-in-one tool that intelligently applies denoising, sharpening, and facial recovery.
      • Perpetual Licensing: Buy the software once and own it forever, with an option to pay for a year of updates.
    • Pricing: Products can be purchased individually (around $99 for Photo AI) or as a bundle. A perpetual license is included, with an optional $49/year upgrade plan after the first year for continued updates.

    Practical Assessment & Alternatives

    In a direct comparison, Topaz's enhancement results are frequently cited in reviews as superior to many built-in filters found in broader editing suites. The main drawback is its specificity; it’s not a full raster editor. For users seeking generative features or layer-based editing alternatives, platforms like Adobe Photoshop or Luminar Neo are more appropriate. However, for the specific tasks of rescuing and refining image quality, Topaz Labs often remains the professional's choice.

    5. Skylum Luminar Neo

    If Photoshop is the industrial-strength powerhouse, Skylum's Luminar Neo is the specialized artist's studio, leveraging AI to deliver stunning results with astonishing speed. Designed as a user-friendly desktop editor, Luminar Neo excels at complex, often tedious tasks like sky replacement and portrait retouching, making it one of the most accessible and powerful AI tools for image editing for photographers and content creators. Its slider-based controls make pro-level edits feel almost like applying a filter.

    Skylum Luminar Neo

    The platform’s magic lies in its dedicated AI modules. With one click, Sky AI not only replaces a dull sky but also automatically relights the entire scene to match the new sky’s mood and lighting. Similarly, its portrait tools can enhance skin, eyes, and even bokeh without requiring meticulous masking. This focus on simplified, high-impact edits has cemented its reputation in countless glowing reviews as a go-to for quick, impressive photo enhancements.

    Key Features & Use Cases

    • Best For: Photographers, content creators, and marketers who need fast, high-quality results without a steep learning curve.
    • Standout Features:
      • Sky AI & Relighting: Industry-leading automated sky replacement and scene relighting.
      • Portrait AI Tools: Quick tools for skin enhancement, bokeh creation, and facial feature adjustments.
      • Noiseless & Sharpen AI: Intelligent modules for cleaning up and clarifying images.
      • Plugin Capability: Works as a standalone app or as a plugin for Photoshop and Lightroom.
    • Pricing: Offers flexible options, including a monthly subscription around $14.95/month or perpetual license bundles starting near $199, which is often seen as a great value.

    Practical Assessment & Alternatives

    In a direct comparison, Luminar Neo's one-click AI tools are often faster for specific tasks than manual methods in Photoshop. However, its cataloging and library management features are less robust than Adobe Lightroom's, a key consideration for professionals with massive photo libraries. While it's one of the best AI-powered Photoshop alternatives for task-specific edits, teams needing API access for automation would be better served by a platform like PixelPanda.

    6. ON1 Photo RAW (and Photo RAW MAX)

    For photographers and editors wary of endless subscriptions, ON1 Photo RAW presents a compelling all-in-one package that stands on its own. It’s a powerful photo editor, manager, and effects engine that has aggressively integrated AI, positioning itself as a direct competitor to the Adobe suite. The platform champions a non-destructive workflow, combining traditional layer-based editing with modern AI enhancements.

    Its AI-powered masking tools, like Super Select AI, allow you to simply point and click on objects like skies, people, or flora to create instant, precise masks. Features like Generative Erase remove distractions content-aware style, while its renowned Resize AI uses machine learning to upscale images with incredible detail retention, making it a standout among other AI tools for image editing. The MAX version even functions as a plugin for Adobe or Affinity, bringing ON1's AI magic into existing workflows.

    Key Features & Use Cases

    • Best For: Photographers seeking a subscription-free Photoshop/Lightroom alternative, and designers wanting powerful AI tools that can plug into an existing Adobe stack.
    • Standout Features:
      • NoNoise AI & Resize AI: Best-in-class noise reduction and image upscaling.
      • Perpetual License Option: A rare chance to "own" your software without recurring fees.
      • MAX Plugin Workflow: Seamlessly integrates ON1's AI features into other editors like Photoshop, Lightroom Classic, and Affinity Photo.
    • Pricing: Offers both a perpetual license (around $99.99 for Photo RAW) and an "Everything" subscription (starting at $7.50/month) that includes cloud storage and all future upgrades.

    Practical Assessment & Alternatives

    In a direct comparison to Adobe, ON1 holds its own on core AI features, especially upscaling, and wins big with its perpetual license model. Many user reviews praise its powerful feature set as one of the best Photoshop alternatives. However, the ecosystem is smaller, with fewer third-party plugins and presets available. For those needing enterprise-level, API-first solutions for tasks like automated background removal, a specialized tool like PixelPanda offers a more scalable and developer-friendly approach.

    7. DxO (PhotoLab, Nik Collection, PureRAW, ViewPoint)

    For the purists out there, DxO offers a different flavor of AI tools for image editing, one less concerned with generating pixels and more obsessed with perfecting them. Instead of text-to-image wizards, DxO’s suite (PhotoLab, PureRAW, Nik Collection) leverages machine learning for unparalleled photographic fidelity. Its AI is trained on hundreds of thousands of images to perform class-leading RAW demosaicing and noise reduction.

    DxO (PhotoLab, Nik Collection, PureRAW, ViewPoint)

    The star of the show is DeepPRIME XD, an AI-powered process that cleans up digital noise and enhances detail in RAW files with breathtaking clarity. It’s not about changing your image; it's about revealing the absolute best version of the data you captured. For photographers who live and die by image quality, especially in low-light situations, DxO's approach is nothing short of magical, making it a critical first step in a professional workflow.

    Key Features & Use Cases

    • Best For: Professional photographers, serious hobbyists, and anyone who wants the cleanest possible starting point for their edits.
    • Standout Features:
      • DeepPRIME XD: Industry-leading AI noise reduction and detail enhancement for RAW files.
      • Automated Optical Corrections: AI analyzes your camera/lens combination and applies precise corrections for distortion, vignetting, and aberrations.
      • Perpetual Licensing: A refreshing one-time purchase model with transparent upgrade paths, avoiding subscription fatigue.
    • Pricing: Products are sold with perpetual licenses. PhotoLab 7 is around $229, and PureRAW 4 is $129, with bundles and upgrade discounts available.

    Practical Assessment & Alternatives

    In a direct comparison, DxO's DeepPRIME XD technology frequently comes out on top in reviews against competitors like Topaz Labs for pure noise reduction. However, it lacks any generative AI features like in-painting or out-painting. For those seeking creative editing or asset generation, alternatives like Photoshop are necessary. DxO's strength is as a specialized pre-processor or a dedicated RAW editor for achieving technical perfection before creative work begins.

    8. Picsart

    If Photoshop is the heavyweight champion for professionals, Picsart is the nimble, social-media-savvy contender for creators and marketers. It began as a mobile-first creative suite and has evolved into a powerful cross-platform editor packed with accessible AI tools for image editing. It's designed for speed and ease of use, prioritizing quick, shareable results over granular, layer-based precision.

    Picsart

    Picsart’s strength lies in its all-in-one approach. You can go from generating a concept with its AI Image Generator to removing a background, replacing an object with AI Replace, and then dropping the result into a social media template from its massive library, all within one ecosystem. The web and mobile apps are synced, making it perfect for the creator who starts a design on their desktop and finishes it on their phone.

    Key Features & Use Cases

    • Best For: Social media managers, content creators, and small businesses needing a fast, template-driven workflow.
    • Standout Features:
      • AI Replace & Background Tools: Simple, effective one-click solutions for common editing tasks.
      • Huge Asset Library: Access to templates, fonts, stickers, and Getty Images stock video clips.
      • Cross-Platform Sync: Seamlessly move between web, iOS, Android, and Windows apps.
      • Bulk Editor: Apply edits like background removal to up to 50 images at once.
    • Pricing: Offers a free tier with limitations. Paid plans like Picsart Plus start around $5/month (billed annually) and include more features and AI credits.

    Practical Assessment & Alternatives

    In a direct comparison, Picsart is far more approachable and affordable than a full Adobe subscription. However, user reviews often note that the credit-based system for AI features on lower tiers can feel restrictive. It’s not a true Photoshop replacement for complex compositing. For users seeking alternatives focused purely on automated, high-volume processing via API, tools like PixelPanda offer a more developer-centric solution without the creative suite wrapper.

    9. Pixlr

    If you're looking for a powerful, browser-based editor that doesn't require a hefty download or subscription, Pixlr is your champion. It’s a versatile suite of tools that brings sophisticated AI image editing to anyone with a web browser, making it incredibly accessible. Acting as a lightweight-yet-mighty alternative to desktop software, Pixlr integrates AI features like background removal and generative fill directly into a familiar, layer-based interface.

    Pixlr

    The platform is split into two main editors: Pixlr X for quick, template-driven designs and Pixlr E for more advanced, Photoshop-like control. Its AI-powered Generative Fill and expand tools are shockingly capable for a web app, allowing you to seamlessly add or remove elements with text prompts. This makes it a go-to for creating social media graphics or quick product mockups without leaving your browser.

    Key Features & Use Cases

    • Best For: Students, social media managers, and small businesses needing quick, accessible AI editing tools without software installation.
    • Standout Features:
      • AI Remove Background/Object: Fast and effective one-click tools for isolating subjects.
      • Web-Based AI Suite: Includes Generative Fill and Expand, accessible on any device with a browser.
      • Education Program: Special pricing and access for schools, making it a great educational tool.
    • Pricing: Starts with a free plan, with premium subscriptions from just $1.99/month (billed annually), which includes a starter pack of AI credits.

    Practical Assessment & Alternatives

    In a direct comparison, Pixlr shines with its low cost and high accessibility. User reviews praise its ease of use for everyday tasks. However, the AI credit limits on lower-tier plans can be restrictive for heavy users, and it lacks the raw power of desktop applications for complex, high-resolution work. For those seeking alternatives focused on automated, API-first solutions rather than manual editing, tools like PixelPanda provide a more scalable backend for high-volume processing.

    10. remove.bg (by Kaleido)

    Sometimes you don't need a Swiss Army knife; you just need a scalpel. That's the entire philosophy behind remove.bg, a hyper-specialized tool that does one thing with ruthless efficiency: removes backgrounds. Forget complex selection tools or manual masking. This platform is the one-click wonder for generating clean, professional cutouts of people and products, making it a staple in high-volume e-commerce and creative workflows.

    remove.bg (by Kaleido)

    While many other AI tools for image editing bundle background removal as a feature, remove.bg makes it the main event. Its AI is meticulously trained on portraits and product shots, resulting in remarkably accurate edges, even with tricky details like hair or fur. For developers and e-commerce teams, its true power lies in its robust API and integrations, which allow for complete automation of background removal tasks at scale.

    Key Features & Use Cases

    • Best For: E-commerce catalog managers, developers needing an API for automated workflows, and marketers creating high volumes of social media assets.
    • Standout Features:
      • High-Precision Cutouts: Exceptionally accurate for human subjects, products, and even cars.
      • Multi-Platform Integrations: Offers a web app, desktop apps (Windows/Mac/Linux), a Photoshop plugin, and a powerful API/CLI.
      • Batch Processing: Drag and drop hundreds of images for simultaneous processing via the desktop app.
    • Pricing: Offers a free-forever plan with one full-resolution download and unlimited previews. Paid plans use a credit system, available via subscription (starting at $9/month for 40 credits) or pay-as-you-go packs.

    Practical Assessment & Alternatives

    In a direct comparison, remove.bg often outperforms generalist editors in speed and accuracy for its specific task. User reviews consistently praise its reliability and ease of use. However, its specialized nature is also its main limitation; you'll need another editor for any further work. For teams seeking all-in-one alternatives or more complex generative AI features, platforms like PixelPanda or Canva provide a broader toolset, though potentially without remove.bg's pinpoint cutout precision.

    11. Clipdrop

    Clipdrop, now part of Stability AI, is a suite of lightning-fast, single-purpose AI tools for image editing, designed with a web-first and API-centric approach. Instead of a single complex interface, it offers a collection of dedicated tools that do one thing exceptionally well, making it a favorite for e-commerce teams and developers who need quick, reliable results without firing up a heavyweight application.

    Clipdrop

    Its strength lies in its focused utilities. The Cleanup tool can precisely remove objects or text from an image, while the Relight feature lets you add realistic studio lighting to product shots after the fact. The Uncrop tool works just like you'd expect, intelligently expanding the canvas of your photo. This modular approach makes it perfect for automating specific steps in a creative workflow.

    Key Features & Use Cases

    • Best For: E-commerce sellers, developers needing API access, and marketers who require quick, specific retouching tasks.
    • Standout Features:
      • Cleanup and Relight: Excellent for product photography post-production directly in the browser.
      • Image Upscaler & Uncrop: Expand and enhance images up to 16x their original size with impressive clarity.
      • Comprehensive API: Offers programmatic access to all its tools, ideal for batch processing or integration.
    • Pricing: A free tier is available with watermarks and resolution limits. The Pro plan starts at around $9/month, offering higher resolution, no watermarks, and increased API usage credits.

    Practical Assessment & Alternatives

    In a direct comparison, Clipdrop shines for its speed and simplicity. User reviews often praise its clean interface and the high quality of individual tools, especially for product-focused edits. However, the credit-based system on paid plans can feel restrictive for high-volume users. For those seeking alternatives that offer more integrated, layer-based editing, a tool like PhotoRoom might be more suitable. Yet, for developers wanting a powerful, focused API, Clipdrop remains a top contender against more complex platforms.

    12. Let’s Enhance

    If your primary goal is to take a low-resolution image and make it stunningly sharp, Let’s Enhance is your specialist. This platform doesn't try to be an all-in-one editor; instead, it focuses its AI firepower on one critical task: upscaling and enhancement. It’s a go-to service for breathing new life into older photos, preparing e-commerce shots for high-zoom, or getting digital images ready for large-format printing.

    Let’s Enhance

    The platform offers different AI models tailored for specific needs, like "Smart Enhance" for general improvements or "Photo" for realistic details. Its ability to process images in batches makes it a powerful asset for anyone managing large volumes of visual content, from real estate listings to product catalogs. The user experience is straightforward, focusing on getting you a high-quality result with minimal fuss.

    Key Features & Use Cases

    • Best For: E-commerce sellers, real estate photographers, and anyone needing to print low-res digital images at high quality.
    • Standout Features:
      • High-Resolution Upscaling: Can increase image resolution up to 16x while intelligently improving tone, color, and clarity.
      • Batch Processing: Upload and enhance multiple images simultaneously, streamlining high-volume workflows.
      • Developer API: Offers an API for businesses to integrate its powerful upscaling capabilities directly into their own applications.
    • Pricing: Operates on a credit-based system. Plans start from $9/month (billed annually) for 100 credits, with pay-as-you-go options and higher-tier business plans available.

    Practical Assessment & Alternatives

    In a direct comparison, Let’s Enhance excels at pure upscaling, often outperforming generalist AI tools for image editing. User reviews consistently praise its simple, results-first workflow. However, it's not a full-fledged editor; you'll need another tool for complex composites or creative changes. For those seeking broader editing features or one-click alternatives with a different feature set, platforms like Fotor or even PixelPanda’s enhancement APIs offer a more comprehensive suite of tools beyond just upscaling.

    AI Image Editing — Top 12 Tools Comparison

    Product Core features / USP ✨ Quality ★ Price / Value 💰 Target 👥
    PixelPanda 🏆 Background removal, text/watermark removal, 4× upscaling, face enhancement, smart inpainting, depth‑aware/edge‑preserving models, avatar training ★★★★★ Free 10‑credit trial; Starter $49/mo (500), Pro $99/mo (1,500), Business $249/mo (4,500) — volume API + batch Developers, e‑commerce & marketing teams
    Adobe Photoshop + Firefly Generative Fill/Expand, integrated AI in layers, Firefly text‑to‑image, cloud sync & enterprise controls ✨ ★★★★★ 💰 Subscription (Creative Cloud); enterprise plans — higher cost Agencies, publishers, enterprise creatives
    Canva (Magic Studio) Fast web templates, Magic Edit/Expand, brand kit and team controls — web/mobile first ✨ ★★★★☆ Freemium → Pro/Teams (changed pricing) — templates & brand features SMB marketers, social teams, non‑designers
    Topaz Labs (Photo AI, Gigapixel) Class‑leading denoise, deblur, detail recovery & upscaling (Gigapixel) ✨ ★★★★★ Perpetual licenses or subscription; optional upgrade plans Photographers needing best upscales/enhancement
    Skylum Luminar Neo AI sky replace, relight, portrait enhancers, plugin support — intuitive UI ✨ ★★★★☆ Perpetual bundles & asset marketplace — good value Enthusiast photographers, creatives
    ON1 Photo RAW (MAX) AI masking, generative erase/expand, Resize AI, MAX plugins for Adobe/Affinity ✨ ★★★★☆ Perpetual or subscription (Everything Plus) — plugin bundles Photographers wanting subscription alternative
    DxO (PhotoLab, PureRAW) DeepPRIME XD demosaic/denoise, optical corrections, Nik Collection plugins ✨ ★★★★★ Perpetual + clear upgrade pricing — pro toolset Pro photographers focused on RAW fidelity
    Picsart AI generator, background replace, bulk editing, large asset library — cross‑platform ✨ ★★★★☆ Affordable promos; credit caps on lower tiers Creators, SMB marketers, social creators
    Pixlr Web editor (E/X) with AI remove & generative fill, low‑cost entry & edu programs ✨ ★★★★☆ Low‑cost subscriptions; AI credit packs Students, casual editors, social users
    remove.bg One‑click highly accurate background removal, desktop/Photoshop plugin & API ✨ ★★★★★ Pay‑as‑you‑go credits or subscription — high‑res costs at scale E‑commerce, product/portrait cutout workflows
    Clipdrop Cleanup, relight, upscaler (up to 16×), uncrop & API for fast product retouch ✨ ★★★★☆ Pro plan with daily quotas/credits E‑commerce retouchers, fast browser workflows
    Let’s Enhance High‑quality upscaling + tone/clarity enhancement, batch & credit rollover ✨ ★★★★☆ Credit‑based plans; rollover on some individual plans E‑commerce, prints, real estate image upscaling

    Choosing Your Creative Co-Pilot: Final Thoughts on the Best AI Editor for You

    Well, there you have it. We've journeyed through the digital darkroom, explored the AI-powered assembly lines, and met a dozen creative co-pilots, each with its own unique flair. From the integrated powerhouse of Adobe Photoshop + Firefly to the rapid-fire content creation engine of Canva, the landscape of ai tools for image editing is more vibrant and diverse than ever. It's no longer a question of if you should use AI, but which AI fits snugly into your creative or technical workflow.

    Our detailed reviews and comparison of these platforms reveal a crucial truth: the "best" tool is a myth. The right tool, however, is very real. It’s the one that speaks your language, whether that's the C-suite dialect of ROI and efficiency, the developer's tongue of APIs and integration, or the creator's visual vocabulary of pixels and light.

    Finding Your Perfect AI Partner

    Making the final choice requires a bit of introspection. Ask yourself not just "What can this tool do?" but "How does this tool solve my biggest problem?" Let's distill the decision-making process into a few key scenarios:

    • For the All-in-One Creative Professional: If you live and breathe the Adobe ecosystem, sticking with Photoshop + Firefly is a no-brainer. The deep integration and professional-grade controls are unmatched for designers who need granular power over every pixel. Similarly, photographers invested in a single-source-of-truth library might find their home with Skylum Luminar Neo or ON1 Photo RAW, which blend powerful AI enhancements with robust digital asset management.
    • For the Agile Marketer and Social Media Guru: Speed and simplicity are your currency. Canva is your undisputed champion here, turning complex design tasks into a few clicks. For quick, one-off tasks like background removal, a specialized tool like remove.bg can be a lifesaver, delivering exactly what you need with zero friction.
    • For the Technical Implementer and High-Volume Business: This is where the conversation shifts from user interfaces to APIs. Your primary concern isn't a single polished image; it's a thousand, or a million, processed flawlessly. This is the domain where PixelPanda truly shines as a powerful alternative. While many tools offer an API as an afterthought, PixelPanda is built API-first, designed for the programmatic demands of ecommerce marketplaces, SaaS platforms, and automated marketing workflows.

    Final Considerations Before You Commit

    Before you hand over your credit card details, remember to put these tools to the test in your own environment. A feature that looks amazing in a demo video might crumble under the specific demands of your product photos or marketing assets. Take advantage of free trials to run your own benchmarks.

    Consider the long-term implications. How does the pricing scale? What are the usage limits? For developers, how good is the API documentation, and what does the support system look like when you inevitably hit a snag? A thorough evaluation now will save you countless headaches later. The journey through the various alternatives has shown us that while many tools can perform a similar function, their implementation and business model can make all the difference.

    The era of manual, tedious editing is officially over. The army of AI co-pilots we've reviewed is ready to handle the heavy lifting, freeing you up to focus on the one thing they can't replicate: your unique creative vision. Your job is simply to choose the right partner for the mission. So go ahead, pick a few contenders, take them for a spin, and prepare to elevate your visual content game to a whole new level.


    Ready to see how a developer-first approach to ai tools for image editing can transform your workflow? PixelPanda offers a powerful, scalable API for everything from background removal and upscaling to generative model photography. Start building for free and discover the power of automated, on-brand visual creation at PixelPanda.

  • How to Optimize Images for Web A Guide to Speed and SEO

    How to Optimize Images for Web A Guide to Speed and SEO

    Optimizing images for your website isn't some dark art. It really just boils down to a simple formula: pick the right format, shrink the file size, and then serve it up smartly. When you nail this, your site gets faster, your visitors are happier, and Google gives you a nice little nod in the rankings. Your images become a performance asset, not an anchor dragging your site to the bottom of the ocean.

    Why Slow Images Are Your Website's Kryptonite

    Let's get straight to the point: slow-loading images are one of the biggest reasons people will ditch your site and never come back. Every single unoptimized photo or graphic is a digital speed bump, ticking off your visitors and slowly eroding your credibility. It's the silent killer of user engagement.

    Picture this: a potential customer lands on your slick e-commerce site. They're greeted by a stunning hero shot… that takes a full five seconds to load. Annoyed but persistent, they click on a product, only to watch the gallery photos crawl into view one by agonizing one. By the time the page is usable, their initial excitement has evaporated, and they’ve already bounced over to a competitor who gets it right. This isn't just a tech hiccup; it’s a direct punch to your revenue.

    Sketch of a slow-loading website with a spinning wheel and a person, illustrating page speed issues.

    The True Price of a Sluggish Visual Experience

    The damage from slow images goes way beyond a bad first impression. It sends a destructive ripple effect through all the metrics you care about.

    • Bounce Rates Through the Roof: Let's face it, nobody has time to wait. Staggering data shows that 53% of mobile users will abandon a site if it takes more than 3 seconds to load. And what's usually the heaviest thing on a page? You guessed it.
    • Conversion Rates in a Nosedive: Every extra second of load time is proven to chip away at your conversion rate. If your "Buy Now" button is held hostage by a lazy-loading product shot, you're literally watching money walk out the door.
    • Plummeting SEO Performance: Search engines like Google are obsessed with user experience. A site bogged down by heavy visuals will get hammered on its Core Web Vitals scores, which translates directly to lower search rankings and less free traffic.

    The big takeaway here is that knowing how to optimize images isn't just a neat trick for web developers—it's a non-negotiable skill for anyone who wants to win online. It's as fundamental as writing a good headline.

    In the rest of this guide, we'll dive deep into a practical comparison of modern image formats, review the best tools for the job, and look at some powerful alternatives for putting your entire optimization workflow on autopilot. For a glimpse into how the pros handle this at scale, you can even check out tools like the PixelPanda API for automated image processing.

    Picking The Right Tool For The Job: A Guide to Image Formats

    Choosing the right image format is your first, and maybe most important, decision in the quest for a faster website. Getting this wrong is like showing up to a go-kart race with a monster truck. Sure, it's big and powerful, but it's clumsy, slow, and completely wrong for the job.

    It’s not just about the classic JPEG vs. PNG debate anymore. We’ve got new, powerful contenders that can slash your file sizes without making your visuals look like they were made in 1998. Let's dive into what you should be using and when.

    Diagram showing four document icons representing different image file formats: JPEG, PNG, WebP, and AVIF.

    The Old Guard: JPEG and PNG

    For years, the rules of the road were simple. Use JPEGs for photos, and use PNGs for graphics that need a transparent background. While that's still a decent starting point, clinging only to this rule means you're leaving a ton of performance on the table.

    • JPEG (Joint Photographic Experts Group): This is the workhorse for photographs and anything with complex color gradients. It uses lossy compression, which is a fancy way of saying it cleverly throws out tiny bits of data your eye won't miss, all to shrink the file size.

    • PNG (Portable Network Graphics): The undisputed hero for logos, icons, and any graphic that needs a see-through background. PNGs use lossless compression, so every single pixel is preserved. This is fantastic for quality but often results in much larger files.

    The trade-off here is pretty clear. A product photo saved as a PNG will be ridiculously huge, while a logo saved as a JPEG will look fuzzy and unprofessional. You've got to match the format to the content.

    Don't get stuck in the past. JPEG and PNG are reliable, but treating them as your only options is a huge mistake. The real performance gains come from embracing their modern replacements.

    The Modern Challengers: WebP and AVIF

    Okay, this is where the real magic happens. WebP and AVIF are next-generation formats built from the ground up for the web, offering far better compression than their older cousins.

    WebP: The New Standard

    Developed by Google, WebP is the versatile champion of the modern web. It can handle both lossy and lossless compression, supports transparency like a PNG, and can even do animations (bye-bye, clunky GIFs!). The best part? WebP files are typically 25-34% smaller than equivalent JPEGs with virtually no visible difference in quality. Browser support is now rock-solid, making it a safe and incredibly powerful choice.

    AVIF: The Future is Now

    AVIF (AV1 Image File Format) takes things to another level. It often produces files that are a staggering 50% smaller than a comparable JPEG. It’s the new kid on the block, backed by tech giants like Netflix and Microsoft. While browser support isn't quite as universal as WebP yet, it's growing fast and represents the absolute cutting edge of image optimization.

    This screenshot from Squoosh, an awesome in-browser compression tool, shows a direct comparison. Notice how the AVIF version achieves a mind-boggling 91% file size reduction compared to the original, while the visual difference is almost impossible to spot with the naked eye.

    Diagram showing four document icons representing different image file formats: JPEG, PNG, WebP, and AVIF.

    Image Format Comparison: A Quick Guide

    Feeling overwhelmed? Don't be. This table gives you a quick side-by-side review to help you choose the best format for different situations.

    Format Best For Key Feature File Size
    JPEG Photographs, complex images without transparency Universal support, good for complex scenes Medium
    PNG Logos, icons, graphics with transparency Lossless quality, full transparency support Large
    WebP The all-around replacement for JPEG & PNG Excellent compression, transparency, animation Small
    AVIF High-quality photographs where size is critical Best-in-class compression, cutting-edge quality Smallest

    Ultimately, your goal is to use the most modern format that fits your needs and is supported by your users' browsers. For most sites today, that means leading with AVIF or WebP and keeping JPEG/PNG as a fallback.

    Making the Right Choice: Your 2-Question Checklist

    So, how do you decide? Just ask yourself two simple questions.

    1. Does my image need a transparent background?

    • YES: Your best bet is WebP. It will almost always give you a smaller file than a PNG. Only use PNG as a fallback for really old browsers that might still be lurking around.
    • NO: Great, move on to the next question.

    2. Is the image a photograph or does it have complex colors?

    • YES: Go with AVIF first, and use WebP as your next-best option. Both will dramatically outperform an old-school JPEG. If you're worried about quality after heavy compression, you can always explore tools to sharpen the final output. For instance, you can see how AI handles this with an image upscaling demo to restore lost details.
    • NO (like a simple logo or icon): Stick with WebP for raster images, but you should really be using SVG (Scalable Vector Graphics). SVGs aren't raster formats at all; they're code-based, infinitely scalable, and have a tiny file size.

    That's it! By running through this quick mental checklist, you can confidently pick the perfect format for nearly any image, striking that perfect balance between stunning visuals and a lightning-fast website.

    The Honest Guide to the Best Compression Tools

    Alright, you’ve picked the right image format. Now for the real magic: making that file tiny without turning your gorgeous photo into a blocky mess from 1998. This is the art of compression, and it all boils down to two main philosophies: lossy and lossless.

    Think of it like packing a suitcase.

    Lossless compression is for the meticulous packer. You fold everything perfectly, roll your socks, and use vacuum-sealed bags. Nothing gets left behind. The suitcase (your image file) is smaller, but every single piece of clothing (pixel data) is still there, untouched. It’s perfect for quality, but the size reduction is pretty modest.

    Lossy compression, on the other hand, is for the pragmatic, ruthless packer. You look at those five nearly identical t-shirts and admit you only really need two. You toss the extras, making the suitcase way lighter. Lossy compression does the same thing, intelligently throwing away bits of image data your eyes probably won’t even notice. The result? A massive drop in file size with a barely perceptible dip in quality.

    For almost everything on the web, lossy is your best friend.

    Don't underestimate the impact. A massive six-month study by Optimole saw them process 26 million images. They crunched the original 9.6 TB down to just 1.0 TB—that's an average reduction of 80-90%! This aggressive trimming cut visual loading times in half and boosted PageSpeed scores by 30-40%. You can dig into the numbers in the full technical SEO statistics report.

    But enough theory. Let’s get our hands dirty with the tools that actually do the work.

    Browser-Based Tools for Quick Fixes

    When you just need to shrink one or two images, there's no need to download anything. These web-based tools are fast, free, and surprisingly powerful.

    TinyPNG and TinyJPG

    TinyPNG (and its identical twin, TinyJPG) is the undisputed king of quick-and-dirty compression. It’s been around forever for a reason. The interface is gloriously simple: you just drag, it squishes, and you download.

    It uses a smart lossy algorithm that consistently hits a sweet spot, often knocking 50-80% off the file size without you noticing a thing. It's the go-to first stop for countless pros.

    Squoosh by Google

    If TinyPNG is a trusty hammer, Squoosh is the whole toolbox. This app, straight from the brainiacs at Google, gives you an insane amount of control right in your browser. You can resize, fiddle with the color palette, and—this is the best part—see a real-time, side-by-side comparison of different formats and compression levels.

    Squoosh is basically a training ground for your eyes. Drag that quality slider back and forth. Watch the file size plummet and see exactly when the image starts to look crunchy. You’ll quickly build an instinct for how far you can push it.

    Desktop Software: The Power User's Choice

    When you're dealing with a whole folder of images or need to work offline, desktop apps are the way to go.

    • ImageOptim (Mac Only): A long-time favorite in the Mac community, this free tool is a beast. It throws a whole suite of compression algorithms at your images to wring out every last byte. It’s pure drag-and-drop simplicity with seriously powerful results.

    • RIOT (Windows Only): Standing for Radical Image Optimization Tool, RIOT is a fantastic freebie for Windows users. It gives you a live before-and-after view so you can tweak settings and immediately see the impact on quality and file size.

    • Adobe Photoshop: If you're already in Photoshop, don't overlook the classic "Save for Web (Legacy)" feature. It offers incredibly fine-grained control and a detailed preview window, letting you dial in the settings for that perfect balance. It’s all about precision here, though it can be a bit slow for bulk work.

    Automated Solutions: Set It and Forget It

    Look, manually compressing every single image is a soul-crushing task, especially on a big website. Automation is the only sane way to handle images at scale.

    The choice really comes down to control versus convenience.

    Tool Type The Good The Bad Perfect For…
    Online Tools Free, fast, zero installation Limited batch processing, manual up/download Quick, one-off image shrinks
    Desktop Apps Works offline, total control Needs to be installed, OS-specific Designers who need granular control
    Automated Plugins Hands-off, bulk optimization Can add site overhead, often has a cost Anyone with a big WordPress site

    For the millions of us on WordPress, plugins like Smush, ShortPixel, or Imagify are game-changers. You install one, and it quietly works in the background, automatically compressing every image you upload. It’s a true "set it and forget it" solution.

    For developers building custom sites or apps, an API-first service like PixelPanda is the ultimate move. You integrate their API, and suddenly you have a complete image processing pipeline. It can automatically compress, resize, convert to next-gen formats, and serve images from a CDN, all without you ever thinking about it again. It’s how you ensure every single image is perfectly optimized, every single time.

    Smarter Delivery with Responsive Images and Lazy Loading

    You've picked the perfect format and compressed your image into a lean, mean, web-ready machine. Fantastic! But don't pop the champagne just yet. The final piece of the puzzle isn't just what you serve, but how you serve it.

    Sending a massive, 1920-pixel-wide hero image to a tiny mobile screen is like trying to fit a grand piano through a cat flap. It's clumsy, wasteful, and slows everything to a crawl.

    This is where smart delivery comes into play. We need to serve up images that are perfectly tailored to each user's device. With 60% of global visits now coming from mobile users, this isn't just a "nice-to-have"—it's non-negotiable.

    Making these tweaks can seriously lift your Core Web Vitals compliance, which has been shown to improve rankings and user engagement by as much as 24% in some markets. For a deeper dive, check out the latest web design statistics and findings.

    Serving the Right Size with Responsive Images

    The one-size-fits-all approach is dead. Responsive images are the answer. By using simple HTML attributes like srcset and sizes, you can give the browser a whole menu of image options and let it pick the best one for the current screen size.

    Think of it like this: instead of a single image file, you provide a whole set.

    • hero-image-small.jpg (perfect for phones)
    • hero-image-medium.jpg (great for tablets)
    • hero-image-large.jpg (for those big desktop screens)

    The browser does the heavy lifting, picking the most efficient option and preventing a tiny phone from wasting bandwidth on a giant desktop image it can't even display properly. It's a total game-changer for mobile performance.

    This whole process follows a simple, three-step workflow: pick the right format, squash that file size down, and give it a quick quality check.

    Flowchart illustrating the three-step image compression process: choose, compress, and review.

    Nailing this upfront makes smart delivery techniques like lazy loading even more powerful.

    The Magic of Lazy Loading

    Now for my favorite trick: lazy loading. By default, a browser tries to download every single image on a page the moment it loads—even the ones buried way down in the footer that the user might never see. What a waste of time and data.

    Lazy loading flips that script entirely. It tells the browser, "Hey, only load the images inside the viewport. For everything else, just wait until the user actually scrolls down to it." This makes that initial page load lightning-fast, which is absolutely critical for keeping impatient visitors from bouncing.

    Your Lazy Loading Options

    You’ve got two main ways to pull this off, each with its own quirks.

    • Native Browser Lazy Loading: This is the path of least resistance. Just add loading="lazy" to your <img> tag, and modern browsers handle the rest. It's clean, simple, and requires zero extra code. The only catch? It won't work on ancient browsers, but at this point, its adoption is so widespread it’s almost a non-issue.

    • JavaScript-Based Libraries: Need more granular control or have to support that one client still using Internet Explorer? JavaScript libraries like lazysizes or Lozad.js are your friends. These lightweight scripts offer more customization, like cool fade-in effects as images appear. They're fantastic alternatives when you need that extra bit of flair or must cater to an audience on outdated tech.

    My two cents? Just start with native lazy loading. It’s a one-word addition that solves 95% of the problem with zero overhead. Only reach for a JavaScript solution if you have a specific, undeniable need that native can't cover. It’s the definition of working smarter, not harder.

    Finally, to truly supercharge your delivery, serve all your images through a Content Delivery Network (CDN). A CDN is a global network of servers that caches your images all over the world. When a user in Tokyo visits your site, the images get served from a server in Asia, not one in Texas. This slashes latency and makes your site feel incredibly snappy for everyone, everywhere. It’s the final, crucial step in mastering image optimization.

    Turning Images into SEO Powerhouses

    So far, we’ve been treating images like performance cargo—something to be squashed down and made as light as possible. But let's flip that script. What if every single image on your site was also a powerful magnet for search traffic? When you get this right, your visuals stop being a drag on page speed and start pulling in brand-new visitors.

    This isn't just about loading faster; it's about getting found. And it all starts with telling search engines what they're actually looking at.

    Crafting Alt Text That Actually Works

    Forget the tired old advice to just "use alt text." That's like telling an author to "use words." The real magic is in how you write it. Alt text is the little description you add to an image's HTML, and it’s doing double duty. It's there for screen readers to help visually impaired users, and it’s a massive clue for search engine crawlers trying to understand your page.

    Lazy, generic alt text is a huge missed opportunity. You want to be descriptive and, where it feels completely natural, weave in a relevant keyword or two.

    Let's look at a quick before-and-after for a product photo:

    • Bad: alt="shoes"
    • Okay: alt="red running shoes"
    • Excellent: alt="pair of bright red Nike Air Zoom running shoes on a white background"

    The "excellent" example paints a crystal-clear picture for both people and bots. It’s specific, descriptive, and naturally includes keywords like "Nike Air Zoom running shoes." To really nail this, you have to understand how SEO and accessibility go hand-in-hand.

    Smart File Naming Strategies

    Before you even think about uploading an image, you’ve got a golden SEO opportunity sitting right in front of you: the file name. Search engines read file names for context, so a name like IMG_8432.jpg tells them absolutely nothing. It's a total blank slate.

    Instead, get into the habit of renaming your files with descriptive, hyphen-separated words before they ever touch your website.

    • Before: DCIM_101.jpg
    • After: vegan-chocolate-chip-cookie-recipe.jpg

    This simple trick gives Google one more powerful clue about your content, helping your images pop up in relevant searches. It’s a zero-cost, ten-second fix that really adds up. For any site heavy on products, clean file names are just as crucial as clean product shots. If you’re constantly battling distracting backgrounds, a tool for background removal can be a lifesaver.

    Supercharge Visibility with Sitemaps and Structured Data

    Alright, ready to kick it up a notch? Two powerful tools can put your images directly on Google's radar: image sitemaps and structured data.

    An image sitemap is just a list of all the images on your site, neatly packaged for Google. It makes it dead simple for crawlers to discover and index every single one. While Google is pretty good at finding images on its own, a sitemap ensures it doesn’t miss anything, especially if you have images loaded by JavaScript. Don't worry, many SEO plugins offer easy alternatives to building these by hand.

    Structured data (you might know it as schema markup) is even more potent. It's a special kind of code you add to your pages to spoon-feed search engines specific details. For an image, you can tell Google, "Hey, this picture is part of a recipe," or "This is a product photo." This is your ticket to getting those eye-catching rich results—like the fancy thumbnails you see in search results.

    Optimizing your images isn't just about shrinking files. It's about turning every visual into a discovery point for your brand, driving traffic from places you might be ignoring.

    In fact, some industry reviews have shown that well-optimized images can lead to a 23% uplift in organic traffic. That's huge, especially when you consider that image searches now make up nearly 22.6% of all queries on Google. This makes image SEO a surprisingly high-impact play.

    Got Questions About Image Optimization? Let's Talk.

    Alright, we've dived deep into everything from compression algorithms to SEO sorcery. But let's be real—theory is one thing, and practice is another. You've probably got some nagging questions rattling around.

    These are the ones that always come up, so let's get them answered once and for all.

    If I Can Only Do One Thing, What Should It Be?

    Great question. If you’re strapped for time and need the biggest win, focus on this: choosing the right format and applying smart compression. This is the one-two punch that makes the most dramatic difference.

    Seriously. Start by saving your image in a modern format like WebP. It strikes a beautiful balance between crisp quality and a tiny file size. Then, run that WebP through a good compression tool. This simple sequence directly attacks the root cause of most slow-loading pages: bloated image files.

    How Big Should My Images Actually Be?

    Here’s the golden rule: your image should be no larger than the biggest it will ever appear on your site. It’s just that simple. There’s no point in uploading a mammoth 4000-pixel photo when it’s destined for a little 800-pixel-wide content column. That's just wasted bandwidth.

    Not sure what that size is? Just use your browser's developer tools (right-click on the page and hit "Inspect") to measure the image's container. If your blog’s main area is 800px wide, your images shouldn't be any wider. For those big, full-screen hero images, 1920 pixels is usually a safe upper limit for desktops, but you absolutely must use srcset to serve up smaller versions for tablets and phones.

    I see this all the time: people upload images straight from their professional camera or a stock photo site. Don't do it! Those files are built for print, not pixels. Always, always resize before you upload.

    Can't I Just Automate All of This?

    Yes! And you absolutely should. Manually resizing, compressing, and converting every single image is a fast track to insanity. It's just not sustainable. Automation is your best friend here, ensuring every visual is perfectly optimized without you lifting a finger.

    When you put manual workflows head-to-head with automated ones in a direct comparison, automation wins on speed and consistency every single time.

    Here are a few popular ways to get it done:

    • CMS Plugins: Using WordPress? Plugins like Smush or ShortPixel are fantastic alternatives to doing it by hand. They get to work the second you hit "upload."
    • Build Tools: If you’re a developer working on a custom site, you can bake optimization right into your build process using tools like Webpack or Gulp.
    • Image APIs & CDNs: This is where the real magic happens. Services like Cloudinary or our own PixelPanda API can resize, compress, and switch formats on the fly, delivering the perfect version of an image from a lightning-fast global network.

    If you're looking for a deep dive into implementing some of these more advanced techniques, check out Mustang WPO's comprehensive documentation for some seriously detailed guidance.

    JPEG vs. WebP vs. AVIF… My Head is Spinning. Which One Do I Use?

    It feels complicated, but the modern solution is surprisingly elegant. Instead of picking just one, you let the browser decide for you by using the <picture> HTML element.

    This tag lets you offer up a menu of options. You list your image sources in order of preference: AVIF first (it's the smallest), WebP as a fantastic second choice, and good old JPEG as the fallback for any ancient browsers that might stop by. This approach means everyone gets the fastest image their browser can handle. You get all the performance perks of modern formats without leaving anyone with a broken image.


    Tired of wrestling with Photoshop and ready to put your entire visual workflow on autopilot? PixelPanda offers a dead-simple API that handles everything from background removal and upscaling to smart compression and format conversion. See how others are building faster, more beautiful experiences at https://pixelpanda.ai.