Ever tilted your phone and watched the background subtly shift, creating an almost magical sense of depth? That's a 3D live wallpaper at work, and you're about to learn how to make one yourself, starting with nothing more than a simple, flat image.
From Flat Photos to Interactive Art
Let's be honest, static backgrounds are a bit dated. A really well-made 3D live wallpaper turns your device from a functional tool into a small, interactive piece of art. This isn't just about a looping video; it's a dynamic scene that responds to your phone's movement, creating a cool parallax effect that gives your screen a genuine feeling of depth.
This guide is your roadmap. We’ll kick things off with the basics, like how to pick the perfect source image. Then, we'll get into the real magic: using AI tools like the PixelPanda API to instantly generate a detailed depth map, which is basically the secret sauce for the whole 3D effect. After that, I'll show you how to bring the layers to life with animation and get your creation ready for any platform—whether it's for a website, an Android phone, or an iPhone.
Why This is a Skill Worth Having
The world is hungry for rich, custom visuals, and that demand isn't slowing down. Believe it or not, the 3D wallpaper market was already valued at around USD 1.5 billion in 2023, and it's expected to rocket to nearly USD 2.8 billion by 2033. This explosion is happening because AI-driven design tools have made creating these immersive backgrounds ridiculously accessible.
Here's the entire workflow in a nutshell:
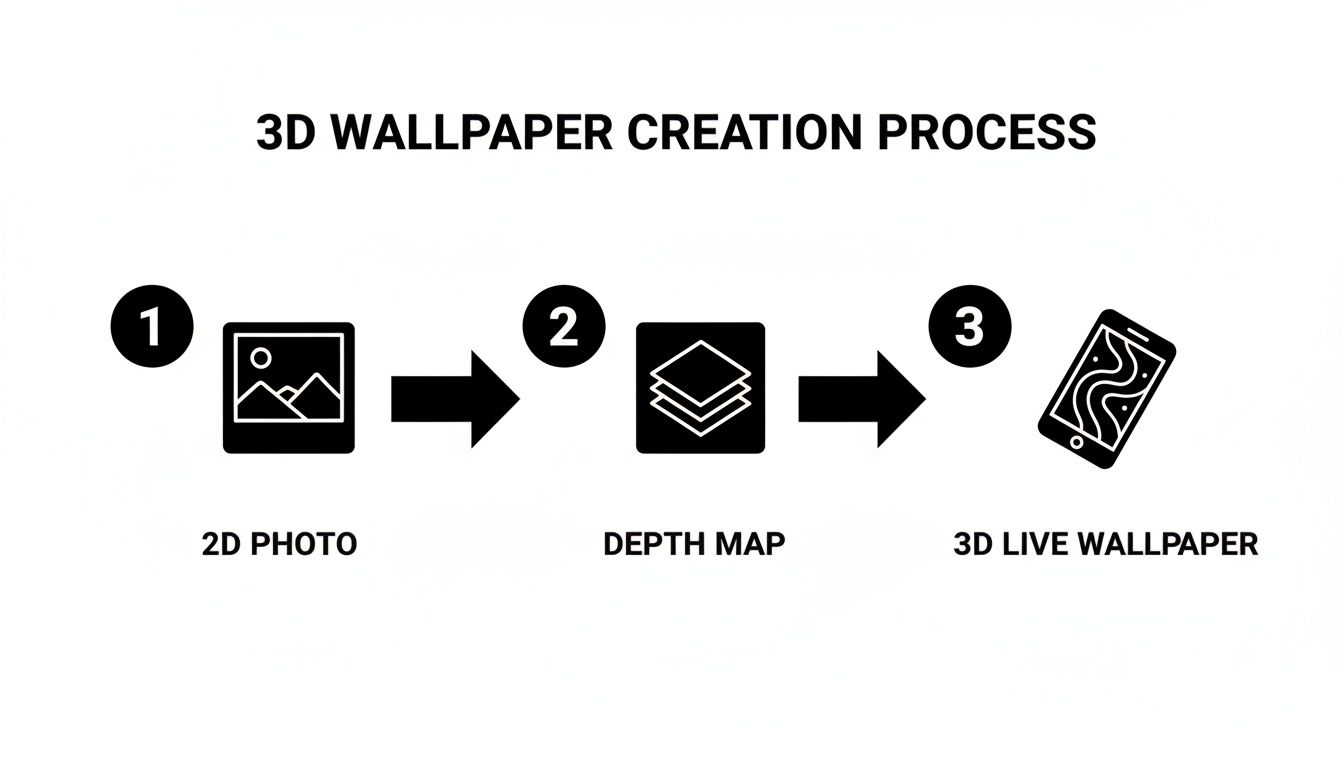
As you can see, it all boils down to a few key steps. The AI-generated depth map is the critical bridge connecting your static photo to the final, interactive wallpaper.
Core Stages of 3D Live Wallpaper Creation
Here's a high-level look at the key stages for turning a flat image into a 3D live wallpaper, including the goal and tools for each step.
| Stage | Objective | Key Tools & Technologies |
|---|---|---|
| Asset Preparation | Isolate key subjects from the background to create distinct layers. | Adobe Photoshop, GIMP, AI background removal tools. |
| Depth Map Generation | Create a grayscale image that maps the distance of objects from the viewer. | PixelPanda API, specialized depth map generation models. |
| Animation & Deployment | Use the depth map to create the parallax effect and package for distribution. | JavaScript libraries (like parallax.js), Android/iOS SDKs. |
Whether you're a developer adding some visual punch to an app or a designer wanting to create stunning visuals, this process is a game-changer.
Let's break down those core stages a bit more.
-
Prep Your Assets: It all starts with the right image—one with a clear distinction between the foreground and background. You can even take it a step further by using an AI-powered tool to remove the background entirely, which really makes your main subject pop.
-
Generate the Depth Map: This is where the AI does the heavy lifting. We’ll feed it our 2D photo, and it will spit out a grayscale map. In this map, white represents things that are "close" to the camera, and black represents things that are "far away."
-
Animate and Deploy: Finally, we’ll use that depth map to create the parallax effect, making the layers move in response to the device’s gyroscope. Then, it's just a matter of packaging it up for your platform of choice.
By the time you're done with this guide, you’ll have everything you need—from practical tips to actual code—to transform any photo into an awesome 3D live wallpaper.
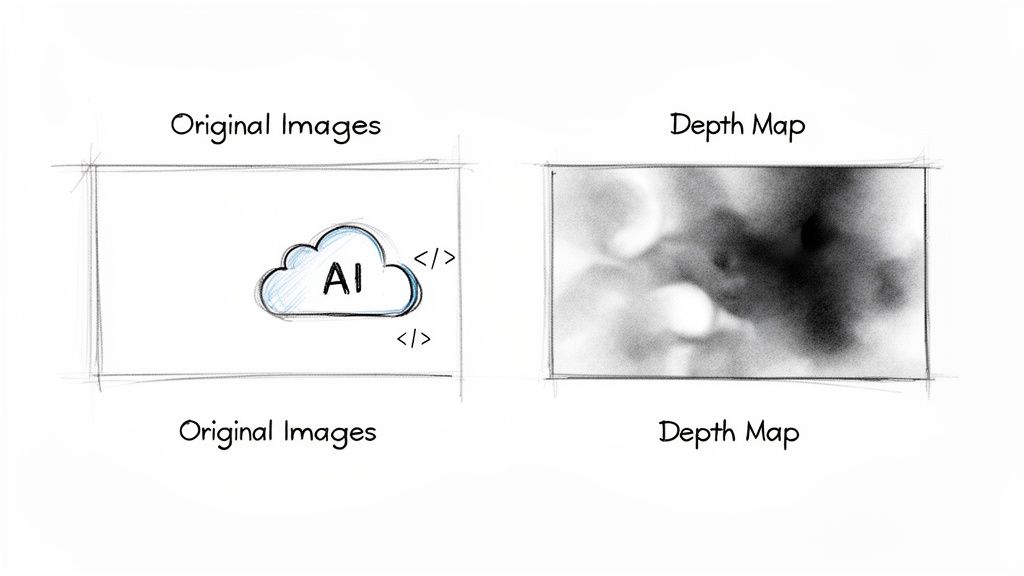
Getting Your Depth Map Cooked Up with AI
The magic trick behind any mind-blowing 3D live wallpaper isn't some dark art—it’s a killer depth map. This grayscale image is the blueprint for your whole parallax effect. It's a dead-simple set of instructions for your software: pure white screams "I'm right in your face!" while pure black whispers "I'm way back there." Everything else is just a shade of gray in between.
Trying to paint one of these by hand? Good luck. It's a tedious, soul-crushing process of guessing distances and meticulously shading pixels. This is precisely where AI swoops in to save the day, turning hours of agony into a few seconds of pure automation.
Let the AI Do the Heavy Lifting
Instead of playing a frustrating guessing game, you can just toss your image at an AI service and have it spit back a pixel-perfect depth map. This whole process is called monocular depth estimation, which is a fancy way of saying the AI has been trained to look at a flat, 2D picture and figure out the 3D space within it.
The process itself is refreshingly simple. You fire your source image off to an API endpoint, and the AI sends back the finished depth map. It looks at all the little clues—textures, how big things are, perspective lines—to build a surprisingly accurate 3D model of the scene.
Pro Tip: Want the best results? Feed the AI images with a really clear foreground, middle, and background. A portrait where the background is nice and blurry? Perfect. A landscape with mountains fading into the distance? Gold. A flat photo of a brick wall? Not so much.
For all you developers out there wanting to build this into your own app, it's just a simple API call. With a tool like PixelPanda, for instance, you can automate the entire thing. The PixelPanda API documentation has all the code snippets and walkthroughs you'll need to get this running in your own project without breaking a sweat.
Give Your New Depth Map a Quick Once-Over
When you get your depth map, take a second to really look at it. Does it feel right? The main person or object in your photo should be the brightest part of the map, and the distant sky or horizon should be the darkest.
Sometimes, the AI can get a little tripped up by weird stuff in the image. Keep an eye out for these common culprits:
- Shiny Things: Reflections on windows or water can throw the AI for a loop, causing it to misjudge the distance.
- Crazy Patterns: Super busy, repeating patterns can sometimes be read as being closer or further away than they really are.
- See-Through Stuff: Things like chain-link fences, lace, or wispy hair can be tough, though the newer AI models are getting much better at handling these tricky edges.
If you spot a little glitch, don't panic. You can usually pop the image into an editor like Photoshop and do a quick touch-up with a soft, slightly lighter or darker brush. But honestly, if you pick a solid source image to begin with, you probably won't have to do anything at all. Choose your photo well, and you'll give the AI everything it needs to create the perfect foundation for your 3D live wallpaper.
Let's Make It Move: Adding the Parallax Magic
Alright, you've got your AI-generated depth map, and it's looking sharp. That grayscale image is the secret sauce, the blueprint for the entire 3D illusion we're about to cook up. Now for the really cool part: breathing life into your static image and making it dance with a parallax effect.
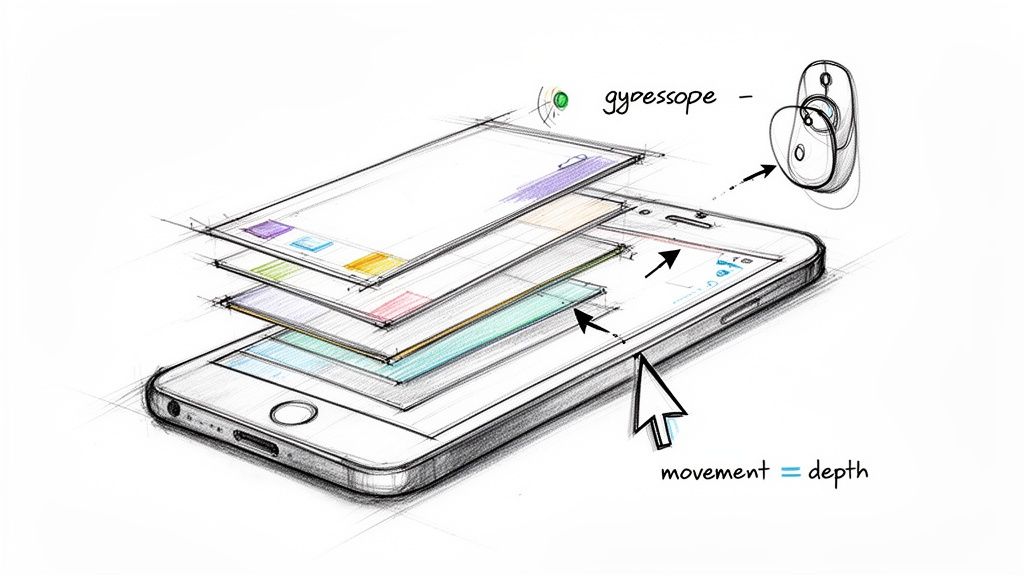
The concept is surprisingly simple. We're going to treat that depth map as a set of instructions. When the user tilts their phone or moves their mouse, the pixels in your original image will shift based on their "distance" from the viewer. The bright white parts of the map? That’s your foreground, and it’s going to move a lot. The dark black areas? That’s the background, and it will barely budge. This difference in movement is what tricks the brain into seeing depth.
How the Motion Works
Ever look out the window of a moving train? The fence posts right next to the tracks zip by in a blur, but the mountains way off in the distance seem to crawl along at a snail's pace. That’s parallax in a nutshell. Our code is going to mimic this exact effect by tying the phone's gyroscope or a computer's mouse movement to this pixel-shifting logic.
For a web-based wallpaper, for example, we can use a little JavaScript to track the mouse cursor. As it moves away from the center of the screen, we'll calculate an offset. We then multiply this offset by the pixel's depth value (where black is 0.0 and white is 1.0).
The core formula is pretty straightforward:
finalPixelOffset = sensorInput * depthValue * sensitivity. That sensitivity value is your fun dial. Crank it up for a dramatic, in-your-face 3D effect, or dial it back for a more subtle, elegant shift.
This calculation has to happen for every single pixel, dozens of times per second. This is where you’ll be glad you're not doing the math yourself. A graphics library like Three.js that uses WebGL is your best friend here. It hands off all that heavy lifting to the GPU, keeping the animation silky smooth and preventing your device from trying to achieve liftoff.
Shaders: Where the Real Wizardry Happens
The true magic unfolds inside what’s called a fragment shader. Think of it as a tiny, super-efficient program that runs on your GPU and gets to decide the final color of every pixel on the screen. It needs two key ingredients: your original image and your shiny new depth map.
Here’s a play-by-play of what the shader does for every single frame of animation:
- Check for Input: It grabs the latest data from the phone's tilt sensors or the mouse's position.
- Calculate the Shift: Based on that input, it figures out how much the scene needs to move.
- Consult the Depth Map: For the pixel it's currently drawing, it looks up the grayscale value from your depth map.
- Displace the Image: It uses that depth value to shift where it looks on the original image for the color.
- Paint the Pixel: Finally, it grabs the color from that new, shifted coordinate and draws it to the screen.
Today’s smartphones, with their buttery-smooth 90–120 Hz OLED screens and pixel densities over 400–500 PPI, are built for this kind of eye candy. When you pair that hardware with an AI-powered workflow for generating depth maps, you can slash your manual editing time by a staggering 70–90%. This kind of speed makes it possible to produce a ton of high-quality assets, a huge leg up in what's becoming a very busy market, as shown in these insights into the digitally printed wallpaper market.
Nailing this rendering loop is what separates an amateurish-looking wallpaper from a truly professional 3D live wallpaper. Get the sensitivity right, make sure your assets are optimized, and you'll create a jaw-dropping effect that feels like a natural part of the device itself.
Getting Your Wallpaper to Run Smoothly Without Killing Batteries
You’ve done the creative part—you've got a gorgeous 3d live wallpaper that looks amazing. But here’s a dose of reality: if it makes a phone feel like it's running through molasses or drains the battery in an hour, nobody's going to use it. A beautiful wallpaper that gets uninstalled is just a failed experiment. Performance isn't a "nice-to-have"; it's everything.
So, let's roll up our sleeves and make sure your creation is as lean as it is stunning. We're going to dive into some essential optimizations that transform a laggy resource hog into something people will actually love having on their screen.
Your New Best Friend: Smart Compression
The quickest and most impactful optimization is compressing your images intelligently. Bloated, uncompressed images are the absolute worst offenders for poor performance, especially on mobile devices where every kilobyte counts. The goal is to slash those file sizes without making your art look like it was saved on a potato.
This is where modern image formats come to the rescue. It's time to leave old-school JPEGs and PNGs behind.
- WebP: This is your go-to. WebP offers fantastic lossy and lossless compression that blows older formats out of the water, often shrinking files by 25-35% compared to a JPEG of similar quality.
- AVIF: The new kid on the block, AVIF, pushes things even further. You can sometimes see file sizes 50% smaller than a comparable JPEG with virtually no perceptible loss in quality.
Before you write a single line of code, run your source image and depth map through a good compression tool. This one step dramatically cuts down the data your GPU needs to chew on, making your wallpaper feel snappier right away. If you find your textures lose a bit of their sharpness after compression, you can use AI tools to bring back the detail. We have a guide on leveraging image upscaling technology that shows you exactly how to keep things crisp.
Clever GPU Tricks for Silky-Smooth Animation
File size is only half the battle. How you organize your assets makes a huge difference. One of the oldest and most effective tricks in the book is using a texture atlas (you might also hear it called a sprite sheet). Instead of having a bunch of separate little images for your animation layers, you stitch them all together into one big image.
Why? Because the GPU works much more efficiently when it only has to load one large texture instead of juggling a dozen small ones. This slashes the number of "draw calls"—basically, the number of times you ask the GPU to draw something. Fewer draw calls mean less work for the GPU and a smoother experience for the user.
Think of it like a trip to the grocery store. It’s way faster to go once with a full shopping list than to drive back and forth for every single item. A texture atlas is your GPU's shopping list.
If you're building this for the web, requestAnimationFrame is non-negotiable. This browser API is your secret weapon for efficient rendering. It syncs your animation code perfectly with the screen's refresh rate, which is far smarter than using something clunky like setInterval. The browser is smart enough to pause the animation when the tab is in the background, saving a ton of CPU and battery. This gives you that buttery-smooth 3d live wallpaper when it's visible and puts it to sleep when it's not—the best of both worlds.
Advanced Tricks for Cinematic Wallpapers
Once you've got the basic parallax effect down, you're at the doorstep of some seriously cool creative territory. A simple depth shift is neat, but a truly cinematic 3D live wallpaper tells a story. It's time to move past that first layer of movement and start breathing some dynamic life into your scenes.
Think of your depth map as just one ingredient in the recipe. The real magic happens when you start blending it with other masks and effects to create animations that feel alive.
Isolating Elements for Unique Animations
Let's say your wallpaper is a dramatic mountain landscape with clouds rolling overhead. The parallax effect gives the mountains a nice sense of depth, but those clouds are just… sitting there. We can fix that. By creating a separate mask that singles out just the clouds, you can treat them as their own animatable layer.
With that cloud mask in hand, you can apply a slow, looping horizontal drift. This animation moves completely independently of the main parallax effect. The result? The mountains shift as you tilt your phone, while the clouds drift serenely across the sky. Now we're talking.
This technique works for almost anything you can imagine:
- Shimmering Water: Mask out a lake or ocean and apply a subtle, noisy shimmer effect. It's a perfect way to simulate light reflecting off the water's surface.
- Flickering Lights: Got a city scene? Isolate the streetlights or neon signs and make them gently flicker or pulse.
- Rustling Leaves: For a forest scene, a mask on the tree canopy can drive a gentle swaying animation, making it feel like a breeze is passing through.
The key is to think in layers. Your main parallax effect provides the foundation of depth, while these smaller, masked animations add character and realism, transforming a static scene into a living moment.
Adding Dynamic Particles and Lighting
Ready to push your wallpaper into truly cinematic territory? Start introducing elements that actually interact with the scene's depth. Particle effects are your best friend here. Think gentle snow falling, embers rising from a campfire, or dust motes floating in a sunbeam.
By feeding your depth map to the particle system, you can make these effects feel like they're really part of the world. Snowflakes, for example, can appear to land on foreground objects (the brighter areas of the map) while falling behind elements in the background. Suddenly, the particles aren't just a cheap overlay; they're integrated into the environment.
You can even take it a step further and simulate dynamic lighting. Imagine a virtual light source that shifts as the user tilts their device. This can cast subtle highlights and shadows that move across the scene, cranking up the 3D illusion and giving everything a polished, professional feel.
When you start combining these advanced tricks—isolated animations, depth-aware particles, and dynamic lighting—you elevate a simple 3D live wallpaper into a pocket-sized piece of interactive art. It's the kind of thing that will genuinely captivate anyone who sees it.
Got Questions About 3D Live Wallpapers?
So, you're ready to dive into making your own 3D live wallpapers, but a few things might be nagging at you. From picking the right picture to stressing about battery life, let's tackle the questions I hear all the time.
Nailing these fundamentals is the difference between a wallpaper that just looks cool and one that's a joy to actually use every day.
What Kind of Image Works Best for This?
Honestly, the best images have an obvious sense of depth. You're looking for a clear subject in the foreground that really pops from a detailed background. Picture a portrait with a sprawling landscape behind the person, or a nature shot with a big tree right in front and mountains way off in the distance.
High-contrast photos with sharp, clean edges are your secret weapon. They make the AI's job of generating a depth map so much easier, and that map is the heart of your entire 3D effect. If you start with a blurry, flat, or muddy image, you're just going to get a soupy, unconvincing mess.
Is This Going to Nuke My Phone's Battery?
Ah, the million-dollar question. The honest answer? It all boils down to how well you build it. A properly optimized live wallpaper is surprisingly gentle on the battery.
The single most important thing is making sure your wallpaper completely freezes its animation and rendering when it's not visible.
A live wallpaper has to be a good citizen on the user's device. If it's chugging away at full power while hidden behind other apps, it will absolutely murder the battery. Smart lifecycle management isn't just a nice-to-have; it's a must.
Beyond that, keeping your asset sizes down with smart compression and using efficient GPU shaders makes a massive difference. Stick to the optimization tips we've covered, and you can create something beautiful that won't have users scrambling for their chargers.
Can I Just Use a Video Instead of a Picture?
You can, but it cranks the complexity and power consumption up to eleven. For a full-screen parallax effect on a phone, it's a terrible idea. The constant processing required will drain the battery in no time.
A much smarter play is to use a video for just one part of the wallpaper. Think of it as a texture for a specific layer. You could swap out a static sky for a perfectly looping video of clouds, for instance. This hybrid approach gives you that dynamic, eye-catching movement without the brutal performance hit. It's the best of both worlds.
Ready to stop wrestling with manual edits and start generating perfect depth maps in seconds? PixelPanda offers a developer-friendly API that automates the entire process, letting you build stunning 3D experiences at scale. Get started for free at pixelpanda.ai.