Let's be clear from the start: learning how to get rid of a watermark isn't about stealing images. It's a practical skill for anyone who manages digital assets professionally. When you have the legal right to an image, cleaning it up is often just part of the job.
Why and When You'd Need to Remove a Watermark
Think about real-world situations. Maybe you're a marketer who bought a stock photo but only have the watermarked preview to work with for a quick mockup. Or perhaps you're an ecommerce manager, and your supplier's product shots are all stamped with their logo.
In these cases, removing the watermark is a legitimate step. The end goal is to present a clean, professional image that fits your own brand, not someone else's.
Legitimate Reasons for Removal
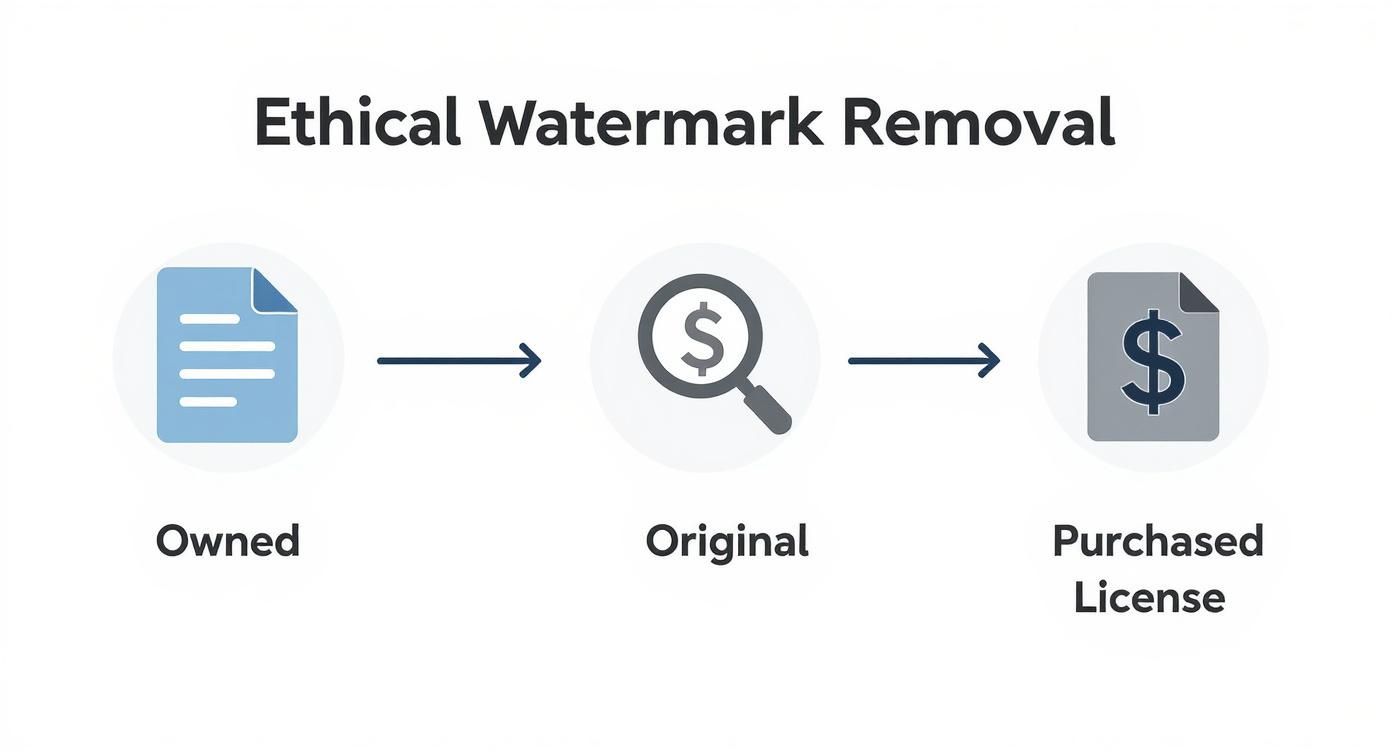
So, when is it okay to remove a watermark? There are a few common scenarios that fall squarely within ethical and legal boundaries.
- You own the photo outright. This is the most straightforward case. You might need to remove a pesky date stamp your old camera automatically added or a logo from a mobile app you used for a quick edit. It’s your photo, your rules.
- You've lost the original file. It happens to the best of us. Your company might have a branded graphic from years ago, but the original, clean version is long gone. All that’s left is a watermarked copy, and you need it for a new project.
- You’ve licensed the image. When you purchase a license from a stock photo site, you're paying for the right to use the clean, high-res version. If you only have the watermarked "comp" file on hand, removing the mark is simply part of getting your project ready.
- You have explicit permission. The photographer or creator might have given you direct, written permission to use their work without the watermark for a specific campaign or purpose.
The demand for clean, professional imagery is massive, which is why the global market for watermark removal software is expected to hit $500 million by 2025. This isn't a niche problem; it's a widespread need in marketing and ecommerce. You can dig into more of the data on this trend in research from Market Report Analytics.
The rule of thumb is simple: if you have the rights to the image, you have the freedom to edit it. If you don't, you're crossing a line into copyright infringement.
This guide is for those legitimate situations. We’ll cover everything from the hands-on control of Photoshop’s Clone Stamp tool to the almost-magical speed of modern AI platforms. My goal is to give you the skills to handle these tasks correctly, so you can produce high-quality work while respecting intellectual property. It’s about empowerment, not infringement.
Getting Your Hands Dirty: Manual Removal in Photoshop and GIMP
While AI tools are great for speed, there are times when you need surgical precision. That's where manual techniques in programs like Adobe Photoshop or its free cousin, GIMP, really shine. When a watermark is slapped over a complex detail—like a face, an intricate pattern, or a tricky texture—an AI can sometimes leave behind a blurry, slightly "off" artifact. Going manual gives you the control to make the edit truly invisible.
Think of it less as a rigid, step-by-step process and more like an art. The goal is to understand a few core tools and adapt your approach to the photo in front of you. You're aiming for a seamless repair that perfectly preserves the original lighting and texture.
First, a quick but important reminder: this kind of work should only be done on images you have the rights to. Whether you've purchased a license, own the photo, or are restoring a file where you've lost the original, always make sure you're on solid ethical ground.
Picking the Right Tool for the Job
Your first stop in Photoshop will often be the Content-Aware Fill. It’s incredibly smart. You just select the watermark, and the software analyzes the surrounding pixels to generate a patch. This thing works magic on simpler backgrounds—think clear skies, open water, or a plain studio backdrop.
But when a watermark crosses over multiple textures or sharp architectural lines, you need to roll up your sleeves and grab the classic tools. They give you far more control.
- The Clone Stamp Tool is your precision instrument. You define a source point and literally "paint" with a copy of that area. It's perfect for rebuilding defined patterns, straight edges, or anything where you need an exact duplicate of another part of the image.
- The Healing Brush Tool is a bit more sophisticated. It also samples from a source point, but it intelligently blends the texture, lighting, and color of your sample with the area you're painting over. This makes it the go-to for organic surfaces like skin, fabric, or wood grain, giving you a much more natural-looking fix.
Here's a pro tip that makes all the difference: constantly re-sample your source point. If you keep picking new source pixels close to where you're working, you’ll maintain the subtle shifts in lighting and texture. This is how you avoid those repetitive, blotchy patterns that are a dead giveaway of a clumsy edit.
How to Make Your Edits Invisible
Just grabbing the right tool isn’t enough. The settings you use are what separate an amateur edit from a professional one. You've probably seen bad edits before—they often have harsh, obvious brush strokes. A good edit, on the other hand, is built up in subtle layers.
First, adjust your brush. A soft-edged brush with 0% hardness is almost always the right call. It feathers the edges of your work, creating a smooth, undetectable transition between your fix and the original photo.
Even more important is to lower your brush's Opacity or Flow down to around 20-30%. This is a game-changer. Instead of trying to cover the watermark in one heavy-handed stroke, you build up the repair with gentle layers. It gives you incredible control over the final blend and feels more like painting than patching.
Always Work Non-Destructively with Layers
This is probably the single most important habit you can develop in photo editing: never work directly on your original image. Always, always create a new, blank layer on top of it first.
From there, when you select the Clone Stamp or Healing Brush, look for the "Sample" option in the top toolbar. Change it to "Current & Below" or "All Layers." This setting tells the tool to borrow pixels from the original image below, but to apply your changes only to the new, empty layer you created.
This workflow is the foundation of professional editing for two huge reasons:
- It’s Forgiving: Make a mistake? No problem. You can just erase that section of your new layer without ever touching the original photo.
- It’s Flexible: You can lower the opacity of your entire repair layer to tone it down, or just delete it and start over. Your original image remains completely untouched and safe.
This layered approach protects your asset and gives you the freedom to experiment until the result is absolutely flawless. By combining the right tool with subtle brushwork and a non-destructive workflow, you can tackle even the most stubborn watermarks and get a clean, professional-looking image every time.
Using AI Tools for Fast and Automated Removal
When you're short on time or the manual approach just isn't cutting it, AI-powered tools are a game-changer. Forget painstakingly cloning pixels one by one. These platforms use smart algorithms to analyze and completely rebuild the area under a watermark, often getting the job done in seconds. For anyone handling images in bulk, this is a massive time-saver.

The tech behind this magic is called inpainting. The AI model has been trained on millions of images, so it understands textures, patterns, and light. When you mark a watermark for removal, the AI doesn't just guess what’s underneath—it intelligently generates new pixels that perfectly match the surrounding context, making the fix look completely natural.
This is especially clutch for tricky backgrounds that would give you a headache in Photoshop. Think about taking a logo off a patterned shirt, a brick wall, or a field of grass. The AI recreates these organic textures flawlessly.
AI Inpainting: The Good and The Bad
The real strength of AI lies in its ability to understand context. It’s not just a fancy blur tool. An inpainting algorithm knows the difference between sky, skin, and fabric, filling the gap with a texture that actually makes sense. The result is a clean patch that blends right in.
But the technology is in a constant cat-and-mouse game with more advanced protection methods. The global AI watermarking market was valued at $427.2 million in 2024 and is expected to rocket to $3.07 billion by 2033, according to Grand View Research. This growth is fueled by the need to fight deepfakes and protect intellectual property.
Innovations like Google's SynthID, which embeds an invisible watermark directly into an image's pixels, are a serious challenge for typical removal software. It means that while today's AI tools are incredibly good, they're always playing catch-up to the next big thing in watermarking.
Top AI Platforms for Watermark Removal
A few platforms have really nailed user-friendly watermark removal. The process is usually dead simple: upload your image, paint over the watermark with a brush tool, and let the AI do its thing.
- Cleanup.pictures My go-to for quick, one-off fixes. Its free tier is generous, and it’s incredibly effective on simple to moderately complex watermarks.
- Fotor This is more of an all-in-one photo editor that happens to have a very reliable watermark remover. A great choice if you need other editing tools too.
- PixelPanda For more advanced needs, especially with text-based watermarks or objects, our platform offers a seriously powerful solution. You can even try our text removal demo to see how well it cleans up images by intelligently rebuilding the background.
The biggest win with a dedicated AI tool is the sheer lack of effort. A task that could take 15 minutes of careful clicking in Photoshop is often done in under 30 seconds. For busy professionals, that’s huge.
Deciding between a manual editor and an AI tool often comes down to your specific needs. Here's a quick breakdown to help you choose the right path.
Comparing Manual vs AI Watermark Removal Methods
| Factor | Manual Methods (Photoshop, GIMP) | AI Tools & APIs |
|---|---|---|
| Speed | Slow and methodical; can take several minutes per image. | Extremely fast; often just a few seconds per image. |
| Skill Level | Requires patience and technical skill, especially with complex backgrounds. | Beginner-friendly; very little skill needed for great results. |
| Precision | Offers the highest level of control for pixel-perfect edits. | Fully automated; control is limited to selecting the area. |
| Batch Processing | Impractical for large volumes; each image must be edited individually. | Ideal for scale; APIs allow for thousands of images to be processed automatically. |
| Consistency | Results can vary depending on the editor's skill and effort. | Highly consistent results across all images. |
| Cost | Professional software has subscription fees; GIMP is free but has a steep learning curve. | Often subscription-based or pay-per-use, but with free tiers available. |
Ultimately, AI tools excel at speed and convenience, while manual methods still hold the crown for absolute creative control.
Scaling Up with Watermark Removal APIs
For businesses and developers, the real magic of AI is unlocked through an Application Programming Interface (API). Instead of processing images one by one on a website, an API lets you plug watermark removal directly into your own apps, websites, or internal workflows.
Picture this: you're an ecommerce manager getting thousands of product photos from suppliers, and they all have different watermarks. Editing each one manually is out of the question.
With a watermark removal API, you can build a system that automatically:
- Ingests a new product image.
- Sends it to the AI service to remove the watermark.
- Receives the cleaned-up image.
- Pushes the clean version live to your product listings.
This kind of automated pipeline saves an incredible number of hours and keeps your branding consistent. Developers can integrate this with just a few lines of code, turning a mind-numbing manual task into an efficient, hands-off operation. This is exactly how modern businesses manage visual content at scale.
Navigating Copyright and Ethical Boundaries
Before you even think about touching a pixel, we need to talk about the legal and ethical side of things. It’s a big deal. A watermark isn't just some annoying graphic layered on a picture; it’s a digital signature that says, "I made this, and it belongs to me." Removing it without permission isn't just a simple edit—it’s copyright infringement.
This guide is written for professionals who are working with images they have every right to modify. The techniques we'll cover are for legitimate business needs, not for swiping someone else's hard work.
When Is It Okay to Remove a Watermark?
Knowing where the line is drawn protects you, your company, and the creative community. The rules are actually pretty clear, and you're generally safe to remove a watermark in a few specific situations.
- You Own the Image Outright: If you took the photo or designed the graphic yourself, it’s your property. Go ahead and get rid of that old camera date stamp or the logo your editing app accidentally added.
- You've Purchased a License: When you buy a stock photo, you're paying for the right to use the clean, high-resolution version. Removing the watermark from the "comp" or preview image is exactly what you're supposed to do.
- The Original File Is Lost: It happens more than you'd think. A company misplaces the original, un-watermarked version of its own logo or a key marketing image. In this case, restoring the asset is a perfectly valid business need.
- You Have Explicit Written Permission: Sometimes a creator or copyright holder will give you direct permission to use their image without the watermark for a specific project. Just make sure you get it in writing.
Anything outside of these scenarios is a minefield. Grabbing a watermarked photo from a photographer's portfolio or a stock site's preview without paying is illegal. It also directly hurts the creator’s ability to earn a living.
The bottom line is simple: If you don't have clear, documented rights to an image, leave the watermark alone. The potential legal fallout and reputational damage just aren't worth it.
The Real Risks of Unauthorized Removal
Ignoring copyright law has very real consequences. Creators and stock photo agencies use sophisticated image recognition tools to hunt down unauthorized uses of their work across the internet. It's not a matter of if you'll get caught, but when.
If they find you, your company could be hit with a demand for licensing fees that are way higher than the original cost. Even worse, you could be facing a lawsuit. The financial penalties can be steep, but the hit to your professional credibility can be permanent. A reputation for misusing creative work is incredibly hard to shake.
For a full breakdown of your responsibilities when using our service, please review the guidelines in our PixelPanda Terms of Service.
Watermarks Are Getting Smarter
The push to protect creative work is driving some serious innovation. The global digital watermarking market was valued at $1.45 billion in 2024 and is expected to hit $3.8 billion by 2033. That explosive growth, which you can read more about in this market report from Grand View Research, shows just how serious creators are about protecting their intellectual property.
We're moving way beyond just a visible logo in the corner. New techniques embed invisible data directly into an image's pixels. These "forensic" watermarks are designed to survive cropping, compression, and even minor edits, making it easier than ever to trace an image back to its source.
This evolving technology just reinforces why it's so important to work ethically from the get-go. Making the right choice protects everyone in the long run.
Don't Let Watermark Removal Ruin Your Photos
Getting a watermark off an image is one thing. Doing it so cleanly that nobody can tell it was ever there? That’s the real goal. A botched removal can leave behind artifacts, blurs, or weird color patches, making the final image look worse than the original.
The secret to a professional-grade edit isn't just about the tool you use; it's about the entire workflow. Let's walk through how to keep your photos looking pristine from start to finish.

It all starts with your source file. Seriously. If you begin with a low-resolution, heavily compressed JPEG, you're already at a disadvantage. Every edit you make and every time you re-save the file, you’re just adding more compression and losing more detail, which quickly leads to a blurry, blocky mess.
So, rule number one: always, always start with the highest-resolution file you can get your hands on. If you’re downloading a licensed stock photo, grab the largest version available. This gives you the maximum amount of pixel data to work with, making your edits far cleaner and more convincing.
Work Smarter, Not Harder: Use Non-Destructive Layers
As we touched on earlier, this is probably the most critical habit to develop. Never apply edits directly to your original image layer. That's the digital equivalent of working in permanent ink—one slip-up and your original photo is damaged.
Instead, get in the habit of creating a new, blank layer right on top of your photo. Do all your cloning, healing, and patching on this separate layer. It feels like an extra step at first, but it saves so much time and frustration.
By keeping your fixes on a separate layer, you can easily dial back the opacity of your repair, mask out parts that don't look right, or just delete the layer and start over without ever harming the original photo. It’s the cornerstone of professional editing.
Troubleshooting Common Quality Glitches
Even when you do everything right, you can still run into annoying problems. You might see a faint "ghost" of the old watermark, the colors in the patched area might not quite match, or you might lose the natural texture of the image.
Don't worry, these are common hurdles, and each has a fix.
-
Problem: The spot you edited looks too smooth and artificial, losing the original grain.
-
Fix: This is an easy one. Create a new layer, fill it with 50% gray, and change its blend mode to "Overlay." Now, go to Filter > Noise > Add Noise. Add a tiny amount of monochromatic noise to create a subtle grain, then use a layer mask to paint it only over your repaired area. This little trick instantly restores a natural-looking texture.
-
Problem: You can still see a faint outline or "ghost" of the watermark.
-
Fix: This usually happens because the watermark changed the brightness or contrast of the pixels underneath it. The solution is to use the Dodge and Burn tools. Set them to work on a new 50% gray layer in "Overlay" mode, and gently paint over the area to brighten or darken it until the ghosting vanishes.
Nailing Advanced Texture and Color Matching
When a watermark sits on top of a complex texture—like wood grain, fabric, or skin—the standard tools might not be enough. This is where a pro technique called frequency separation comes in. It splits your image into two layers: one for color and tone (low frequency) and another for fine details and texture (high frequency).
This separation is incredibly powerful. It lets you smooth out color blotches without destroying the delicate texture, and vice versa. You can rebuild the texture layer with the Clone Stamp tool with surgical precision, ensuring a completely seamless result.
Color matching is the other piece of the puzzle. Sometimes, a Content-Aware Fill leaves a patch that's just a slightly different shade.
- Quick Fix: Add a "Hue/Saturation" adjustment layer and clip it directly to your repair layer. Now you can gently tweak the sliders until the patch blends in perfectly with the surrounding colors.
- Pro Method: For more control, use a "Curves" or "Color Balance" adjustment layer. This gives you granular control over the reds, greens, and blues in the different tonal ranges of the image.
Finally, if your source image was a bit lower resolution to begin with, you can give it a final boost with an AI upscaler. These tools can intelligently add detail and increase pixel density after your edits are done, giving you a much sharper, higher-quality final product. You can see what's possible with our AI-powered image upscaling demo and how it can transform your edited photos.
Clearing Up Your Watermark Removal Questions
Even when you have a good workflow, some questions are bound to pop up. Let's tackle the most common ones I hear, covering everything from the legal stuff to dealing with those tricky technical issues.
Is It Actually Illegal to Remove a Watermark?
This is the big one, and the answer is refreshingly straightforward: it's only illegal if you don't own the rights to the image. That's the golden rule.
- When you're in the clear: You can absolutely remove watermarks from your own photos, from stock images you’ve properly licensed, or any asset where the creator gave you the green light.
- When you're crossing the line: Scrubbing a watermark from a stock photo preview to avoid paying for it, or lifting a photographer's work from their portfolio, is straight-up copyright infringement.
Think of a watermark as the creator's signature. Messing with it on an image you don't have rights to is not just bad form—it's illegal and hurts the people who create the content we all rely on.
Which Removal Method Should I Use?
There's no single "best" tool for every job. The real choice comes down to speed versus control—do you need it done fast, or do you need it done perfectly?
- Go with AI tools when: Speed is everything. If you're clearing dozens of images for an e-commerce site or just need a quick fix without diving into complex software, AI is your best friend.
- Stick with manual editing when: The watermark sits on something incredibly detailed, like a person's face or a fine-textured fabric. You'll also want to go manual if you need absolute pixel-perfect quality for high-resolution print work or if an AI tool left a few subtle blemishes.
My rule of thumb? For about 90% of cases, a quality AI tool gets the job done beautifully in seconds. I only break out Photoshop for that last 10% where every single pixel counts.
Will Removing the Watermark Ruin My Photo's Quality?
It's a valid concern, but thankfully, modern tools are smart enough to avoid this. A good AI watermark remover doesn't just smudge the area. It uses sophisticated inpainting technology to analyze the surrounding pixels and intelligently rebuild what was underneath the mark.
But to get the best results, you need to set it up for success:
- Start with a high-res image. You can't add detail that isn't there. Editing a blurry, low-quality photo will only make its flaws more obvious.
- Consider the watermark itself. A simple, semi-transparent logo on a plain background is a breeze to remove. A huge, solid-color watermark slapped over a complex pattern is a much tougher challenge for any tool.
The goal is always a clean, seamless edit. With the right starting image and a good tool, you can get a result where no one would ever know a watermark was there.
What if the AI Tool Isn't Quite Perfect?
Even the best AI can stumble, especially on super busy backgrounds. You might occasionally see a small, blurry patch or a subtle artifact where the watermark used to be. Don't sweat it—this is where a simple two-step process comes in handy.
Let the AI tool do 95% of the work in an instant. Then, just pop that image into a free editor like GIMP or a pro tool like Adobe Photoshop for a quick touch-up. A few clicks with the Clone Stamp or Healing Brush is usually all it takes to fix those tiny imperfections. You get a perfect image with a fraction of the manual effort.
Ready to automate your image editing and get studio-quality results without the manual work? PixelPanda offers powerful, developer-friendly APIs for watermark removal, background removal, and much more. Try our free demos and see the difference.