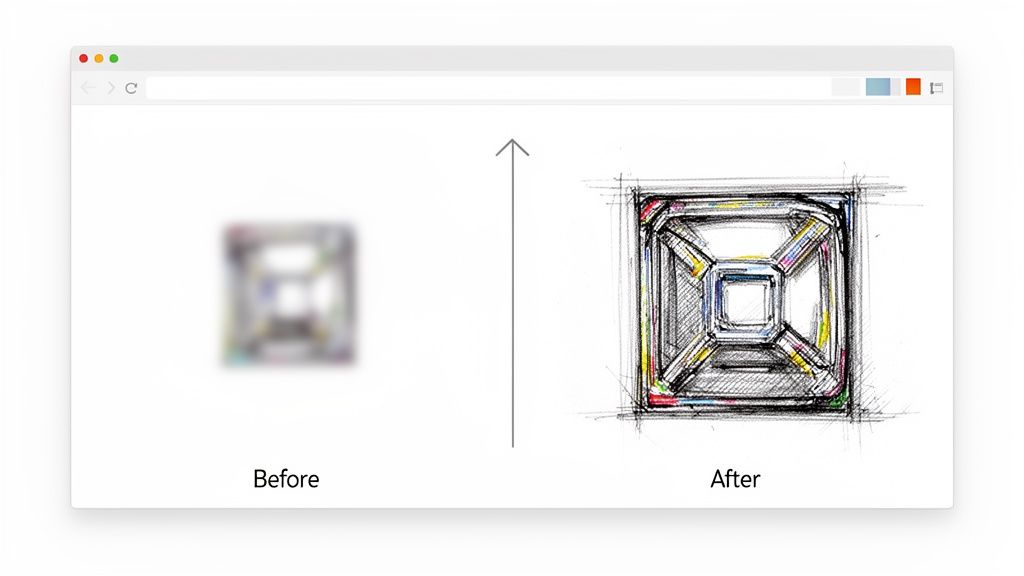
Let's be honest, we've all been there. You upload what you think is a great photo, only to see it look fuzzy, pixelated, or just plain sad on the screen. It's a frustrating, all-too-common problem.
But what if you could fix those lackluster images in a few clicks or with a single API call? That's exactly where AI-powered tools come in. They can automatically upscale resolution, erase digital noise, and bring blurry details into sharp focus, producing results that leave old-school filters in the dust.
Why Your Online Images Need a Serious Upgrade
Ever wondered why those product shots just aren't popping, or why your campaign visuals feel a bit flat? You're not just imagining it. Low-quality images are more than just an eyesore; they can actively damage your brand's credibility and absolutely tank your conversion rates.
In a world where everyone is scrolling at lightning speed, a mediocre image is a huge liability. It screams unprofessionalism and can make even the most incredible product seem cheap. The data backs this up—time and again, studies show that sharp, high-quality visuals are a massive factor in building customer trust and driving sales.
The Modern Fix Is Automated and Scalable
Forget spending hours painstakingly tweaking sliders in Photoshop. The new standard for improving image quality online is all about AI-powered tools and APIs like PixelPanda. These platforms have turned professional-grade image enhancement into a quick, automated task.
What once took a skilled designer half a day can now be done in seconds. This guide is your crash course in transforming entire image libraries in minutes, not days. The benefits are impossible to ignore:
- Blazing Speed: Automatically enhance thousands of images in the time it used to take to manually edit just one.
- Rock-Solid Consistency: Apply the same high standard of enhancement across every single visual for a cohesive brand identity.
- Major Cost Savings: Slash the hours and software expenses tied to manual photo editing.
The real game-changer isn't just making one image look better. It's the power to elevate your entire visual strategy at scale, freeing up your team to focus on big ideas instead of tedious editing.
This isn't just a minor improvement; it's a fundamental shift in how businesses handle their visual assets. Whether you're an e-commerce store needing crisp product photos or a marketing team pumping out social media content, using AI to improve your images is no longer a "nice-to-have." It’s essential for staying in the game.
To get started, let’s look at the core AI techniques you’ll be using to upscale, denoise, and sharpen your way to visuals that stop the scroll.
Core AI Techniques for Image Enhancement
Understanding the tools in your new AI arsenal is the first step. Each technique is designed to solve a specific problem, and knowing which to use is key to getting flawless results.
| Technique | What It Solves | Best For |
|---|---|---|
| Upscaling | Low resolution, pixelation | Enlarging small images, preparing photos for print, improving user-submitted content. |
| Denoising | Graininess, digital "noise" | Photos taken in low light, images from older digital cameras, cleaning up scanned pictures. |
| Sharpening | Soft focus, blurriness | Making product details pop, clarifying text in images, fixing slightly out-of-focus shots. |
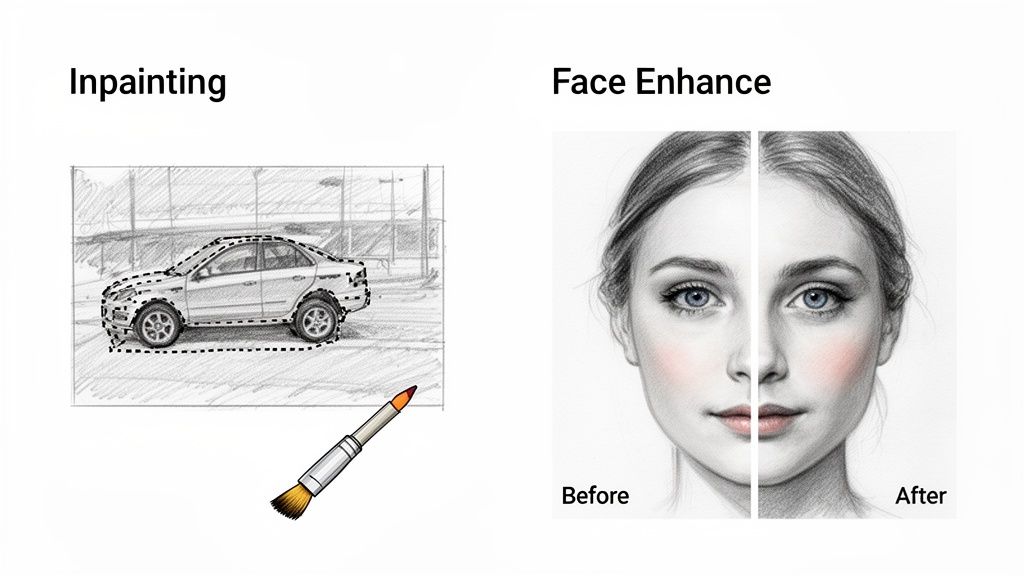
| Face Enhancement | Blurry faces, poor lighting on people | Improving portraits and headshots, rescuing group photos, enhancing social media profile pictures. |
| Inpainting (Object Removal) | Unwanted objects, watermarks, text | Cleaning up product backgrounds, removing distracting elements, restoring old or damaged photos. |
With these techniques, you can tackle almost any image quality issue. The real magic happens when you start combining them to create a polished, professional final product.
Figuring Out What's Wrong With Your Picture
Before you can bring a bad image back to life, you have to play detective. The first job is to pinpoint exactly what's making it look so rough. Think of it like a doctor diagnosing a patient—you wouldn't just start throwing medicine at them without knowing the illness, right?
Every image flaw has a story behind it and, luckily, a specific AI tool ready to fix it. Let's dig into the usual suspects that are probably ruining your visuals. Once you can spot the problem, you can confidently choose the right tool to improve your image quality with laser precision.
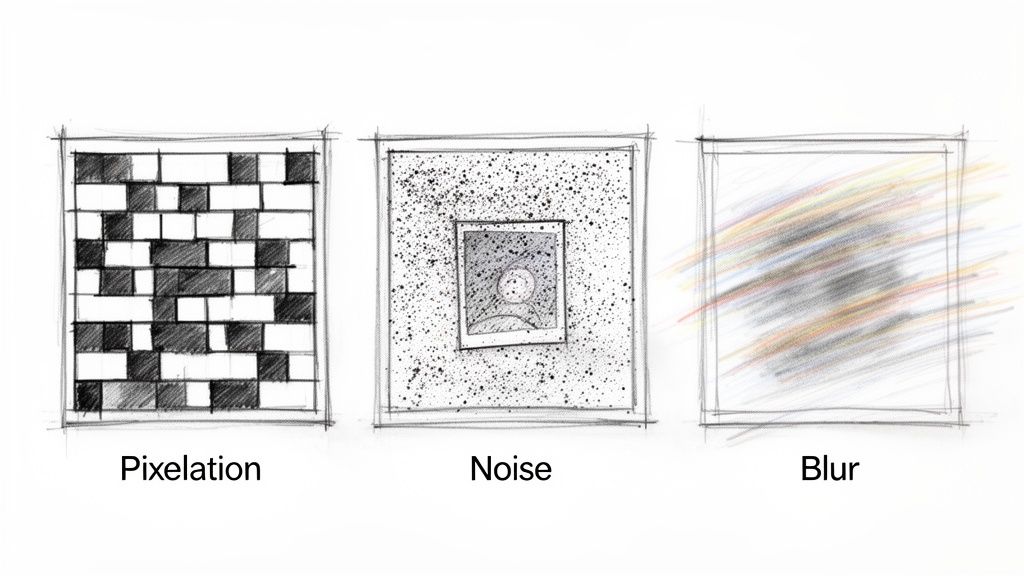
The Blocky Mess: Low-Resolution and Pixelation
We’ve all seen it. That classic, chunky look an image gets when you try to make it bigger. That's pixelation, and it's the calling card of a low-resolution file.
Picture this: you get a fantastic photo from a user-generated content campaign, but it was snapped on an ancient smartphone. It looks fine as a tiny thumbnail. But the moment you try to use it for a website banner, it explodes into a mosaic of jagged squares. This happens because the image just doesn't have enough data (pixels) to fill that larger space without falling apart.
- The Scenario: A small product photo needs to be the star of a high-resolution hero section on your homepage.
- The Problem: Stretching it makes the edges look like a bad 8-bit video game, and all the important details vanish.
- The AI Fix: This is a job for AI upscaling. Instead of just making the existing pixels bigger, AI upscalers intelligently create new ones to fill in the gaps. The result is a larger, clearer image that looks like it was high-resolution all along.
The Grainy Annoyance: Digital Noise
Next on the list is digital noise, that grainy, speckled texture that swamps your photos. It loves to show up in pictures taken in low light, where the camera's sensor freaks out and adds a bunch of random color specks trying to see in the dark.
Imagine a great shot from an evening event or an indoor photo without decent lighting. The composition is perfect, but it’s covered in a layer of distracting "fuzz." That grain just screams unprofessional. In the old days, noise reduction filters would just blur the whole image into a smudge, killing any sharpness you had.
AI denoising models are a game-changer. They’re trained on millions of clean and noisy image pairs, so they know the difference between real detail and random grain. They can surgically remove the noise while keeping sharp edges and textures intact.
The Softness Struggle: Blur and Bad Focus
An image is "soft" when it lacks that crisp, defined look. This usually comes from two culprits: a slight camera shake causing motion blur, or the camera simply missing the focus point.
You see it all the time in product shots where the main subject isn't perfectly sharp, or in an action shot that looks just a little bit smeared. While intentional blur can be artistic, accidental softness just looks amateur. It’s a subtle but powerful flaw that can drain the impact right out of a photo.
The fix here is AI sharpening. These tools are way smarter than a simple "sharpen" slider. They analyze the image to figure out which parts are supposed to be sharp and then boost the contrast along those specific edges, bringing blurry details back into focus without adding ugly halos or artifacts.
The Ghost of Compression Past: Artifacts
Finally, we have compression artifacts. These are the weird, blocky blotches and blurry spots you find on images that have been saved and re-saved one too many times, especially as JPEGs.
Every time you save a JPEG, it throws out a little bit of data to keep the file size down. That data is gone forever. Do it enough times, and the image starts to visibly degrade. This happens constantly with images downloaded and re-uploaded across different social media platforms. Of course, getting the size wrong in the first place—stretching or squishing an image—is another fast track to poor quality. Knowing the correct social media post dimensions from the start can save you a world of hurt.
The need for these advanced fixes isn't just a niche problem; it's driving a massive industry. The global digital image processing market was valued at USD 93.27 billion in 2024 and is on track to hit an incredible USD 435.68 billion by 2035. That's a clear signal of just how critical this technology has become for everyone.
Picking the Right Tool for the Job
Alright, you know what’s messing with your images—the pixelation, the noise, the blur. Now comes the fun part: choosing your weapon. Jumping into the world of online image enhancement can feel a bit like car shopping. Do you need a zippy little roadster for a quick spin, or are you looking for a heavy-duty truck to haul some serious cargo?
The tools out there really break down into two camps: simple, web-based editors for quick fixes and powerful, developer-friendly APIs for heavy lifting. Your choice really just boils down to what you're trying to accomplish. It's the classic battle between fixing one photo for your Instagram story versus automatically enhancing thousands of product shots every single day.
One-Off Fixes vs. Industrial-Scale Workflows
Let's put this into perspective. Say you’re a marketer with a deadline breathing down your neck. You’ve got one slightly fuzzy photo for a new landing page that needs to look sharp, like, yesterday. A free, browser-based upscaler is your absolute best friend in this moment. You just drag, drop, download, and you're done. Fast, easy, and perfect for those one-off emergencies.
But let's flip the script. Imagine you’re building an e-commerce platform where users are uploading hundreds of product photos a day. The quality is all over the place. Trying to manually fix each one with a drag-and-drop tool would be an absolute nightmare. This is where an API-first platform like PixelPanda shines. An API lets you bolt these powerful enhancement features right into your application, creating a completely automated, hands-off system.
The real question isn't "which tool is best?" but "which tool fits my scale?" For a single image, convenience is king. For high-volume, ongoing needs, automation and integration are the only way to go.
The Nitty-Gritty: What to Look For
When you're shopping around for a way to improve image quality online, a few key factors will steer you toward the perfect solution. It’s not just about the pretty "after" picture; it’s about how you get there and how that process fits into your bigger picture.
Here’s what you should be weighing:
- Workflow Integration: How neatly does this tool fit into how you already work? A web tool means manual labor, while an API can be wired directly into your code to trigger enhancements automatically.
- Scalability: How many images are we talking about? If you’re processing more than a handful a week, you need an API. They're built to handle massive volume without even breaking a sweat.
- Result Quality: Don’t just test with easy images. Throw something tricky at it—a photo with complex fur, fine text, or subtle facial expressions. The top-tier tools use sophisticated AI that knows how to preserve those delicate details.
- Speed and Performance: How fast can you get from "before" to "after"? For APIs, this means looking at server response times. In any user-facing app, every millisecond counts.
Look for tools that offer interactive demos. You need to see the magic happen for yourself.
A good hands-on demo lets you upload your own problem images and see the results firsthand. It's the best way to judge the tech. To get a feel for it, you can play around with an interactive image upscaling demo and see what's possible.
This whole field is exploding thanks to huge leaps in AI. The generative AI powering these tools is completely changing the game. Just look at the numbers: the global generative AI market was valued at USD 37.89 billion in 2025 and is on track to hit a staggering USD 1,206.24 billion by 2035. That’s a massive shift, and you can dive deeper into these generative AI market trends to see where things are headed.
At the end of the day, picking the right tool is all about understanding your own operational reality. The solo marketer and the enterprise developer are solving completely different problems—and lucky for us, there’s a perfect solution out there for both.
Getting Your Hands Dirty with an Image Enhancement API
Alright, enough with the theory. Let's roll up our sleeves and see how this all works in practice. It's time to stop talking about blurry images and actually start fixing them with a bit of code. The cool thing is, plugging an image processing API into your project is way easier than you might think. It turns a complicated, multi-step editing job into a simple, automated command.
We'll use PixelPanda for this walkthrough. Imagine you run an e-commerce store and just got a batch of new product photos. Going through each one manually in an editor would be a mind-numbing, full-day affair. This is where automation becomes your best friend.
Your First Foray into API Integration
The first thing you'll need is your credentials. Every API needs to know who's asking for stuff, and this is handled with an API key. Just think of it as your secret handshake—a unique code that tells the service, "Hey, it's me, let me in."
Once you have your key, you're ready to make a request. This is where you tell the API what to do. You'll send it the image you want to fix along with a set of instructions (we call these "parameters") that spell out exactly which enhancements you're after.
This diagram lays out the thought process perfectly. Are you fixing one photo, a whole folder, or building a system that runs on its own?
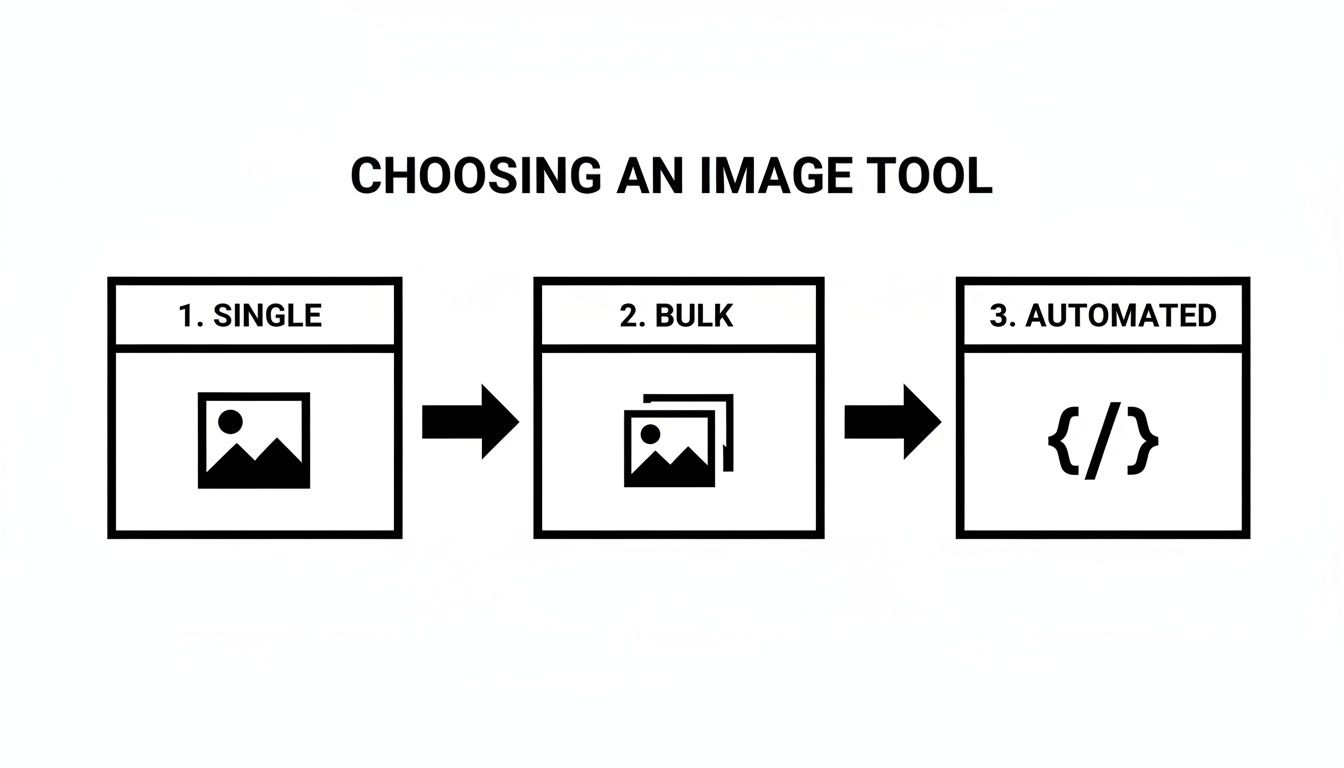
The takeaway is simple: as soon as you move past fixing a single image, an API is almost always the smartest, most scalable way to go.
A Practical Python Script Example
Let’s put this into action with a simple Python script. The goal? Grab an image from our computer, fire it off to the PixelPanda API for upscaling, and save the beautifully crisp result. This is a bread-and-butter task for anyone who needs to improve image quality online for their website or app.
First things first, you'll need that API key, which you can typically find on your account dashboard. For a more detailed guide on setup and authentication, good services like PixelPanda always have clear documentation for developers at https://pixelpanda.ai/developers.
Here’s a quick script to get the ball rolling:
import requests
import os
Your API key and the image you want to enhance
PIXELPANDA_API_KEY = "YOUR_API_KEY_HERE"
IMAGE_PATH = "path/to/your/blurry-product-image.jpg"
OUTPUT_PATH = "path/to/your/upscaled-product-image.png"
The API endpoint for upscaling
url = "https://api.pixelpanda.ai/v1/upscale"
Open the image file in binary read mode
with open(IMAGE_PATH, 'rb') as image_file:
# Prepare the request with your key and parameters
response = requests.post(
url,
files={'image': image_file},
data={'scale': 4}, # We want to upscale it 4x
headers={'Authorization': f'Bearer {PIXELPANDA_API_KEY}'}
)
Check if the request was successful
if response.status_code == 200:
# Save the enhanced image
with open(OUTPUT_PATH, 'wb') as output_file:
output_file.write(response.content)
print(f"Image successfully upscaled and saved to {OUTPUT_PATH}")
else:
print(f"Error: {response.status_code}")
print(response.json())
See? This little script grabs a local file, tells the API to make it 4x bigger, and saves the new high-res version. It’s a beautifully simple workflow that you can build on for all sorts of tasks.
Understanding the Magic: Key API Parameters
The real power of an API comes from its parameters. These are the little knobs and dials you can turn to tell the AI exactly how to tweak your image. The code just sends the package; the parameters are the instructions inside.
Here's a quick cheat sheet for some of the most useful parameters you'll run into.
Key PixelPanda API Parameters for Image Quality
This table is a handy reference for the core parameters that give you control over the final look of your enhanced images.
| Parameter | Function | Example Value |
|---|---|---|
scale |
Defines the upscaling factor. A value of 4 makes the image four times larger. |
2, 4 |
face_enhance |
A boolean that turns on a specialized AI model to restore blurry faces. | true |
denoise_level |
Controls the intensity of noise reduction, from subtle to strong. | 1, 2, 3 |
output_format |
Specifies the desired file type for the enhanced image, like PNG for transparency. | png, jpeg |
Think of these parameters as ingredients. You can mix and match them to cook up the perfect enhancement recipe for any image. For example, you could upscale a photo, sharpen up faces, and apply a bit of noise reduction, all in one go.
For those who are serious about getting the absolute sharpest visuals, it's also worth looking into advanced techniques like mastering high-resolution screenshots with APIs, which can be another killer tool in your image-quality toolkit.
A Fun Mini-Project to Try
Feeling pumped? Here’s a perfect weekend project to solidify what you've learned.
Write a script that "watches" a folder on your computer. Anytime you drop a new image into it, your script should automatically send it to the PixelPanda API for a touch-up, then save the shiny new version into a different "processed" folder.
This little automation is a fantastic, hands-on way to see just how much manual work an API can save you. It's the first step to effortlessly improving image quality online, no matter how many photos you're dealing with.
When the Standard Fixes Just Don’t Cut It
Sometimes, simply upscaling or denoising an image feels like putting a band-aid on a broken leg. You’re dealing with a much trickier problem—a blurry face in an otherwise perfect group photo, or a distracting object photobombing your hero product shot.
This is where the real magic of AI image processing shines. We're moving beyond the basics into specialized tools that tackle the kind of nuanced issues that used to require hours of painstaking manual labor by a graphic designer. Now, you can fix them at scale with a single API call.
Let's get into two of the most powerful tools in this advanced arsenal: Face Enhancement and Inpainting.
Bringing Portraits Back to Life with AI Face Enhancement
We’ve all been there. You get a photo from an event or a user-submitted headshot that's almost perfect. The lighting is good, the composition is solid, but the most important part—the face—is just a little soft. It’s a maddeningly common problem that can make an otherwise great image totally unusable.
AI Face Enhancement is your secret weapon for this exact scenario. This isn't your garden-variety sharpening filter. It's a sophisticated model trained to recognize facial features—eyes, noses, mouths—and intelligently reconstruct them with incredible clarity. It literally brings back detail lost to motion blur or bad focus.
Here’s a thought: picture an e-commerce platform that relies on seller profiles to build trust. If sellers are uploading blurry, low-quality headshots, the whole marketplace can start to feel a bit sketchy. An automated workflow that runs every new profile picture through an AI Face Enhancement model can instantly boost the professional look and feel of the entire site.
This tech is a game-changer for:
- Cleaning up corporate headshots: Make sure every team member looks sharp on your "About Us" page.
- Rescuing event photography: Fix those group shots where some people are in focus and others, well, aren't.
- Improving user-generated content: Automatically enhance profile pictures in social apps, online communities, and marketplaces.
The demand for this kind of specialized visual processing is absolutely exploding. The AI-based image analysis market was valued at USD 10.79 billion in 2024 and is on track to hit USD 36.36 billion by 2030. That growth tells you everything you need to know about how critical these tools have become. You can dive deeper into the growth of the AI image analysis market to see the full picture.
Making Distractions Disappear with AI Inpainting
Ever had that perfect shot completely ruined by something in the background? A stray coffee cup, a messy power cord, or an unwanted watermark can kill the entire vibe of a marketing image. The old-school fix, the clone stamp tool, often leaves behind smudgy, tell-tale patches that scream "bad Photoshop."
Enter AI Inpainting, the modern, intelligent answer to object removal. You just mask the thing you want to get rid of, and the AI analyzes all the surrounding pixels to fill in the blank. The result is a seamless, context-aware patch that looks like the object was never even there.
Imagine a marketing team prepping a hero image for a new product launch. The photo is amazing, but there's a competitor's logo faintly visible on a screen in the background. Instead of a costly reshoot, they use AI inpainting to zap the logo in seconds. Problem solved, time and money saved.
For similar content-aware wizardry, like cleanly removing backgrounds from product photos, you have to see this interactive background removal demo to truly appreciate how powerful it is.
Got Questions About Improving Image Quality? Let's Talk.
Jumping into AI image enhancement can feel like stepping into a whole new world. You start hearing terms like "upscaling," "denoising," and "API," and it's easy to feel a little lost. It's one thing to know these tools exist, but it's another thing entirely to trust them with your projects.
So, let's cut through the noise. Here are the real-world answers to the questions I hear most often from people just starting out.
Can AI Really Turn a Low-Quality Image into a High-Quality One?
Yes, absolutely—and honestly, the results can be mind-blowing. Modern AI upscalers aren't just stretching your image and hoping for the best like old-school software did. They’ve been trained on millions of images, so they can intelligently predict and reconstruct details that were completely lost.
For a standard 2x or 4x upscale on a small but decent source file, a good AI tool can produce something that looks genuinely high-resolution. It can bring back textures, sharpen edges, and pull out fine lines you thought were gone for good.
That said, let's keep it real: this is incredible technology, not a magic wand. If you start with a tiny, artifact-riddled thumbnail, the AI won't spit out a perfect 4K masterpiece. What it will do is give you the absolute best possible version of that image, which is a massive improvement over anything we could do just a few years ago.
Will Better Image Quality Clobber My Website's Load Time?
This is the classic trade-off, right? Better images mean bigger files, which means slower websites. It’s a totally valid concern, but luckily, it's a solved problem. The modern workflow for web images gives you the best of both worlds.
It's a simple one-two punch:
- Enhance first. Use an AI tool to get the image looking perfect. Upscale it, denoise it, do whatever it takes to get that visual pop.
- Optimize second. Now, take that beautiful new high-res image and run it through an optimization service. This step is non-negotiable. It shrinks the file size down and serves it up in a super-efficient format like WebP or AVIF.
This way, your visitors see a stunningly crisp image that loads in a flash. So, no, better quality doesn't have to mean slower speeds—as long as you nail the workflow.
How Much Does an Image Enhancement API Actually Cost?
It's almost always more affordable than people assume, especially when you weigh it against the soul-crushing cost of manual editing or clunky software licenses. Most services, including PixelPanda, run on a pay-as-you-go or simple subscription model.
You're often looking at a tiny fraction of a cent per image or a monthly credit bundle that fits your volume. This makes it incredibly easy to scale. If you're processing thousands of images a month, the cost per image drops to almost nothing—far, far cheaper than hiring a human to do it.
Plus, most platforms have a generous free tier. This lets you process hundreds or even thousands of images to kick the tires and see the value for yourself before you ever open your wallet.
Is Integrating an Image Processing API a Huge Technical Headache?
Nope, and this is probably the biggest misconception out there. Modern APIs are built by developers, for developers. If you've ever made a basic HTTP request in any programming language, you've already got all the skills you need.
Platforms like PixelPanda provide dead-simple documentation, interactive API explorers, and copy-paste code snippets for Python, JavaScript, PHP, and more. A basic integration to upscale an image is often just a handful of lines of code. Seriously. It’s designed to be a quick win, not a week-long engineering nightmare.
Ready to stop wrestling with blurry images and start automating your visual production? With PixelPanda, you can integrate powerful AI image enhancement directly into your workflow in minutes. Try our hands-on demos and get your free API key to see the difference for yourself.